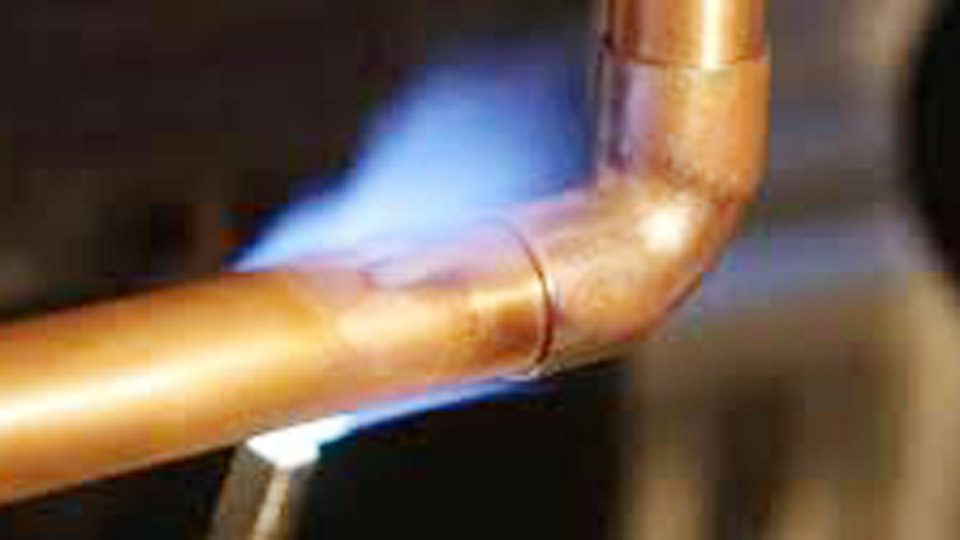
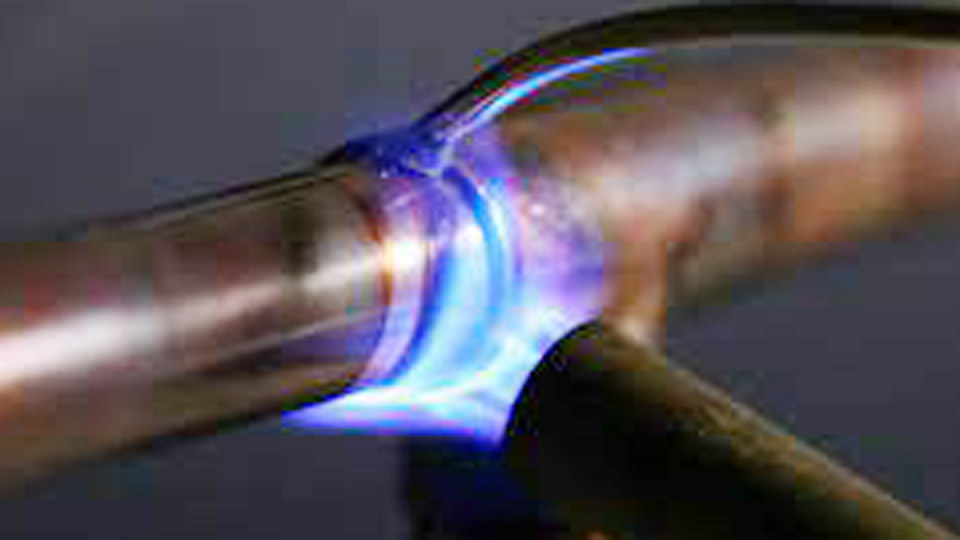
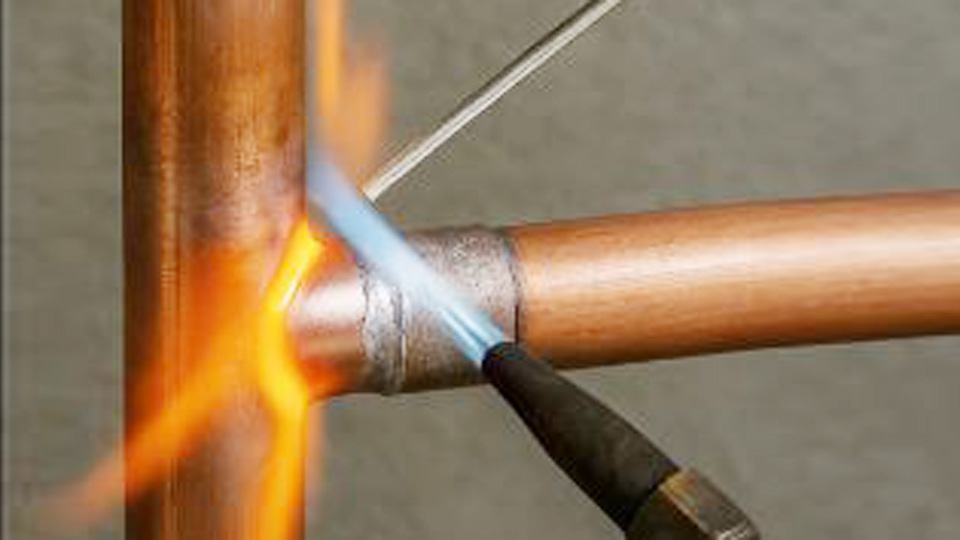
The first time I had to braze copper refrigerant lines, I was both excited and a little nervous. I’d soldered copper pipes before, but this was different—higher heat, tighter tolerances, and a whole lot more pressure riding on getting it right. I was working on an HVAC install, and I knew one bad joint could mean a costly leak, system failure, or a callback I definitely didn’t want.
That job taught me a lot—like how crucial it is to purge with nitrogen to prevent oxidation, and how controlling the heat is just as important as applying the filler metal. It wasn’t perfect the first time, but with practice, I found a rhythm. Now, brazing refrigerant lines is second nature, and I trust every joint I make to hold strong under pressure.

Image by focoinduction
I’ll walk you through how I braze copper refrigerant lines the right way—from prep to finish—based on real-world experience. Whether you’re learning the trade or tackling your first HVAC job, I’ll help you avoid the rookie mistakes and show you how to get clean, reliable, leak-free joints every time.
Why Brazing Copper Refrigerant Lines Matters
Refrigerant lines carry high-pressure refrigerants like R-410A at 300–600 psi and temperatures up to 250°F. A weak joint can leak, kill efficiency, or destroy a compressor—I’ve seen it cost thousands in repairs. Brazing creates a leak-proof, durable bond that handles vibration, heat, and pressure, unlike soldering, which is fine for low-pressure water lines but not HVAC.
For DIYers, brazing might feel like a big step, but it’s learnable with practice. For pros, it’s a core skill that ensures your work stands up to tough conditions.
What Is Brazing?
Brazing joins copper pipes by heating them above 840°F and melting a filler metal, like copper-phosphorus or silver alloys, into the joint. The filler flows through capillary action, creating a bond stronger than soldering. I’ve brazed lines from 3/8-inch to 1-1/8-inch for AC units, and the joints hold up under 500 psi.
Unlike welding, brazing doesn’t melt the copper itself, so it’s gentler on thin pipes. It’s the standard for refrigerant lines because it ensures reliability in high-pressure, high-temperature systems.
Tools and Materials You’ll Need
Here’s my field-tested kit for brazing refrigerant lines:
- Oxy-Acetylene Torch: For high heat (4,700°F). Propane or MAPP gas works for small lines but struggles with ¾-inch and up.
- Brazing Rods: Copper-phosphorus (BCup-5, 15% silver) for copper-to-copper; 45% silver rods for copper-to-brass.
- Flux: Borax-based for silver rods; BCup-5 is self-fluxing.
- Nitrogen Tank and Regulator: To purge lines and prevent oxidation.
- Pipe Cutter: For clean, square cuts. Hacksaws leave burrs.
- Cleaning Tools: Emery cloth, fitting brush, wire brush for prep.
- Safety Gear: Welding gloves, shade 5–6 glasses, fire-resistant jacket.
- Extras: Fire blanket, wet rag, leak detection solution, fire extinguisher, vacuum pump, pressure gauge.
I keep my gear in a sturdy toolbox for job-site mobility. A good setup saved me hours on a recent chiller repair.
Step-by-Step Guide to Brazing Copper Refrigerant Lines
Brazing is all about prep, heat control, and testing. Here’s how I do it, based on years of HVAC work.
Prepare the Pipe and Fitting
Clean surfaces are non-negotiable. I sand the pipe ends with emery cloth until they’re shiny, removing grease, dirt, or oxidation. Use a fitting brush to clean the fitting’s interior. I once rushed prep on a ½-inch line, and the filler didn’t flow right—leaked in days.
Cut pipes with a pipe cutter for a square edge. Deburr with a reaming tool to avoid turbulence or weak joints. Ensure the pipe fits snugly into the fitting—gaps over 0.005 inches weaken the bond. I check fit with a feeler gauge for tight jobs.
Set Up Nitrogen Purge
Oxidation inside the pipe forms scale that can clog compressors or valves, a killer for refrigeration systems. I hook up a nitrogen tank with a regulator, setting flow to 2–4 cubic feet per hour (CFH). Too much pressure causes pinholes; too little leaves oxides.
Nitrogen flows through the pipe during brazing, exiting the open end. I skipped this step early on, and scale wrecked a compressor—$2,000 lesson. For DIYers, rent a nitrogen tank from a welding supply shop; it’s critical for HVAC.
Apply Flux (If Needed)
For copper-phosphorus rods like BCup-5, skip flux—they’re self-fluxing. For silver rods or copper-to-brass, I brush on a thin layer of borax-based flux. Excess flux corrodes pipes later, so I apply it sparingly. On a brass valve job, flux made the filler flow like a dream. Assemble the pipe and fitting, twisting slightly to spread flux evenly if used.
Heat the Joint
Light your oxy-acetylene torch and set a neutral flame—blue cone, no yellow. I heat the fitting first, circling the flame, then move to the pipe near the joint. The copper should turn dull red (1,100–1,200°F). For 3/8-inch lines, I use a #3 tip; for ¾-inch and up, a rosebud tip. Propane works for small DIY jobs but takes longer. I burned a hole in a thin pipe once by lingering too long—keep the flame moving.
Apply Brazing Rod
Touch the brazing rod to the joint’s edge. If it’s hot enough, the rod melts and flows into the gap via capillary action. I feed 2–3 inches of BCup-5 for a ¾-inch joint, stopping when a smooth fillet forms. Don’t aim the flame at the rod—it burns the alloy, weakening the joint. I scorched a rod early on, leaving a brittle mess. Let the filler flow naturally. For silver rods, the flux turns clear as a heat cue.
Cool and Clean
Let the joint cool naturally for 10–15 minutes. Quenching with water risks cracks—I learned that after ruining a suction line. Brush off flux residue with a wire brush or damp rag to prevent corrosion. I inspect for voids or uneven fillets, ensuring a clean look. For HVAC jobs, a shiny joint signals quality work that clients notice.
Test the Joint
Pressure-test with nitrogen at 150–300 psi, based on the system’s rating. I use a gauge to check for drops over 10–15 minutes. Apply soapy water or leak detection solution—bubbles mean a leak. Then, pull a vacuum to below 500 microns with a vacuum pump to remove moisture, critical for refrigerant systems. I caught a pinhole leak this way on a chiller line, fixing it before charging.
Brazing Rod Options
Here’s a table of rods I use for refrigerant lines:
| Rod Type | Best For | Pros | Cons |
|---|---|---|---|
| BCup-5 (15% silver) | Copper-to-copper HVAC joints | Self-fluxing, strong, affordable | Not for dissimilar metals |
| 45% Silver | Copper-to-brass, high-pressure | Flows well, versatile | Expensive, needs flux |
| 5% Silver | Budget repairs, small lines | Cheap, decent strength | Weaker, not for high pressure |
I stick with BCup-5 for most HVAC jobs—it’s cost-effective and reliable.
Why Brazing Over Soldering?
Soldering uses low-temperature alloys (350–600°F), fine for water lines (100–150 psi) but not refrigerant lines. I tried soldering an AC line once, and it failed under 400 psi. Brazing’s higher heat (1,100–1,500°F) and stronger fillers create joints that handle 300–600 psi and 250°F+, per ASHRAE standards.
Soldering’s flux residue can clog compressors, while brazing with a nitrogen purge keeps lines clean. For refrigerant lines, brazing is the only way to go.
Safety Tips for Brazing
High heat and flammable gases demand caution:
- Wear Protective Gear: Welding gloves, shade 5–6 glasses, fire-resistant jacket. A hot pipe burned my arm once—long sleeves now.
- Ventilate the Area: Flux fumes can make you dizzy. I work in an open garage or use a fan.
- Keep a Fire Extinguisher Nearby: Sparks can ignite insulation. I always have one on hand.
- Use a Fire Blanket: Protect valves or gaskets from heat. Cool Gel spray works too.
- Handle Cylinders Safely: Keep acetylene tanks upright to avoid acetone leaks. I check pressures (5–7 psi acetylene, 10–15 psi oxygen) before lighting.
Common Mistakes and How to Avoid Them
I’ve made these mistakes, so you don’t have to:
- Dirty Surfaces: Grease or oxidation blocks filler flow. Clean until shiny.
- No Nitrogen Purge: Skipping this causes scale that clogs systems. I always purge now.
- Overheating: Too much heat burns pipes or filler. I use a neutral flame and move it constantly.
- Poor Fit-Up: Gaps over 0.005 inches weaken joints. I check with a feeler gauge.
- Excess Flux: Too much corrodes pipes. I apply a thin layer with a brush.
I burned a hole in a ½-inch line once by overheating—now I watch the copper’s color closely.
Real-World Applications
Brazing refrigerant lines comes up in:
- DIY Repairs: Fixing a leak in a home AC’s suction line. I brazed a 3/8-inch joint with BCup-5 after a pinhole formed.
- Hobbyist Projects: Building a custom mini-split for a garage. I brazed ½-inch lines for a leak-free system.
- Professional Jobs: Installing a rooftop chiller. I brazed 1-1/8-inch lines to handle 500 psi of R-410A.
Advanced Tips for Better Brazing
Take your brazing up a notch:
- Choose the Right Torch Tip: #3 for ½-inch pipes, rosebud for ¾-inch and up. I swap tips for control.
- Follow AWS 3-T Rule: Filler should penetrate three times the pipe’s thickness (e.g., 2.4 mm for 0.8 mm pipe).
- Practice on Scrap: I test heat and rod flow on spare copper before big jobs.
- Monitor Nitrogen Flow: Set 2–4 CFH with a flowmeter to avoid pinholes.
- Protect Components: Shield service valves with a wet rag or heat sink. I saved a valve this way on an AC repair.
When to Consider Other Methods
Brazing is standard for refrigerant lines, but alternatives exist. Soldering with tin-silver alloys (like Stay Brite 8) works for low-pressure R-22 systems, but I avoid it for R-410A (500+ psi). Press fittings, like SmartLock, are a no-heat option—fast but expensive and not always client-approved. I used press fittings on a rush job, but brazing is stronger. TIG welding copper is overkill for refrigerant lines but useful for structural projects.
Maintaining Your Equipment
Keep your tools in top shape:
- Check Hoses: Look for cracks or leaks. I replace mine every few years.
- Clean Torch Tips: Clogged tips cause uneven flames. I use a tip cleaner weekly.
- Store Rods Properly: Keep brazing rods in a dry container to avoid oxidation.
- Test Regulators: Ensure 5–7 psi for acetylene, 10–15 psi for oxygen. I check before every job.
A clogged tip botched a braze on a suction line once—maintenance prevents that.
Troubleshooting Leaky Joints
If a joint leaks:
- Check Cleanliness: Reclean and rebraze if oxidation’s the issue.
- Inspect Fit-Up: Gaps over 0.005 inches need a tighter fitting. I redo if needed.
- Verify Heat: Uneven heating causes voids. I reheat slowly and evenly.
- Confirm Nitrogen Purge: Scale from no purge blocks filler. I cut out and retry.
I found a leak in a liquid line with a pressure test and fixed it before charging.
Conclusion
Mastering how to braze copper refrigerant lines is essential for reliable HVAC work. Clean pipes thoroughly, purge with nitrogen, heat evenly, and test every joint to ensure leak-free performance. Whether you’re a DIYer fixing a home AC, a hobbyist crafting a cooling system, or a pro installing a commercial unit, brazing delivers joints that last. Practice on scrap, use quality rods like BCup-5, and prioritize safety.
FAQ
Why is nitrogen purging necessary when brazing refrigerant lines?
Nitrogen displaces oxygen inside the pipe, preventing scale that can clog compressors or valves. I set flow to 2–4 CFH to keep lines clean and ensure strong, leak-free joints.
Can I use a propane torch to braze refrigerant lines?
Yes, for small lines (½-inch or less), but it’s slow and less reliable for larger pipes. I use oxy-acetylene for ¾-inch and up—it’s faster and gives better heat control.
What’s the best brazing rod for refrigerant lines?
BCup-5 (15% silver, copper-phosphorus) is my pick for copper-to-copper joints. It’s self-fluxing and handles 300–600 psi. For copper-to-brass, I use 45% silver rods with flux.
How do I test for leaks after brazing?
Pressure-test with nitrogen at 150–300 psi and check for drops over 10–15 minutes. Apply soapy water to the joint—bubbles show leaks. I also vacuum to 500 microns to remove moisture.
What if I overheat the copper while brazing?
Overheating burns through pipes or ruins the filler, creating weak joints. I use a neutral flame, move it constantly, and watch for a dull red color to stay in the 1,100–1,200°F range.

I’m Darrell Julian, the founder, lead writer, and hands-on welding enthusiast behind ArcWeldingPro.com. With more than 15 years of real-world welding experience, I created this platform to share what I’ve learned in the field, in the shop, and in the heat of the arc.


