Back when I first started MIG welding in my little garage shop, I burned through a whole cylinder of shielding gas in what felt like no time. I thought maybe the regulator was faulty—but it turned out I just hadn’t learned how to calculate gas consumption in MIG welding properly. Whether you’re running mild steel, stainless welding, or comparing MIG vs TIG for your project, knowing exactly how much gas you’re using matters.
It’s not just about saving money—it’s about consistent arc control, proper joint prep, and getting that clean, spatter-free bead on any metal thickness. Too little gas and you risk porosity; too much and you’re literally watching dollars escape into thin air. In this guide, I’ll walk you through the simple math, shop-tested tips, and real-world habits that keep your welds strong, your gas use efficient, and your workbench frustration-free.

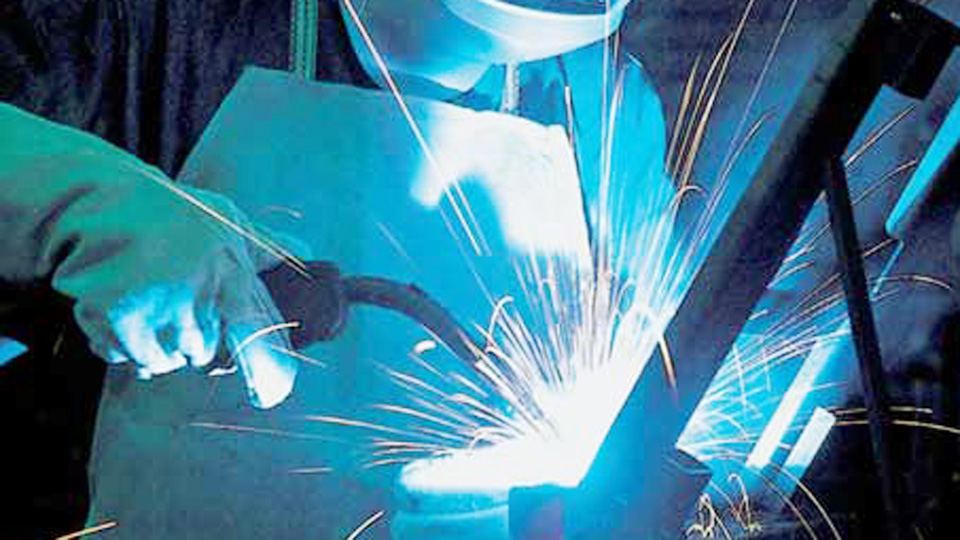
Image by r-techwelding
Why Gas Consumption Matters in MIG Welding
Shielding gas in MIG welding protects your weld pool from atmospheric contamination, ensuring strong, clean welds. Run out of gas mid-weld, and you’re left with porous, brittle beads that fail inspection or break under stress. I’ve seen a rookie welder blow through a cylinder in a day because they didn’t understand flow rates—ouch, that’s an expensive lesson!
Calculating gas consumption helps you plan your supply, control costs, and maintain weld quality. Whether you’re welding mild steel in your backyard or stainless in a fab shop, knowing your gas needs keeps your projects on track and your wallet happy.
Understanding Shielding Gas in MIG Welding
MIG welding (Metal Inert Gas, or GMAW) relies on a continuous feed of shielding gas to protect the molten weld pool from oxygen, nitrogen, and hydrogen in the air. Common gases include argon, CO2, or argon-CO2 blends (like 75/25). The gas flows through your MIG gun, creating a protective “bubble” around the arc. Too little gas, and you get porosity; too much, and you’re wasting money. I’ve burned through too much argon on a stainless job before I learned to dial in the right flow—let’s help you avoid that mistake.
Types of Shielding Gas
- Argon: Used for aluminum and stainless steel. It’s inert, stable, and gives a smooth arc but is pricier.
- CO2: Common for mild steel. It’s cheaper but can cause more spatter. I use it for rough jobs where looks don’t matter.
- Argon/CO2 Blends (75/25 or 80/20): A go-to for mild steel. Balances cost, arc stability, and weld quality. Most shops I’ve worked in stock 75/25 for versatility.
- Helium Blends: Used for thicker aluminum or stainless. Expensive but great for deep penetration.
Why Gas Choice Affects Consumption
Different gases have different densities and flow characteristics, which impact how much you use. For example, pure CO2 often requires a higher flow rate (15-20 CFH) than argon (10-15 CFH) to achieve the same shielding. Knowing your gas type is step one in calculating consumption.
Factors That Influence Gas Consumption
Before we crunch numbers, let’s talk about what drives gas usage. I’ve learned the hard way that small tweaks in setup or technique can make a big difference in how fast you go through a cylinder.
Flow Rate
Flow rate, measured in cubic feet per hour (CFH), is how much gas your MIG gun releases. Most welders set their regulator between 10-30 CFH, depending on the gas, material, and conditions. Too high, and you’re wasting gas; too low, and your welds suffer. I once cranked the flow too high on a windy job site and burned through a cylinder in hours—lesson learned.
Weld Time
The longer you’re pulling the trigger, the more gas you use. Continuous welding (like long seams) consumes more than short tacks. For example, a full day of welding structural steel eats up more gas than a few quick repairs.
Nozzle Size and Condition
Your MIG gun’s nozzle affects gas coverage. A larger nozzle might need more flow to maintain shielding, while a clogged or damaged nozzle can disrupt flow, wasting gas. I’ve seen welders struggle with porosity because a spatter-filled nozzle messed up their gas coverage.
Environmental Factors
Wind or drafts can blow shielding gas away, forcing you to increase flow. I’ve welded outdoors where a slight breeze meant cranking the regulator to 25 CFH to keep the weld clean. Indoors, you can often stick to 15-20 CFH.
Leaks and Equipment Issues
A leaky hose or loose fitting can bleed gas. I once found a tiny crack in a regulator that cost me half a cylinder before I noticed. Check your setup regularly to avoid surprises.
How to Calculate Gas Consumption: Step-by-Step Guide
Alright, let’s get to the meat of it—calculating gas consumption. This is a straightforward process once you know the variables. Here’s how I do it in the shop, broken down like I’m showing a new apprentice.
Step 1: Know Your Flow Rate
Check your regulator’s flow meter, usually set in CFH. For example, let’s say you’re using a 75/25 argon/CO2 blend at 20 CFH, a common setting for mild steel. This is your starting point.
Step 2: Estimate Weld Time
Track how long you’re actually welding (arc-on time). If you’re welding for 2 hours straight, that’s 2 hours of gas flow. For intermittent welding, estimate the percentage of time the gun is active. For instance, a typical fab job might have 50% arc-on time over an 8-hour shift, so 4 hours of actual gas flow.
Step 3: Calculate Gas Used
Multiply flow rate by weld time:
- Gas Consumption (cubic feet) = Flow Rate (CFH) × Weld Time (hours)
- Example: 20 CFH × 4 hours = 80 cubic feet
Step 4: Factor in Cylinder Size
Gas cylinders are rated by cubic feet of gas at standard pressure. Common sizes in the USA include:
- 40 cu ft (small, portable)
- 80 cu ft (common for small shops)
- 125 cu ft (industrial use)
- 330 cu ft (large shop or heavy use)
If you used 80 cu ft from a 125 cu ft cylinder, you’ve got 45 cu ft left. This tells you when to reorder.
Step 5: Account for Waste
Add 10-20% to account for leaks, purges, or environmental factors. For our example:
- 80 cu ft × 1.15 (15% waste) = 92 cu ft total consumption
Example Calculation
Let’s say you’re welding mild steel with 75/25 at 20 CFH for 3 hours a day, 5 days a week, with 15% waste:
- Daily: 20 CFH × 3 hours × 1.15 = 69 cu ft
- Weekly: 69 cu ft × 5 days = 345 cu ft
A 330 cu ft cylinder won’t last a week—you’d need to swap it out midweek or get a larger one.
Practical Tips for Optimizing Gas Usage
Now that you know how to calculate, let’s talk about saving gas without sacrificing weld quality. These are tricks I’ve picked up from years in the shop.
Dial in the Right Flow Rate
Start with 15-20 CFH for most indoor jobs with argon/CO2 blends. For CO2, bump it to 20-25 CFH. Test on scrap metal to find the sweet spot—good bead appearance with no porosity. I once turned down the flow to 12 CFH on a calm day and got perfect welds while stretching my cylinder.
Use a Gas Saver Nozzle
Some MIG guns have gas saver nozzles that reduce turbulence and improve coverage, letting you use less gas. I swapped to one on my Miller Millermatic 211 and noticed my cylinders lasted longer.
Shield Outdoor Welds
If you’re welding outside, use windbreaks (like plywood or tarps) to protect the weld pool. This lets you keep flow rates lower. I’ve rigged up a quick tarp shield on a field job to avoid cranking the regulator.
Check for Leaks
Inspect hoses, fittings, and your regulator for leaks. A soapy water test (spray on fittings, look for bubbles) is quick and effective. I caught a leaky O-ring this way and saved a cylinder.
Purge Smart
When starting a new cylinder, you need to purge the line to clear air. Don’t overdo it—a 5-second burst at 20 CFH is usually enough. I’ve seen newbies purge for 30 seconds and waste a chunk of gas right off the bat.
Common Mistakes and Fixes
- Mistake: Setting flow too high. I’ve seen welders crank it to 30 CFH thinking more is better. Result? Wasted gas and turbulent flow that can pull in air.
- Fix: Start at 15 CFH and adjust up only if you see porosity. Test on scrap first.
- Mistake: Ignoring leaks. A small hiss can drain your cylinder fast.
- Fix: Do a leak check every time you swap cylinders. Tighten fittings or replace damaged hoses.
- Mistake: Overlooking duty cycle. Assuming you’re welding 100% of the time inflates your estimate.
- Fix: Track actual arc-on time for accurate calculations.
Gas Consumption by Welding Process and Material
Different materials and setups affect gas usage. Here’s a quick guide based on my experience:
| Material | Gas Type | Typical Flow Rate (CFH) | Notes |
|---|---|---|---|
| Mild Steel | 75/25 Argon/CO2 | 15-20 | Versatile, good for most shop work |
| Stainless Steel | Argon or Tri-Mix | 10-15 | Lower flow due to argon’s density |
| Aluminum | Pure Argon | 15-20 | Needs consistent flow for clean welds |
| Thick Steel | CO2 | 20-25 | Higher flow to counter spatter |
Settings for Common MIG Welders
- Miller Millermatic 211: For mild steel with 0.035” wire, set 15-18 CFH with 75/25. Increase to 20 CFH for thicker plates.
- Lincoln Electric Power MIG 210 MP: Use 12-15 CFH for stainless with argon-based gas. Bump to 20 CFH for CO2 on mild steel.
- Hobart Handler 190: Stick to 15-20 CFH for general fabrication with 75/25. Check nozzle condition to avoid waste.
Safety Considerations
Shielding gas isn’t just about weld quality—it’s about safety too. Here’s what I always keep in mind:
- Storage: Store cylinders upright, secured to a wall or cart. I’ve seen a loose cylinder tip over and damage a regulator—scary and expensive.
- Ventilation: Welding produces fumes, and high gas flow can displace oxygen in tight spaces. Work in a well-ventilated area or use exhaust fans.
- Regulator Handling: Don’t overtighten regulators; it can damage threads and cause leaks. Hand-tighten, then snug with a wrench.
Real-World Applications
Let’s tie this to actual projects I’ve worked on:
DIY Trailer Build: I welded a utility trailer with 75/25 at 18 CFH. A 40 cu ft cylinder lasted a weekend of intermittent welding (about 6 hours arc-on time).
Shop Fabrication: On a structural steel job, we used 125 cu ft cylinders with CO2 at 22 CFH. Each cylinder lasted 2 days of heavy welding.
Art Project: For a stainless steel sculpture, I used argon at 12 CFH to keep costs down. A 80 cu ft cylinder got me through a week of detailed work.
Industry Standards and Cost Efficiency
In the USA, MIG welding often follows AWS D1.1 for structural work or ASME Section IX for pressure vessels. These codes don’t mandate gas flow rates but emphasize weld quality. Calculating consumption ensures you meet quality standards without overspending. A 125 cu ft cylinder of 75/25 costs about $50-$70 to refill, so wasting gas adds up fast. By dialing in flow and minimizing waste, you can stretch your budget, especially on long-term projects.
Conclusion
You’re now equipped to tackle how to calculate gas consumption in MIG welding like a seasoned pro. By understanding flow rates, weld time, cylinder sizes, and waste factors, you can plan your gas needs, save money, and keep your welds clean and strong. Whether you’re a DIYer, hobbyist, or pro, these calculations ensure you don’t run dry mid-project or blow your budget on extra cylinders.
My pro tip? Always do a quick leak check before starting a big job—it’s saved me more times than I can count. Now, fire up your MIG welder, set that regulator, and weld with confidence!
FAQ
What’s the average gas flow rate for MIG welding?
For most MIG welding with 75/25 argon/CO2 on mild steel, 15-20 CFH is ideal. Use 10-15 CFH for argon on stainless or aluminum, and 20-25 CFH for pure CO2. Adjust based on weld quality and conditions.
How long does a 125 cu ft cylinder last in MIG welding?
At 20 CFH with 4 hours of arc-on time per day and 15% waste, a 125 cu ft cylinder lasts about 1.5 days (125 ÷ (20 × 4 × 1.15) ≈ 1.36 days). Track your weld time for accuracy.
Can I reduce gas consumption without affecting weld quality?
Yes! Use 15 CFH as a starting point, check for leaks, use windbreaks outdoors, and maintain your nozzle. Test lower flows on scrap to ensure clean welds before adjusting.
What happens if I run out of gas during a weld?
Running out of gas causes porosity, weak welds, and potential cracks due to atmospheric contamination. Always monitor your cylinder level and keep a spare handy for big jobs.
Is CO2 cheaper than argon/CO2 blends for MIG welding?
Yes, pure CO2 is cheaper (about 30-50% less per cu ft) but produces more spatter and needs higher flow rates. Argon/CO2 blends (like 75/25) offer better arc stability and often save money long-term due to lower flow needs.

I’m Darrell Julian, the founder, lead writer, and hands-on welding enthusiast behind ArcWeldingPro.com. With more than 15 years of real-world welding experience, I created this platform to share what I’ve learned in the field, in the shop, and in the heat of the arc.


