Welding an exhaust pipe with a stick welder is one of those jobs that looks simple until you strike your first arc. Exhaust tubing is usually thin, rusty, and awkward to position—making it easy to blow holes if your arc control or heat settings aren’t dialed in. I remember the first time I tried it; I went in with a 6013 rod and way too much amperage, and the pipe looked like Swiss cheese by the end. Over time, I learned that success comes down to solid joint prep, choosing the right filler rod, and running short, controlled beads to manage heat.
Whether you’re patching a small hole, replacing a section, or experimenting with MIG vs. TIG vs. stick for thin metal, knowing how to stick weld exhaust pipe properly will save you frustration, time, and money. In this guide, I’ll walk you through the process step by step so you get a strong, lasting repair without burning through your pipe.

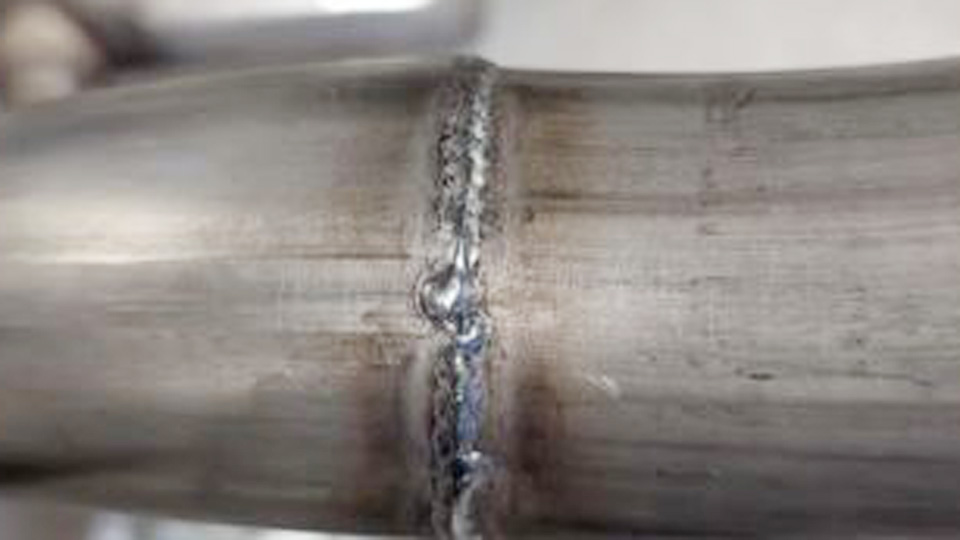
Image by reddit
Why Stick Welding for Exhaust Pipes?
Stick welding, or SMAW (Shielded Metal Arc Welding), is that old-school method where you strike an arc with a coated electrode. It’s tough, versatile, and doesn’t need shielding gas, making it perfect for outdoor or dirty jobs like exhaust repairs. I use it when I’m out in the field without my MIG setup handy. Why choose it for exhaust? It’s cost-effective—rods are cheap, and you can weld rusty or painted surfaces better than some other processes. But it’s tricky on thin metal like exhaust pipes (usually 16-18 gauge mild steel), where heat control is key to avoid burn-through.
If you’re a DIYer fixing your daily driver or a pro patching fleet vehicles, stick welding builds strong joints that hold up to vibrations and heat cycles. Just remember, it’s about integrity— a good weld prevents carbon monoxide leaks and extends your system’s life.
Is Stick Welding Suitable for Exhaust Pipes?
Absolutely, but it’s not always the first choice. I’ve welded plenty of exhaust pipes with stick, especially on older trucks where the metal’s a bit thicker near the manifold. It’s suitable when you need deep penetration on mildly contaminated surfaces, like rusty pipes. However, for super-thin sections or stainless steel exhausts, it can be challenging due to the heat input.
Pros like me use it for quick fixes under the vehicle, but if you’re new, practice first. The key is matching it to the material—mild steel pipes respond well, but aluminized or galvanized ones might need extra prep to avoid zinc fumes. In real-world apps, like farm equipment or custom bikes, stick shines for its portability. If your pipe’s too thin or curved tightly, consider if MIG might be easier, but stick gets the job done with skill.
Challenges with Thin Metal
Exhaust pipes are thin to save weight and cost, but that means they’re prone to warping or holes from too much heat. I once blew through a section on my old Chevy because I cranked the amps too high—lesson learned. The challenge is controlling the arc to deposit metal without melting the base. Why use stick anyway? It’s great for overhead or awkward positions under the car. To handle it, keep your arc short and move fast. Semantic terms like “thin gauge welding” pop up a lot here, reminding us to focus on heat management for weld integrity.
Best Rods for Welding Exhaust Pipe
Choosing the right electrode is half the battle. For exhaust pipes, I swear by rods that run smooth on low amps and provide good penetration without too much spatter. Common choices are E6013, E6011, and E7018. E6013 is my go-to for thin metal—it’s easy to strike, gives a nice bead, and works on AC or DC machines. For deeper penetration on rusty spots, E6011 digs in well. If you’re dealing with cleaner steel, E7018 offers strong, crack-resistant welds but needs dry storage to avoid porosity.
Size matters too—1/16-inch or 3/32-inch for thin pipes to keep heat low. I’ve used E6013 on countless muffler repairs, and it flows nicely into joints. Match the rod to your machine: AC welders love E6013, while DC setups handle E7018 better. Always check the pipe material—mild steel pairs with these, but stainless needs specialized rods like 308L.
Rod Comparison Table
| Rod Type | Best For | Amperage Range | Pros | Cons |
|---|---|---|---|---|
| E6013 | Thin exhaust pipes, general repairs | 40-60 amps | Easy to use, smooth bead, low spatter | Less penetration on thick rust |
| E6011 | Rusty or dirty pipes | 50-70 amps | Deep penetration, works on AC/DC | More spatter, harder to control on thin metal |
| E7018 | Clean steel, high-strength needs | 60-80 amps | Strong welds, low hydrogen | Needs dry storage, not ideal for very thin sections |
Essential Equipment for Stick Welding Exhaust
You don’t need fancy gear, but the basics make a difference. Start with a reliable stick welder—something like a Lincoln AC-225 or a modern inverter like the Hobart Stickmate for portability. I prefer inverters for their lightweight design and stable arc on low amps. You’ll need electrodes (grab a pack of 1/16-inch E6013), a chipping hammer, wire brush, and angle grinder for prep.
Safety gear is non-negotiable: welding helmet, gloves, jacket, and respirator for fumes. For exhaust work, jack stands or a lift help access underneath. A good ground clamp is crucial—clip it close to the weld to avoid arcing through bearings. If your pipe’s galvanized, a fume extractor is smart. In my shop, I always have clamps to hold sections in place. Budget-wise, you can start under $200 for a basic setup, perfect for DIYers.
Machine Settings Suggestions
Dial in your welder right, or you’ll fight it all day. For thin exhaust (16-18 gauge), set to DC electrode negative (straight polarity) if possible—it concentrates heat on the rod, not the pipe. Amps: 40-50 for 1/16-inch rods to start, bumping to 55-60 if needed. Too high, and you’ll burn holes; too low, and the arc sputters. I test on scrap: strike the arc, aim for a small puddle, and whip the rod slightly to control heat. AC machines? Use E6013 at 45-55 amps. Polarity matters—reverse for deeper digs on rust. Always adjust based on your machine’s duty cycle to avoid overheating.
Preparing the Exhaust Pipe for Welding
Prep work is where good welds start. First, jack up the vehicle safely and support it—never trust just a jack. Cut out the damaged section with a hacksaw or reciprocating saw, leaving clean edges. Grind or wire brush the area to remove rust, paint, or galvanizing—those fumes are nasty. For butt joints, bevel the edges slightly for better penetration. If it’s a slip-fit, ensure a tight fit; gaps lead to weak welds.
I always degrease with brake cleaner to avoid porosity. Measure twice: align new pipe sections with clamps. For curved pipes, mock it up on the ground first. This step ensures material compatibility—mild steel to mild steel—and prevents cracks from poor fit-up. Take your time; rushed prep means redo later.
Joint Prep Tips
For lap joints on exhaust, overlap by 1-2 inches and tack first. Butt joints? V-groove with a grinder for full penetration. Clean inside the pipe too—debris can cause inclusions. I once skipped cleaning a rusty spot and got a porous weld that leaked—fixed it by grinding out and rewelding. Use a flap disc for smooth surfaces; it helps the arc glide.
Step-by-Step Guide to Welding Exhaust Pipe
Alright, let’s walk through it like I’m handing you the stinger. Safety first: gear up, ventilate the area, disconnect the battery to protect electronics.
- Set Up Your Workspace: Secure the vehicle, remove any nearby flammables. Ground the welder close to the joint.
- Prep the Joint: Clean, bevel, and clamp the pieces. Tack weld in a few spots to hold alignment.
- Strike the Arc: Hold the rod at 15-20 degrees, tap or scratch to start. Keep a short arc—1/8 inch or less.
- Lay the Bead: Use a whip motion: forward to melt, pause to fill, back to cool. Move fast on thin metal to avoid burn-through. Weld in short sections, letting it cool.
- Build Layers if Needed: For thicker areas, add a second pass. Chip slag between layers.
- Finish Up: Grind smooth if visible, check for leaks with soapy water or smoke.
I did this on a buddy’s truck last summer—tacked the muffler inlet, whipped the rod around the pipe, and it held perfectly. Practice on scrap to get the rhythm.
Techniques for Curved Pipes
Curves make it fun—or frustrating. Weld in position: overhead or vertical. Use a drag technique, pulling the rod along the curve. I rotate the pipe if possible, but under the car, work in segments. Keep the rod angle consistent to follow the contour. If it’s tight, smaller rods help maneuver.
Common Mistakes When Welding Exhaust with Stick
Even pros mess up sometimes. Top mistake: too much heat leading to holes. Fix: drop amps and speed up. Another: poor grounding, causing erratic arc—clamp directly to the pipe. Skipping prep? Rust causes porosity; always clean. I once welded without disconnecting the battery and fried a sensor—costly error.
Overlapping too much creates stress points; keep it minimal. Weak tacks break under heat; make them solid. Undercutting happens from wrong angle—aim the rod into the joint. Test your weld: tap it, look for cracks. If it fails, grind out and redo. Patience fixes most issues.
Fixes for Burn-Through
If you blow a hole, cool it, grind the edges, and patch with a small piece of sheet metal. Weld around it carefully. Prevention: use backing if possible, like a copper spoon to absorb heat.
Safety Considerations for Exhaust Welding
Welding under a car is risky—fumes, sparks, tight spaces. Always wear a respirator; exhaust gases plus welding fumes are toxic. Full PPE: auto-darkening helmet, leather gloves, boots. Disconnect the battery to avoid electrical issues. Work in a ventilated garage or outside.
Fire watch: have an extinguisher handy for sparks near fuel lines. I always check for leaks post-weld—CO poisoning is no joke. For galvanized pipes, grind off the coating to avoid metal fume fever. Stay hydrated; it’s hot work. Follow OSHA basics: secure setup, no lone working on big jobs.
Pros and Cons of Stick Welding Exhaust Pipes
Stick welding has its place, but weigh it out.
Pros and Cons Table
| Pros | Cons |
|---|---|
| No gas needed, great for outdoors | Tricky on very thin metal |
| Deep penetration on rust | Frequent rod changes |
| Cheap setup and rods | More spatter to clean |
| Portable for field repairs | Requires more skill than MIG |
I’ve saved hundreds fixing exhausts this way, but for show cars, MIG’s cleaner.
Alternatives to Stick Welding for Exhaust
Sometimes stick isn’t ideal. MIG welding is my alternate for thin pipes—faster, less heat, cleaner beads. Use .023 wire, 75/25 gas, 15-18 volts. TIG for stainless: precise but slow. Brazing with oxy-acetylene works for non-structural fixes—lower heat, no melting base metal. Clamps or sleeves for quick patches—no welding needed. For pros, MIG shops charge $50-100 per joint, worth it if you’re short on time. I switch to MIG for long seams, but stick for spot repairs.
Real-World Applications and Examples
In the US, exhaust welding follows no strict codes like structural, but aim for gas-tight. On my Ford F-150, I welded a cracked manifold pipe with E6011 at 60 amps—held for years. For a buddy’s motorcycle, thinner pipe meant E6013 at 45 amps, whipped fast. Farm equipment? Thicker exhausts take E7018. Students: start with straight pipes before curves. Hobbyists: custom turbo setups benefit from stick’s strength. Always test drive after—listen for leaks.
Filler Compatibility and Material Insights
Match filler to base: mild steel exhaust needs carbon steel rods. Stainless? Use 309L for mixing. Avoid mismatches—causes cracks. Exhaust metal is often aluminized for corrosion resistance; grind it off. For high-heat areas near the engine, low-hydrogen rods like E7018 prevent cracking. I stock various rods for different jobs—saves trips to the store.
Conclusion
There you have it—everything you need to tackle how to weld exhaust pipe with stick welder with confidence. From choosing E6013 rods and dialing in 40-60 amps to prepping joints and avoiding burn-through, you’re set for solid repairs that prioritize safety and durability. Whether you’re a DIYer saving bucks or a pro on the job, this knowledge prepares you to handle thin metal challenges, pick the right tools, and execute techniques that last. Go ahead, fire up that welder and fix that leak—you’ve got this.
FAQ
Can you weld exhaust pipe with a stick welder?
Yes, it’s possible and effective for mild steel pipes, especially with low amps and thin rods like 1/16-inch E6013. It’s great for rusty repairs but requires practice to avoid burn-through on thin metal.
What is the best rod for welding exhaust pipe?
E6013 is ideal for thin exhaust pipes due to its smooth arc and low spatter. For rusty areas, try E6011 for better penetration. Use 1/16 or 3/32-inch sizes at 40-60 amps.
What amp setting for welding exhaust pipe?
Start at 40-50 amps for thin 16-18 gauge pipes to prevent holes. Adjust up to 60 amps for thicker sections, using DC straight polarity for better heat control.
Is MIG better than stick for exhaust welding?
MIG is often easier for beginners on thin metal, with less heat input and continuous wire. Stick is more portable and gas-free, but MIG gives cleaner beads for exhaust systems.
How do I prevent burn-through when welding exhaust?
Use low amps, short arc, and a whip motion to move quickly. Prep by cleaning rust, practice on scrap, and weld in short segments to let the metal cool.

I’m Darrell Julian, the founder, lead writer, and hands-on welding enthusiast behind ArcWeldingPro.com. With more than 15 years of real-world welding experience, I created this platform to share what I’ve learned in the field, in the shop, and in the heat of the arc.


