To weld a quarter panel on a car, first, remove the damaged panel and clean the area. Then, place the replacement panel and use a welder to attach it to the car’s frame.
Welding a quarter panel on a car can be a daunting task, but with the right tools and technique, it can be done successfully. Quarter panels are a crucial part of a car’s exterior, and if they are damaged, they need to be replaced to maintain the car’s structural integrity and aesthetic appeal.

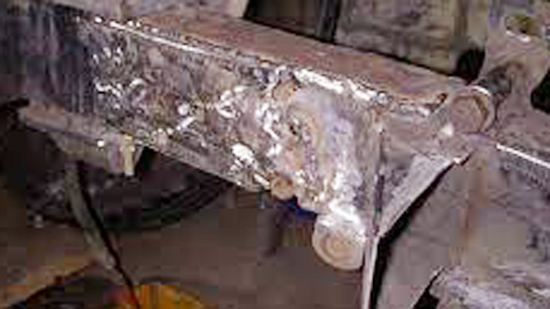
Photo by motortrend
We will discuss the step-by-step process of welding a quarter panel on a car. We will cover the tools and materials needed, the preparation process, and the welding process itself.
Quarter Panel Welding
When it comes to restoring a vehicle’s body, welding a quarter panel is a crucial skill that can make a significant difference in the final result. In this blog post, we will explore the process of welding a quarter panel on a car, starting with the basics of quarter panel welding.
Quarter Panels In Car Structure
A quarter panel plays a vital role in the structural integrity and aesthetics of a vehicle. It serves as a protective outer skin, safeguarding the rear wheel well and rear end of the car. The quarter panel contributes to the overall strength of the vehicle’s body, enhancing its durability and safety.
Benefits Of Proper Welding Techniques
Proper welding techniques not only ensure a seamless appearance but also guarantee the structural integrity of the vehicle. By employing precise and high-quality welding methods, the repaired quarter panel can maintain its original strength and resist future corrosion, ultimately prolonging the lifespan of the vehicle.
Essential Tools and Materials
When welding a quarter panel on a car, having the essential tools and materials is crucial for a successful repair job. Below, you will find a detailed guide on the necessary items you will need before starting the welding process.
Welding Equipment Checklist
- Welder: MIG welders are commonly used for automotive welding.
- Welding Wire: Ensure you have the appropriate wire thickness for the job.
- Clamps: Used to hold the panel in place during welding.
- Angle Grinder: For grinding down welds and preparing the surface.
Safety Gear To Protect Yourself
- Welding Helmet: Protects your eyes from the bright light.
- Welding Gloves: Insulated gloves to shield your hands from heat.
- Welding Jacket: Flame-resistant jacket for added protection.
- Respirator: To avoid inhaling harmful fumes and particles.
Preparing the Vehicle
Before welding a quarter panel on a car, it’s crucial to properly prepare the vehicle. This involves cleaning the work area and removing the damaged quarter panel to ensure a smooth and effective welding process.
Cleaning the Work Area
Start by thoroughly cleaning the work area where the new quarter panel will be welded. Remove any dirt, grime, and rust using a wire brush and a suitable automotive cleaner. Ensure that the area is free from any debris that could interfere with the welding process.
Removing the Damaged Quarter Panel
Begin by removing the damaged quarter panel by carefully cutting it away using a cutting tool such as a reciprocating saw or angle grinder. Take care to avoid damaging surrounding areas or structural components of the vehicle. Once the damaged panel is removed, clean the exposed edges to prepare for the installation of the new quarter panel.

Image by Reddit
Measuring and Cutting the Replacement Panel
When replacing a quarter panel on a car, the process of measuring and cutting the replacement panel is crucial to ensure a perfect fit and seamless integration. Accuracy in measuring and precision in cutting are essential for achieving a professional-looking result. Let’s dive into the details of the measuring and cutting process for a replacement quarter panel.
Accuracy In Measuring For A Perfect Fit
Before cutting the replacement panel, accurate measurements of the damaged area are essential. Use a measuring tape to determine the length, width, and depth of the section that needs to be replaced.
Take multiple measurements to ensure precision and note them down for reference. This step is critical to ensure that the replacement panel will fit perfectly into the designated area without any gaps or misalignments.
Cutting Techniques for Smooth Edges
When it comes to cutting the replacement panel, using appropriate cutting techniques is vital for achieving smooth and precise edges. A plasma cutter or electric nibbler can be used for cutting through the metal with precision.
Be sure to follow the marked measurements accurately and proceed with caution to avoid any errors during the cutting process. Smooth edges are essential for seamless welding and a professional finish.
Aligning the New Quarter Panel
Aligning the new quarter panel during welding is crucial for a seamless finish on a car. Proper alignment ensures structural integrity and a professional-looking repair job. Make sure to take your time and double-check the alignment before proceeding with the welding process.
When welding a quarter panel on a car, proper alignment is crucial for a seamless finish.
Ensuring Proper Alignment
- Use a measuring tape to verify the alignment of the new quarter panel.
- Ensure the gaps between the panel and surrounding areas are consistent.
- Check the panel’s positioning multiple times to avoid misalignment issues.
Clamping For Stability
- Secure the new quarter panel in place with clamps to prevent movement during welding.
- Place clamps strategically along the panel’s edges for stability and accuracy.
- Double-check the alignment after clamping to guarantee precision.
Welding Techniques for A Strong Bond
For a strong bond when welding a quarter panel on a car, proper techniques are essential. Begin by cleaning the metal surface thoroughly and selecting the right welding method, such as MIG or TIG. Take care to avoid overheating or warping the metal, and be sure to grind down any excess weld for a seamless finish.
Choosing the Right Welding Method
Welding techniques are crucial for ensuring a strong bond when welding a quarter panel on a car. Choosing the right welding method is the first step in achieving a successful weld. Whether you opt for MIG welding, TIG welding, or spot welding, each method has its unique benefits and challenges. MIG welding is popular due to its speed and ease of use.
TIG welding, on the other hand, offers precise control but requires more skill. Spot welding is ideal for creating quick, strong welds. When welding a quarter panel, the step-by-step welding process is vital.
Clean the area thoroughly, clamp the panel in place, and tack weld before completing the final weld. Ensure proper ventilation and wear protective gear throughout the process.
Steps for Welding a Quarter Panel:
- Prepare the Area: Remove rust and contaminants.
- Clamp the Panel: Secure it in the correct position.
- Tack Welding: Create small welds to hold the panel.
- Final Welding: Complete the weld along the seam.
- Grind the Weld: Smooth out any imperfections. Following these steps and utilizing the right welding method will result in a durable weld that restores the structural integrity of the car.
Finishing Touches After Welding
After completing the welding process on the quarter panel of your car, it’s time to focus on the finishing touches to ensure a seamless and professional outcome.
Grinding For A Smooth Surface
Grinding the welded area is crucial to achieve a smooth and even surface. Use a grinder to carefully eliminate any excess weld material, creating a seamless transition between the panel and the weld. Take your time to ensure the surface is uniform and free from any imperfections.
Applying Primer And Paint
After the grinding process, it’s essential to apply a high-quality primer to the welded area. The primer acts as a foundation for the paint, promoting adhesion and providing protection against corrosion. Once the primer has dried, carefully apply the matching paint to seamlessly blend the newly welded quarter panel with the rest of the car’s body.
Quality Checks and Safety Inspections
When welding a quarter panel on a car, it’s essential to prioritize quality checks and safety inspections to ensure a secure and reliable repair. These measures not only guarantee the integrity of the welds but also contribute to the overall safety and performance of the vehicle. Let’s delve into the crucial aspects of quality checks and safety inspections when welding a quarter panel.
Inspecting Weld Integrity
After completing the welding process, it’s imperative to conduct a thorough inspection of the welds to assess their integrity. This involves visually examining the welds for any signs of cracks, porosity, or incomplete penetration. Additionally, performing non-destructive testing methods such as ultrasonic testing can provide further insight into the quality of the welds.
Any irregularities or defects discovered during the inspection must be addressed promptly to ensure the structural soundness of the quarter panel.
Final Checks Before Hitting The Road
Before deeming the repair complete, several final checks and safety inspections should be carried out. This includes verifying that all welded areas are free from any sharp edges or protrusions that could pose a safety hazard. Ensuring proper fitment and alignment of the quarter panel is vital to maintain the vehicle’s aerodynamics and structural integrity.
Conducting a test fit of adjacent components can aid in confirming that the repaired quarter panel seamlessly integrates with the rest of the car body.
Maintenance Tips For Welded Quarter Panels
Proper maintenance is essential for welded quarter panels on cars. Before welding, it’s important to clean and prep the area, use the right tools and techniques, and avoid overheating the metal. Regular inspection and touch-ups can also prevent further damage.
Regular Inspection Routines: Inspect welded quarter panels monthly for any signs of damage or wear.
Preventing Rust And Corrosion: Apply a rust-inhibiting primer to welded areas to prevent corrosion.
Maintenance Tips for Welded Quarter Panels include regular inspections and preventing rust. When inspecting, look for signs of damage and wear. Apply rust-inhibiting primer to prevent corrosion.
Learning From The Pros: Advanced Techniques
Workshops And Training Opportunities
Car enthusiasts and aspiring welders can enhance their skills by attending specialized workshops and training opportunities. These programs offer hands-on experience and expert guidance, allowing participants to master advanced welding techniques for quarter panel repair and other automotive applications.
Innovations In Welding Technology
Modern advancements in welding technology have revolutionized the process of repairing quarter panels on vehicles. From the introduction of innovative welding equipment to the development of cutting-edge materials, professionals are continually embracing new techniques to achieve seamless and durable welds. Stay updated on the latest trends in welding technology to refine your skills and stay ahead in the automotive repair industry.
Conclusion
Welding a quarter panel can greatly enhance your car repair skills. The step-by-step guide provided in this blog post offers valuable insights and tips for successfully completing this task. With practice and patience, you can achieve professional results and restore your car’s appearance effectively.

I’m Darrell Julian, the founder, lead writer, and hands-on welding enthusiast behind ArcWeldingPro.com. With more than 15 years of real-world welding experience, I created this platform to share what I’ve learned in the field, in the shop, and in the heat of the arc.