Striking an arc for the first time can be both exciting and intimidating. Many beginners struggle to maintain a steady arc, only to end up with uneven welds, stuck electrodes, or excessive spatter.
These issues often arise not from lack of effort, but from an incomplete understanding of how to use an arc welding machine correctly.
Arc welding, also known as Shielded Metal Arc Welding (SMAW), is one of the most widely used methods in metal fabrication and repair.
It’s simple in setup yet complex in execution. Without proper knowledge of polarity, amperage, and electrode choice, even small mistakes can cause weak joints and structural failure.
According to the American Welding Society, SMAW accounts for nearly 50% of manual welding operations globally, proving its dominance in industries from construction to shipbuilding.
Yet, research shows that over 30% of weld defects in workshops are caused by improper machine setup or poor technique. These statistics highlight why mastering the fundamentals is vital for safety, performance, and productivity.
What makes arc welding unique is its adaptability—it can be used almost anywhere, from factory floors to outdoor construction sites. With the right setup and technique, it produces durable, high-strength joints capable of withstanding extreme stress.
What Is Arc Welding (SMAW) & Why It Matters
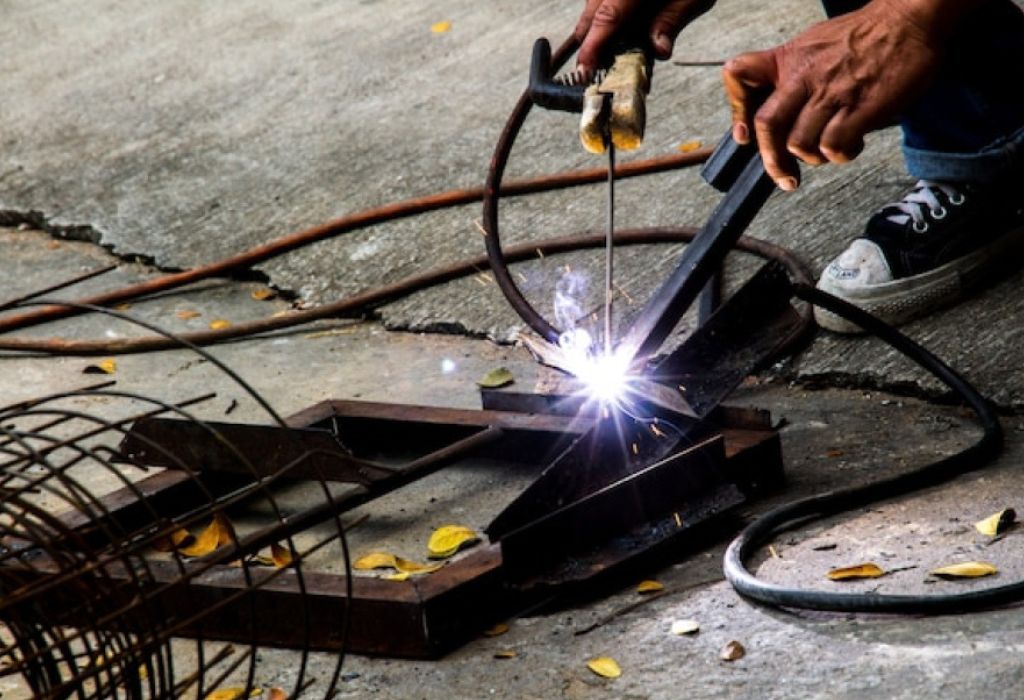
Arc welding, also known as Shielded Metal Arc Welding (SMAW), is one of the oldest and most widely used welding processes in the world.
It works by creating an electric arc between a coated metal electrode and the base metal, generating intense heat that melts both materials to form a strong joint once cooled.
The electrode’s flux coating produces a protective gas and slag layer that shields the molten pool from contamination, ensuring a clean, durable weld.
What makes arc welding especially valuable is its versatility. It can be used on carbon steel, stainless steel, cast iron, and even certain nonferrous metals.
Its ability to perform efficiently in outdoor or windy conditions makes it the go-to method for construction, maintenance, and heavy fabrication projects.
Unlike MIG or TIG welding, arc welding requires minimal equipment and can operate with simple power sources, making it highly accessible for fieldwork.
Understanding how to use arc welding machine properly is crucial for achieving optimal penetration, bead consistency, and minimal defects.
The process demands attention to settings such as current, polarity, and electrode type. When applied correctly, arc welding produces joints that are both structurally sound and aesthetically uniform—meeting industrial standards for strength, precision, and longevity.
Safety & Preparation Before Welding
Before using an arc welding machine, proper safety and preparation are absolutely essential. Arc welding involves extremely high temperatures, ultraviolet radiation, and molten metal spatter, all of which can cause serious injuries if precautions are ignored. A well-prepared environment and the right protective gear ensure both safety and weld quality.
Start by organizing a clean and dry workspace. Remove any flammable materials such as oil, paper, or solvents, and ensure the area has adequate ventilation to avoid inhaling toxic fumes produced by the electrode’s flux coating.
Poor ventilation not only affects breathing comfort but can also lead to long-term respiratory issues. Welding in confined spaces should always include an exhaust fan or fume extractor to maintain air quality.
Personal protective equipment (PPE) is mandatory. This includes a welding helmet with an auto-darkening filter, flame-resistant gloves, long-sleeved jackets, safety boots, and a welding apron.
These items shield the welder from sparks, radiation, and heat exposure. Proper eye protection is critical, as ultraviolet and infrared light from the arc can cause permanent eye damage known as “arc eye.”
Next, inspect the welding machine, power cables, and electrode holder. Look for frayed wires, loose clamps, or damaged insulation that could lead to electric shock or inconsistent current flow. Ensure the work clamp is securely connected to clean metal on the workpiece for a stable electrical path.
Finally, make sure the workpiece is properly cleaned. Rust, paint, oil, or dirt can interfere with arc stability and cause weld defects such as porosity or weak fusion.
A clean, well-grounded setup not only improves safety but also guarantees a smooth arc and stronger weld results once the process begins.
Machine Setup: Connections, Polarity & Current Settings
Setting up an arc welding machine correctly is the foundation of achieving strong, defect-free welds. Even the most skilled welder can produce poor results if the connections, polarity, or current are set incorrectly.
Each adjustment determines how the arc behaves, how deep the penetration goes, and how stable the weld puddle remains throughout the process.
Begin by ensuring all connections are tight and secure. Attach the electrode holder to one terminal and the ground clamp (also known as the work clamp) to the other.
The ground clamp should be fastened to a clean, bare section of metal close to the weld area for the best electrical flow. Loose or dirty clamps can cause unstable arcs, excessive spatter, or incomplete fusion.
Next, set the polarity, which controls the direction of current flow between the electrode and the workpiece. Most general-purpose electrodes, such as E6011 and E7018, use Direct Current Electrode Positive (DCEP), which provides deeper penetration and a more stable arc.
However, for thinner materials or specific electrodes like E6012, Direct Current Electrode Negative (DCEN) can be used to reduce heat and prevent burn-through. Some machines also support Alternating Current (AC), suitable for general repair work and outdoor use.
Now adjust the current (amperage) setting. The correct amperage depends on the electrode diameter and the thickness of the metal.
For example, a 1/8-inch (3.2 mm) rod typically runs best between 90–130 amps, while a 3/32-inch (2.4 mm) rod works well around 70–100 amps.
Too little current will cause the electrode to stick and produce poor penetration; too much will lead to excessive spatter and undercutting.
Finally, check the open-circuit voltage (OCV) on your machine—this is the voltage available before the arc is struck.
A higher OCV makes arc starting easier, especially with certain electrodes or when working on rusted or painted surfaces. Once all parameters are set, run a short test weld on scrap metal to confirm stability before starting the actual job.
Proper setup ensures a consistent arc, uniform penetration, and welds that meet professional standards for both strength and appearance.
Selecting the Right Electrode & Rod Size
Choosing the correct electrode and rod size is one of the most important steps when learning how to use an arc welding machine effectively.
The electrode not only conducts the current but also provides filler metal and shielding gas through its flux coating.
Selecting the wrong rod can cause weak welds, porosity, or poor bead formation, even when machine settings are perfect.
Arc welding electrodes are categorized using codes like E6010, E6011, E6013, and E7018, where each digit represents specific characteristics.
For example, E6013 is ideal for beginners due to its smooth arc and forgiving nature, producing minimal spatter and a stable weld puddle.
On the other hand, E7018 is a low-hydrogen rod used for structural work because it delivers high strength, deep penetration, and smooth bead appearance.
For outdoor or repair jobs where the metal might be dirty or rusty, E6011 or E6010 electrodes are preferred because they can cut through surface contaminants and maintain arc stability.
Rod size must match both the metal thickness and the desired penetration. Smaller electrodes, such as 3/32-inch, are suitable for thin materials or sheet metal, providing better control and reduced burn-through.
Larger electrodes like 1/8-inch or 5/32-inch work better on thicker steel plates, producing deeper penetration and faster deposition rates.
Another key factor is current compatibility. Each electrode type has a recommended amperage range and polarity—some work best on DC, others on AC.
For example, E7018 performs best on DCEP, while E6013 operates well on both AC and DC. Always check the manufacturer’s chart on the electrode box to match the settings accurately.
Finally, electrode storage plays a major role in maintaining weld quality. Moisture in the flux coating can cause hydrogen-induced cracking and porosity in the weld.
Low-hydrogen rods like E7018 should be stored in a rod oven at around 250–300°F (120–150°C) to stay dry.
Before welding, ensure electrodes are clean, dry, and free of rust or debris. Proper selection and storage guarantee consistent arc performance and strong, defect-free welds every time.
Arc Ignition, Travel Speed & Technique
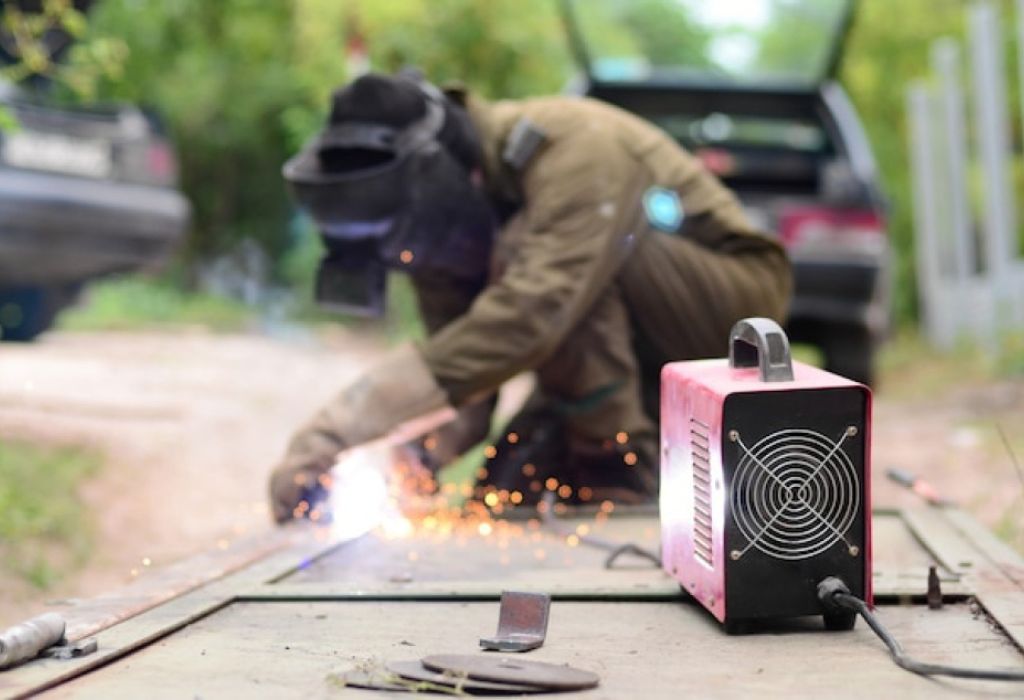
Once the machine is set up and the right electrode is selected, the next step is mastering the actual welding technique. Striking and maintaining a stable arc is the heart of arc welding.
It requires coordination, control, and awareness of how current, travel speed, and electrode movement work together to create a consistent, strong weld bead.
To strike the arc, there are two common methods: the scratch start and the tap start. In the scratch method, the electrode is dragged lightly across the surface like striking a match, then lifted slightly to maintain the arc.
The tap method involves touching the electrode to the workpiece briefly and lifting it quickly to start the arc.
The goal is to establish an arc gap roughly equal to the diameter of the electrode. If the arc length is too short, the electrode sticks; too long, and the weld becomes unstable and produces excess spatter.
Maintaining a consistent arc length ensures uniform heat distribution and penetration. A steady hand is essential—erratic movement causes fluctuations in current and bead shape.
For most electrodes, an arc length equal to the rod’s diameter provides the right balance between stability and control.
Travel speed plays a crucial role in bead quality. Moving too fast results in insufficient fusion and narrow, weak welds, while moving too slowly can cause overheating, excessive buildup, or undercutting. The correct speed creates a smooth, even bead with consistent ripples and proper tie-in along both edges.
The electrode angle should typically be between 10 and 20 degrees in the direction of travel. This allows the arc force and shielding gas to flow over the weld puddle, protecting it from atmospheric contamination.
Vertical or overhead welding requires slight adjustments—shorter arc length and smaller puddles help maintain control against gravity.
Finally, observe the weld puddle closely. The puddle’s movement and brightness reveal the quality of fusion and penetration.
A bright, fluid puddle that flows smoothly means the heat and travel speed are well-balanced. With practice, controlling the puddle becomes intuitive, leading to cleaner, stronger, and more visually appealing welds every time.
Slag Removal & Weld Inspection
After completing a weld, the work is not yet finished. The molten flux coating that protected the weld pool during welding solidifies into a layer called slag.
This brittle covering must be removed to expose the finished weld and to prepare the surface for any additional passes. Proper slag removal and inspection are essential steps to ensure the weld meets both strength and appearance standards.
Once the weld cools slightly—but not completely—use a chipping hammer to knock off the slag. Strike gently at an angle to avoid damaging the weld bead underneath. Follow with a wire brush to clean any fine residue or spatter.
This process not only improves the weld’s appearance but also allows for accurate visual inspection of the bead’s shape, width, and uniformity.
If slag is left on the surface, it can trap impurities or weaken subsequent weld passes, leading to defects such as lack of fusion or inclusions.
A clean weld should show consistent ripples, even penetration, and smooth edges without excessive buildup. Irregularities like pits, undercutting, or porous spots indicate poor technique or incorrect settings during welding.
When multiple passes are required, always remove all slag before beginning the next layer to ensure complete fusion and proper bonding.
After cleaning, conduct a visual inspection under good lighting. Check for cracks, overlaps, porosity, and any visible defects along the bead.
For critical or structural welds, non-destructive testing (NDT) methods—such as dye penetrant or magnetic particle inspection—can detect subsurface flaws that aren’t visible to the naked eye.
Slag removal and inspection not only verify the quality of the weld but also help identify problems early, allowing the welder to adjust technique or settings for better results in the next pass. This step transforms a rough weld into a professional-quality joint that’s both strong and aesthetically clean.
Troubleshooting Common Problems
Even experienced welders face issues when learning how to use an arc welding machine effectively. Small setup errors, poor technique, or incorrect settings can cause visible defects that weaken the weld or ruin its appearance.
Understanding these common problems—and knowing how to fix them—can save time, materials, and frustration while improving weld quality.
One of the most frequent issues is the electrode sticking to the workpiece. This happens when the amperage is too low or the arc length is too short.
Increasing the current slightly or maintaining a proper distance between the electrode and the metal usually resolves this. Keeping electrodes dry and clean also helps prevent sticking, as moisture can cause inconsistent ignition.
Excessive spatter is another common problem caused by high amperage or holding the electrode too far from the workpiece. Reducing the current and shortening the arc length leads to a more stable arc and a cleaner bead.
For beginners, E6013 rods are more forgiving and produce minimal spatter when used with proper technique.
Porosity—tiny holes or pits in the weld—is often caused by contaminated surfaces, damp electrodes, or poor shielding from the flux.
Always clean the metal thoroughly before welding, store electrodes in a dry environment, and ensure proper arc coverage throughout the process. Porosity not only weakens the weld but can also make it more susceptible to corrosion over time.
Lack of fusion and poor penetration result from either low heat or moving too quickly. The weld may look solid on the surface but fail internally. Increasing amperage slightly or slowing the travel speed helps achieve deeper fusion and stronger joints.
Another frequent issue is undercutting, where the edges of the weld bead are eroded, leaving a groove along the base metal. This is caused by excessive heat or incorrect torch angle. Reducing amperage and keeping a consistent electrode angle prevents undercutting.
Finally, cracking and distortion occur when the metal cools unevenly. Controlling heat input, using shorter weld sections, and allowing the material to cool gradually minimize these problems.
By recognizing and correcting these common welding defects, welders gain greater control over the process. Each challenge becomes a learning opportunity, turning errors into experience and helping produce clean, professional, and structurally sound welds every time.
Machine Maintenance & Calibration
Keeping an arc welding machine in top condition is essential for consistent performance, safety, and weld quality. Over time, dust, heat, and vibration can affect the electrical components, cables, and connectors, leading to irregular current flow or unstable arcs.
Regular maintenance and proper calibration ensure the machine continues to deliver accurate output and reliable results.
Start with a visual inspection before every use. Check cables, electrode holders, and ground clamps for cracks, frayed insulation, or loose connections.
Replace worn-out cables immediately, as damaged insulation can cause voltage leaks or electric shock hazards.
Tighten all terminals and ensure the work clamp has solid contact with clean metal. Even a small amount of rust or paint can increase resistance and cause arc instability.
Next, clean the air vents and cooling fans. Dust buildup restricts airflow, causing the machine to overheat and reduce its duty cycle.
Use compressed air to blow out dust and debris, but always disconnect the power supply first. Machines used in dusty environments like workshops or construction sites should be cleaned more frequently.
Calibration is another crucial part of maintenance. Over time, the displayed amperage may drift from the machine’s actual output. Using a calibrated ammeter, compare the readings and adjust as necessary to restore accuracy.
Proper calibration ensures that the settings you choose—especially current and polarity—produce the exact heat input needed for strong, consistent welds.
Also, inspect consumable parts, such as electrode holders, cable connectors, and internal contactors.
Worn components can cause voltage drops, leading to weak arcs and poor penetration. Apply dielectric grease to connectors to prevent corrosion and ensure efficient current transfer.
For storage and care, keep the machine in a clean, dry area away from moisture and direct sunlight. Excess humidity can lead to corrosion of internal parts and damage to circuit boards. If the machine will be unused for a long period, cover it with a protective cloth to keep dust away.
Regular maintenance and calibration not only prevent unexpected breakdowns but also extend the lifespan of the welding machine. A well-maintained arc welder performs efficiently, produces stable arcs, and ensures each weld is as strong and reliable as the last.
Advanced Tips & Best Practices
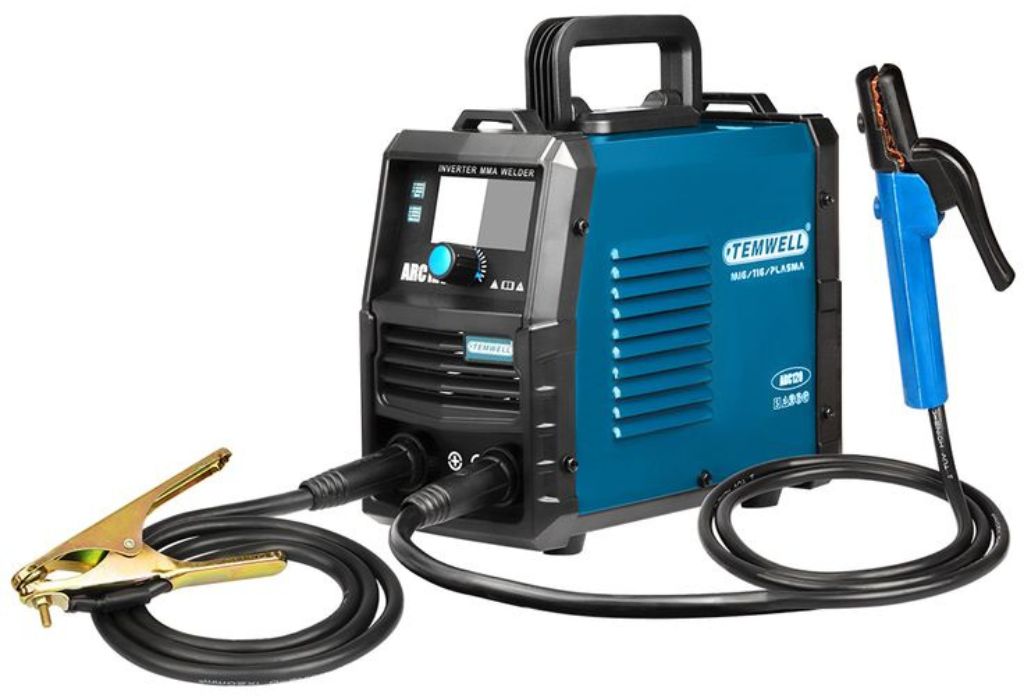
Once the fundamentals of arc welding are mastered, the next step is refining technique and adopting advanced practices that separate average welds from professional ones.
Small improvements in control, heat management, and preparation can make a noticeable difference in strength, appearance, and efficiency.
One of the most effective techniques is tack welding. Before completing a full weld, apply small, evenly spaced tack welds along the joint to hold the metal pieces in alignment.
This prevents distortion caused by heat expansion and ensures the joint remains stable throughout the process. It’s especially important for long seams or thin metals that are prone to warping.
Another valuable practice is using multiple pass welding for thick materials. Instead of trying to fill a joint in one heavy pass, layer the weld gradually using several smaller beads.
This improves penetration, reduces cracking risk, and creates a smoother finish. Between passes, clean off all slag and inspect for defects to maintain quality consistency.
Preheating the base metal is often overlooked but highly beneficial, particularly for high-carbon steel or heavy sections. Preheating reduces thermal shock, improves fusion, and minimizes cracking as the metal cools.
Similarly, allowing the workpiece to cool slowly after welding prevents residual stresses that can cause warping or fractures.
Controlling heat input is critical for achieving both strength and appearance. Maintain a steady travel speed, consistent arc length, and correct amperage.
If the weld pool grows too large, reduce current or pause slightly to allow cooling. The goal is to balance penetration without overheating the base material.
For aesthetic improvement, focus on bead uniformity. Smooth, even ripples and consistent width show proper control and technique.
Adjusting hand movement and electrode angle can enhance bead symmetry and minimize spatter. Practice weaving patterns like straight-line, U-shape, or crescent motions depending on joint type and thickness.
Lastly, keep a weld log to record settings, electrode types, and material thickness for each project. This documentation helps identify what works best for specific metals or positions, improving accuracy and efficiency over time.
By integrating these advanced tips into regular practice, welders can elevate their skills to a professional level—producing cleaner, stronger, and more precise welds that stand the test of time.
Conclusion
Learning how to use an arc welding machine effectively is more than just understanding the controls—it’s about mastering the connection between precision, consistency, and safety.
Every great weld begins long before the arc is struck, starting with the right preparation, setup, and understanding of how electricity, heat, and technique come together to form a strong bond.
From selecting the proper electrode and polarity to maintaining the correct arc length and travel speed, every detail influences the quality of the weld.
A clean work surface, proper grounding, and controlled heat input ensure deep fusion and minimal defects.
Consistent practice and discipline turn these steps into habits that lead to durable, professional-grade welds.
Maintenance and calibration play an equally important role. A well-maintained machine delivers stable amperage, predictable performance, and longer service life, preventing costly downtime.
Regular inspection of cables, connections, and cooling systems keeps the equipment ready for any project.
Advanced techniques like tack welding, preheating, and multi-pass layering elevate both the strength and finish of a weld, giving it the reliability demanded in structural, automotive, and industrial applications.
Ultimately, knowing how to use an arc welding machine correctly isn’t just a technical skill—it’s the foundation of craftsmanship.
Each weld becomes a reflection of precision, patience, and pride in workmanship. When the process is respected and practiced with care, the result is a weld that’s not only strong but built to last.

I’m Darrell Julian, the founder, lead writer, and hands-on welding enthusiast behind ArcWeldingPro.com. With more than 15 years of real-world welding experience, I created this platform to share what I’ve learned in the field, in the shop, and in the heat of the arc.

