I’ve been welding and brazing for years, from fixing farm equipment to installing HVAC systems in sweltering Texas summers. One of the trickiest jobs I tackled early on was brazing refrigerant lines without nitrogen on a residential AC unit. I was out in the middle of nowhere, no nitrogen tank, and a client breathing down my neck.
The joints held, but I learned some hard lessons about oxide buildup and system clogs. If you’re a DIYer, hobbyist, or pro welder wondering how to braze copper lines without nitrogen, I’m here to share what I’ve learned. This guide is like us sitting in my shop, sipping coffee, and talking through the process—mistakes, fixes, and all.

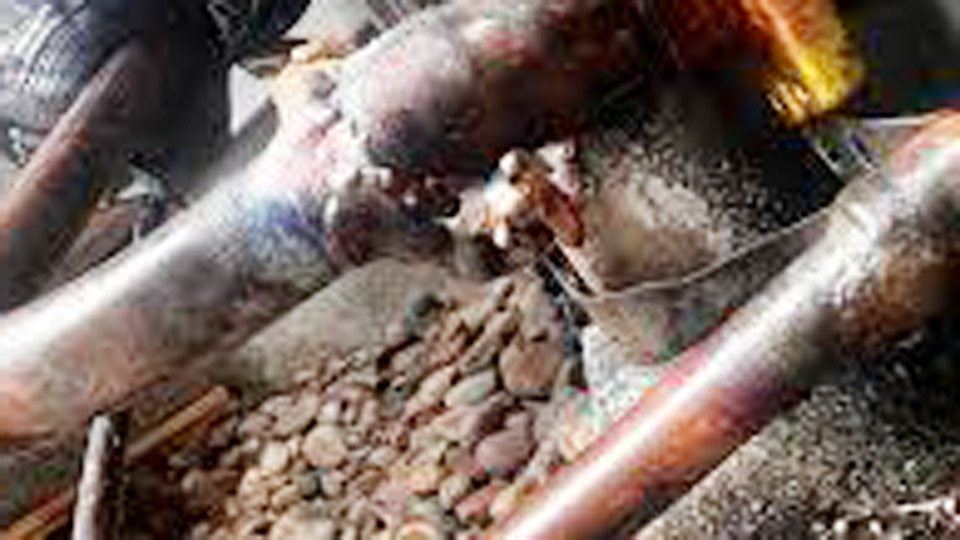
Image by reddit
Brazing refrigerant lines is standard in HVAC work, but nitrogen purging is the go-to method to prevent oxidation. Skipping it can lead to trouble, but sometimes you’re in a pinch. Let’s break down the risks, techniques, and alternatives to make it work safely and effectively.
What Is Brazing and Why Nitrogen Matters
Brazing joins copper pipes using a filler metal, like a silver-based alloy, that melts above 840°F but below the copper’s melting point. It’s common for connecting refrigerant lines in AC units, heat pumps, or chillers. I’ve brazed lines for everything from mini-splits to commercial rooftop units, and the goal is always a leak-proof, durable joint.
Nitrogen purging is standard because it displaces oxygen inside the pipes during brazing. Oxygen reacts with hot copper, forming black, flaky cupric oxide that can clog valves, filters, or compressors. I once skipped nitrogen on a rush job, and the system’s TXV (thermostatic expansion valve) clogged within a year—costly mistake.
Why Braze Without Nitrogen?
Sometimes you don’t have a nitrogen tank or regulator. Maybe you’re at a remote site, working on a budget, or doing a quick DIY fix. I’ve been there, finishing a mini-split install in a rural barn with no nitrogen on hand. But brazing without nitrogen increases risks, so you need to know how to minimize them.
Risks of Brazing Refrigerant Lines Without Nitrogen
Brazing without nitrogen isn’t ideal, and I’ve seen the fallout. Here’s what can go wrong:
Oxide Buildup: Oxygen reacts with copper at high temperatures, forming flaky oxide scale. This can clog TXVs, filter driers, or compressors. I’ve repaired systems where oxide from nitrogen-free brazing caused early failures.
System Contamination: Loose oxide particles reduce efficiency and damage components. A commercial chiller I fixed had a clogged filter drier from improper brazing.
Leaks: Weak or porous joints from improper technique can leak refrigerant. I’ve seen pinhole leaks from rushed, nitrogen-free jobs.
Warranty Issues: Many HVAC manufacturers require nitrogen purging. Skipping it may void warranties or fail inspections.
You can braze without nitrogen in a pinch, but you need to take extra steps to protect the system.
Tools and Materials for Brazing
To braze refrigerant lines, you need the right gear. I’ve had jobs go sideways without proper tools, so here’s my checklist:
- Oxy-Acetylene Torch: Delivers the 1400°F needed for brazing. I use a Victor J-28 with a tip for precision.
- Brazing Rods: 15% silver (like Harris Stay-Silv 15) for strong, leak-proof joints. No flux needed for copper-to-copper.
- Tubing Cutter: For clean, burr-free cuts.
- Emery Cloth or Sandpaper: 120-grit to clean pipes.
- Wire Brush: Stainless steel for final cleaning.
- Degreaser: Acetone or alcohol to remove grease.
- Safety Gear: Shade 5-7 goggles, welding gloves, flame-resistant jacket.
- Filter Drier: Extra driers to catch oxide debris.
- Vacuum Pump and Micron Gauge: To evacuate the system to 500 microns.
- Manifold Gauge Set: For pressure testing.
Pro tip: Always have a spare filter drier. It’s your safety net for catching oxide flakes.
Preparing Copper Lines for Brazing
Preparation is everything when brazing without nitrogen. Here’s how I set up for clean, strong joints.
Clean the Pipes Thoroughly
Dirty pipes ruin joints. I cut the copper with a tubing cutter for a straight, burr-free edge. Then, I sand the ends with 120-grit emery cloth until they’re shiny. A quick wipe with acetone removes grease or oil. I skipped thorough cleaning once on a rush job, and the joint leaked within weeks.
Ensure a Tight Fit
The gap between pipes should be 0.002-0.005 inches for the filler to flow properly. I use a swaging tool to flare one pipe end slightly for a snug fit. Loose joints lead to weak brazes, and I’ve had to redo sloppy connections because of this.
Minimize Oxygen Exposure
Without nitrogen, you can’t eliminate oxygen, but you can limit it. Work in a well-ventilated area to disperse fumes, and braze quickly to reduce heat exposure. I keep my torch moving to avoid overheating any one spot.
| Preparation Step | Purpose | Tools Needed |
|---|---|---|
| Clean Pipes | Removes oxides, grease, dirt | Emery cloth, acetone, wire brush |
| Cut Pipes | Ensures burr-free edges | Tubing cutter |
| Swage Joints | Creates tight fit for filler flow | Swaging tool |
Best Techniques for Brazing Without Nitrogen
Brazing without nitrogen requires precision to minimize oxide formation. Here’s my step-by-step process, based on a recent mini-split repair where I had no nitrogen.
Set Up Your Torch
Use an oxy-acetylene torch with a neutral flame (equal oxygen and acetylene) for even heating. For 3/8-inch copper lines, I use a #2 tip and adjust for a small, focused flame. Too much heat creates more oxides, so I start low and increase as needed.
Heat the Joint Evenly
Heat the pipe, not the filler rod. I move the flame in a circular motion around the joint, heating both pipes until they glow cherry red (1200-1400°F). I watch the copper’s color to avoid overheating—too red, and you’re burning the metal.
Apply the Brazing Rod
When the joint is hot, touch the 15% silver brazing rod to the seam. It should melt and flow into the gap by capillary action. I use about 2-3 inches of rod for a 3/8-inch joint. Don’t overdo it—too much filler creates messy joints.
Cool and Inspect
Let the joint cool naturally. Quenching with water can cause cracks. Check for a smooth, shiny ring of filler metal. If it’s rough or porous, re-braze after cleaning. I tap joints lightly with a screwdriver to test strength.
Clean the System
Oxide flakes are likely without nitrogen. Install an extra filter drier in the liquid line to catch debris. I also flush the lines with a solvent like RX11 before evacuation to remove loose particles.
Alternatives to Brazing Without Nitrogen
If you’re avoiding nitrogen, there are other options I’ve used in specific situations.
Stay-Brite 8 Soft Solder
Stay-Brite 8 is a tin-silver solder with a low melting point (around 430°F). It reduces oxidation because of the lower heat, but it’s not as strong as brazing. I’ve used it for small repairs on low-pressure systems, but it’s not code-compliant for most HVAC work due to vibration risks.
SmartLock or ZoomLock Fittings
No-braze fittings like SmartLock or ZoomLock use compression for flame-free connections. I used ZoomLock on a commercial job where flames were banned. They’re reliable but require special tools and can be expensive. They’ve held up for me with no leaks after years.
Flare Fittings
Flare fittings are common for mini-splits and avoid brazing entirely. I’ve installed flare-connected systems for DIYers who didn’t want to braze. They’re reliable if you use a high-quality flaring tool and torque properly.
| Method | Pros | Cons | Best For |
|---|---|---|---|
| Brazing (No Nitrogen) | Strong joints, widely used | Oxide risk, health hazards | Emergency repairs, small jobs |
| Stay-Brite 8 | Low heat, less oxidation | Weaker, not code-compliant | Low-pressure repairs |
| SmartLock/ZoomLock | No flame, safe, fast | Expensive, needs special tools | Flame-restricted areas |
| Flare Fittings | No heat, DIY-friendly | Risk of leaks if poorly done | Mini-splits, temporary fixes |
Mitigating Oxide Risks Without Nitrogen
Without nitrogen, oxide formation is a concern. Here’s how I minimize it:
- Braze Quickly: Keep brazing time under 30 seconds per joint to limit oxidation. I time myself to stay efficient.
- Use Extra Filter Driers: Add one in the liquid line and, if possible, a temporary one in the suction line. I’ve caught oxide flakes this way.
- Flush the Lines: Use a solvent flush like RX11 to remove debris before evacuation. It’s saved me from clogs.
- Evacuate Thoroughly: Pull the system to 500 microns with a vacuum pump to remove air and moisture. I check with a micron gauge for a tight system.
Safety Tips for Brazing Without Nitrogen
Fumes are a bigger issue without nitrogen, so safety is critical. Here’s how I stay safe:
- Wear a Respirator: A P100 filter blocks copper oxide fumes. I got sick once from skipping this—never again.
- Use Proper PPE: Shade 5-7 goggles, welding gloves, and a flame-resistant jacket are musts.
- Ventilate the Area: Work outdoors or use exhaust fans. I use a portable fume extractor indoors.
- Keep a Fire Extinguisher Handy: Sparks can ignite debris, especially in attics.
- Avoid Overheating: Excessive heat increases fumes. Focus the flame on the joint.
Real-Life Experience: A Costly Lesson
Years ago, I was installing a 3-ton AC unit for a friend. I ran out of nitrogen and brazed the last few joints without it to finish on time. The system worked fine initially, but six months later, the TXV clogged, and the compressor started struggling.
I had to flush the lines, replace the drier, and eat the repair cost. Since then, I only braze without nitrogen in emergencies, and I always flush the system and add extra driers to catch debris.
Common Mistakes and How to Avoid Them
I’ve made and seen plenty of brazing errors. Here’s how to steer clear:
- Dirty Pipes: Uncleaned pipes cause weak joints. Sand and degrease thoroughly.
- Overheating: Too much heat creates oxides. Use a neutral flame and braze quickly.
- Poor Joint Fit: Loose or tight joints lead to leaks. Swage for a 0.002-0.005-inch gap.
- Skipping Evacuation: Without a proper vacuum, air and moisture stay in the system. Always pull to 500 microns.
Practical Tips for Brazing Refrigerant Lines
Here are my go-to tips for better brazing:
- Practice on Scrap: Test braze on copper scraps to hone your technique.
- Use a Mirror: In tight spaces, a small mirror helps you see the joint.
- Mark Joints: Chalk marks ensure consistent brazing locations.
- Pressure-Test First: Use dry air or CO2 to check for leaks before evacuation.
- Clean Torch Tips: A clogged tip ruins heat control. Clean after every job.
These tricks have saved me time and frustration on countless HVAC projects.
Brazing Without Nitrogen Done Right
Brazing refrigerant lines without nitrogen is a last resort, but with careful preparation, quick technique, and extra steps like flushing and adding filter driers, you can get solid joints. I’ve learned from my mistakes—like that clogged AC unit—and now I know how to minimize risks. Whether you’re a DIYer fixing a mini-split or a pro on a tight deadline, these techniques will help you braze safely and effectively.
Can I braze refrigerant lines without nitrogen?
Yes, but it’s risky. Oxide flakes can form and clog system components like TXVs or compressors. Use extra filter driers and flush the lines to reduce damage.
What are the risks of skipping nitrogen when brazing?
Oxygen reacts with hot copper, forming oxide scale that can clog valves or damage compressors. I’ve seen systems fail early because of this.
Is Stay-Brite 8 a good alternative to brazing?
Stay-Brite 8 is a low-temperature solder that reduces oxidation, but it’s not as strong and isn’t code-compliant for most HVAC systems. I’ve used it for minor repairs only.
Are SmartLock or ZoomLock fittings reliable?
Yes, they’re great for flame-free connections. I’ve used ZoomLock in flame-restricted areas with no leaks after years, but they require special tools.
How do I know if my brazed joints are solid?
Look for a smooth, shiny ring of filler metal around the joint. Pressure-test the system and evacuate to 500 microns. I tap joints lightly to check strength.

I’m Darrell Julian, the founder, lead writer, and hands-on welding enthusiast behind ArcWeldingPro.com. With more than 15 years of real-world welding experience, I created this platform to share what I’ve learned in the field, in the shop, and in the heat of the arc.


