To drill out spot welds on a car, use a spot weld cutter or a drill with a cobalt bit. Secure the panel in place and drill through the welds. Drilling out spot welds on a car is a necessary process when replacing panels or making repairs. Spot welds are used to join metal panels together, and removing them requires precision and care to avoid damaging the surrounding metal.
By following the correct procedure and using the right tools, you can effectively drill out spot welds without causing unnecessary harm to the car’s structure. We will discuss the step-by-step process of drilling out spot welds on a car and provide some useful tips to ensure a successful outcome.

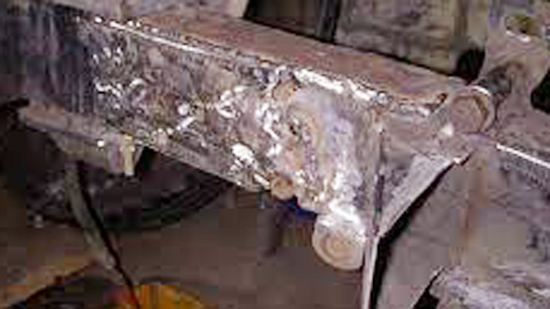
Photo by blairequipment
Spot Welding In Auto Repairs
Spot welding is a commonly used technique in auto repairs, and knowing how to properly drill out spot welds is essential for any repair work. By using the right tools and techniques, you can remove damaged panels and replace them with new ones, ensuring a safe and sturdy repair job.
Spot Welds In Vehicle Assembly: Spot welds are crucial in joining metal panels during vehicle assembly.
Reasons For Removing Spot Welds: Spot weld removal is necessary for body repair and panel replacement.
Essential Tools For Spot Weld Removal
When it comes to removing spot welds on a car, having the right tools is crucial for a successful and efficient process. The essential tools for spot weld removal include a spot weld drill bit, alternative tools for weld removal, and safety equipment.
Spot Weld Drill Bit Selection
Choosing the right spot weld drill bit is essential for effective weld removal. The drill bit should be made of high-speed steel (HSS) or cobalt to ensure durability and precision. It’s important to select a bit with a sharp cutting edge to easily penetrate the hardened steel of the spot weld without causing damage to the surrounding metal.
Alternative Tools For Weld Removal
While a spot weld drill bit is the primary tool for removing spot welds, there are alternative tools that can be used for this purpose. These include spot weld cutters, pneumatic chisels, and rotary burrs. Each alternative tool offers unique advantages and may be preferred in certain situations based on accessibility and the specific nature of the spot weld.
Safety Precautions Before You Start
Before you start drilling out spot welds on a car, ensure to take proper safety precautions. Wear protective eyewear and gloves, and make sure the work area is well-ventilated. Additionally, use a sharp center punch to mark the center of the welds before drilling to prevent slipping.
Protective Gear Recommendations
Before starting, ensure you wear the following protective gear:
- Safety goggles to protect your eyes from debris.
- Heavy-duty gloves to shield your hands from sharp edges.
- Ear protection to minimize noise exposure.
Workspace Preparation Tips
Prepare your workspace by following these tips:
- Clean the area around the spot weld to ensure clear visibility.
- Keep a fire extinguisher nearby as a safety precaution.
- Secure the car to prevent movement during drilling.
Identifying Spot Welds On Your Car
Visual Inspection Techniques
When you’re trying to identify spot welds on your car, it’s crucial to use visual inspection techniques. Start by closely examining the seams and joints of the vehicle’s body. Look for small, circular indentations that indicate the presence of spot welds. These indentations are often more visible on older vehicles, as they may have accumulated rust and dirt over time.
Common Locations For Spot Welds
Spot welds are commonly found in specific areas of a car’s body. These include door sills, wheel arches, roof seams, and fender edges. When inspecting these areas, pay close attention to any irregularities in the surface that may indicate the presence of spot welds. Additionally, refer to the vehicle’s repair manual for specific guidance on spot weld locations for your particular make and model.
Step-by-step Guide To Drilling Out Spot Welds
Center Punching For Precision
Center punching is crucial for accurate drilling on spot welds.
Drilling Techniques To Minimize Damage
Use sharp drill bits to reduce damage to the surrounding metal.
Dealing With Stubborn Or Inaccessible Welds
When dealing with stubborn or inaccessible welds on a car, drilling out spot welds can be an effective solution. Using a high-quality drill bit and steady pressure, carefully drill through the weld to remove the panel without causing damage. This method allows for precise removal and replacement of car parts.
In some cases, spot welds can be stubborn and hard to reach, posing a challenge during the removal process. When faced with such welds, it’s essential to have the right tools and techniques at your disposal. Patience and precision are key in tackling these difficult spots effectively.
Using A Rotary Tool For Hard-to-reach Welds
When dealing with welds in tight spaces, a rotary tool can be a lifesaver. Its compact size and maneuverability make it ideal for reaching spots that are inaccessible to larger tools. By using a rotary tool with a cutting wheel attachment, you can carefully cut through stubborn spot welds without causing damage to the surrounding areas.
Troubleshooting Common Challenges
Here are some common challenges you may encounter when drilling out spot welds on a car:
- Broken drill bits due to excessive pressure
- Difficulty accessing welds in cramped areas
- Overheating of the metal during drilling
- Uneven or jagged holes left after drilling
By addressing these challenges with proper technique and the right tools, you can overcome stubborn spot welds and successfully remove them from the vehicle’s body.
Post-drilling Procedures
After successfully drilling out the spot welds on a car, it’s important to follow through with post-drilling procedures to ensure a clean and effective removal process. This phase involves cleaning and prepping the work area, as well as inspecting for complete removal to guarantee a smooth transition to the next step.
Cleaning And Prepping The Work Area
Once the spot welds have been drilled out, the work area needs to be thoroughly cleaned to remove any residual metal shavings and debris. This can be achieved by using a vacuum cleaner or compressed air to ensure that the surface is free from any obstructions that could interfere with the subsequent steps.
Additionally, prepping the area involves smoothing out any rough edges or surfaces to create a clean and even foundation for the next phase of the process.
Inspecting For Complete Removal
After cleaning and prepping the work area, it’s essential to inspect the drilled-out spot welds to confirm complete removal. This involves visually examining the area to ensure that all remnants of the spot welds have been effectively eliminated. Using a flashlight or a similar source of illumination can assist in identifying any remaining traces that may require further attention.
It’s crucial to verify the absence of any residual material to ensure a seamless transition to the subsequent stages of the car repair or restoration process.
Finishing Touches And Surface Preparation
To drill out spot welds on a car, you need to properly prepare the surface and finish the job with precision. This involves removing any debris, selecting the appropriate drill bit, and taking your time to avoid damaging the surrounding metal.
With careful attention to detail, you can successfully remove spot welds without causing any additional damage to the car.
Grinding And Smoothing The Surface
After removing spot welds, grind down any rough edges to ensure a smooth surface.
- Utilize a grinder with the appropriate attachment for precision.
- Smooth out imperfections to create a seamless finish.
Prepping For Repainting Or Welding
When the surface is smooth, prep it for the next step to restore the car.
- Apply a primer to protect the bare metal from corrosion.
- Consider using filler to level out any remaining uneven spots.
Best Practices For Effective Spot Weld Removal
When it comes to working on a car, removing spot welds is a common task that requires precision and care. To ensure a successful spot weld removal process, it’s important to follow best practices that can help make the task easier and more effective. By incorporating these tips and techniques, you can streamline the spot weld removal process and achieve professional results.
Tips To Prolong Drill Bit Life
Drilling out spot welds can be tough on drill bits, leading to premature wear and reduced effectiveness. To prolong the life of your drill bits during spot weld removal, consider the following tips:
- Use sharp, high-quality drill bits specifically designed for metalworking.
- Apply cutting fluid to the drill bit to reduce heat and friction during drilling.
- Regularly inspect the drill bit for signs of wear or damage, and replace as needed.
Avoiding Common Mistakes
When removing spot welds, it’s crucial to avoid common mistakes that can hinder the process and compromise the quality of the work. Some key mistakes to steer clear of include:
- Using excessive force when drilling, which can lead to overheating and premature dulling of the drill bit.
- Neglecting to center punch the spot weld before drilling, which can result in inaccurate hole placement and difficulty in removing the weld.
- Skipping the use of a spot weld cutter or specialized drill bit designed for spot weld removal, which can make the process more challenging and time-consuming.
Restoring Your Car’s Integrity
Recapping The Spot Weld Removal Process
After successfully removing spot welds, it’s essential to ensure the structural integrity of your car.
Ensuring Structural Safety After Weld Removal
- Inspect the surrounding metal for damage or warping.
- Reinforce the area with new welds or structural adhesive.
- Test the strength and stability before proceeding with further repairs.
Conclusion
To sum up, removing spot welds from a car may seem like a daunting task, but with the right tools and techniques, it can be done easily. By following the step-by-step guide provided in this blog post, you can successfully drill out spot welds on your car without causing any damage.
To take your time, be patient, and use safety precautions to avoid any injuries. With practice, you will become an expert at removing spot welds and can confidently tackle any project that comes your way.

I’m Darrell Julian, the founder, lead writer, and hands-on welding enthusiast behind ArcWeldingPro.com. With more than 15 years of real-world welding experience, I created this platform to share what I’ve learned in the field, in the shop, and in the heat of the arc.