Plug welding is a crucial technique in sheet metal fabrication, automotive repair, and various other industries. This method allows for strong, durable connections between overlapping pieces of sheet metal. In this guide, we’ll explore the intricacies of plug welding, from preparation to execution, and provide you with the knowledge needed to master this essential skill.

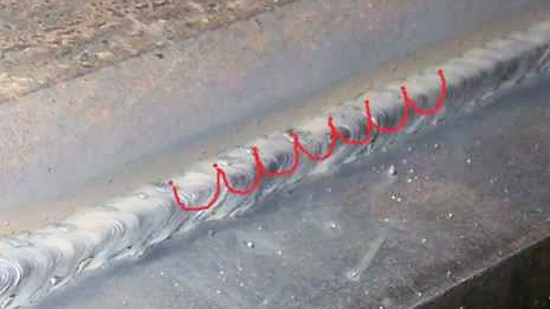
Image by mig-welding-co-uk
What is Plug Welding?
Plug welding is a process where a hole is drilled or punched in the top layer of overlapping sheet metal, and a weld is made through this hole to join the two layers together. This technique is commonly used in automotive body repair, metal fabrication, and construction.
Advantages of Plug Welding
- Strong, durable connections
- Allows joining of overlapping sheets
- Minimal distortion compared to continuous seam welding
- Can be used in areas where access is limited to one side
Disadvantages of Plug Welding
- Requires preparation (drilling holes)
- May leave visible weld marks
- Not suitable for all types of sheet metal
Equipment Needed for Plug Welding
Before you begin plug welding, ensure you have the following equipment:
- Welding machine (MIG welder recommended)
- Welding wire
- Shielding gas (typically a mix of argon and CO2)
- Welding helmet
- Welding gloves
- Safety glasses
- Drill or hole punch
- Metal cleaning supplies (wire brush, solvent)
- Clamps or magnets
- Grinding wheel or sander
Preparing for Plug Welding
Proper preparation is crucial for successful plug welding. Follow these steps to ensure the best results:
Clean the Metal
Remove any paint, rust, or contaminants from both pieces of sheet metal. Use a wire brush, grinder, or chemical cleaner to ensure a clean surface for welding.
Mark and Drill Holes
- Determine the appropriate spacing for your plug welds (typically 1-2 inches apart)
- Mark the locations for your plug welds on the top sheet
- Drill holes at the marked locations (hole diameter should be about 1/4 to 3/8 inch)
Fit and Clamp the Pieces
Align the two pieces of sheet metal and clamp them securely. Ensure there are no gaps between the sheets where you’ll be welding.
Set Up Your Welding Machine
Configure your welding machine for the appropriate settings based on the thickness of your sheet metal. Typically, you’ll want to use:
- Wire speed: Medium to high
- Voltage: Low to medium
- Gas flow: 20-25 cubic feet per hour
Plug Welding Process
Now that you’re prepared, let’s walk through the plug welding process step by step:
Position the Welding Gun: Hold the welding gun at a 90-degree angle to the surface of the metal, centered over the drilled hole.
Start the Weld: Trigger the welding gun and begin welding at the edge of the hole. Move in a circular motion around the edge of the hole.
Fill the Hole: As you circle the edge, gradually move inward, filling the hole with weld material. Aim to create a slightly convex surface.
End the Weld: Once the hole is filled, quickly pull the welding gun away to break the arc.
Allow Cooling: Let the weld cool naturally. Avoid using water or compressed air to cool the weld, as this can affect the weld quality.
Common Mistakes to Avoid
Be aware of these common pitfalls when plug welding:
- Overheating the metal: This can cause warping or burn-through
- Insufficient penetration: Ensure the weld fully penetrates both sheets
- Uneven hole filling: Aim for a consistent, slightly convex surface
- Improper hole size: Too small, and you risk insufficient penetration; too large, and you may burn through
- Dirty surfaces: Always clean the metal thoroughly before welding
Finishing and Inspection
After completing your plug welds, follow these steps:
Clean the Weld
Use a wire brush to remove any slag or spatter from the weld surface.
Inspect the Weld
Look for these qualities in a good plug weld:
- Consistent, slightly convex surface
- Full penetration (visible from the backside if accessible)
- No cracks or porosity
Grind if Necessary
If a smooth surface is required, carefully grind down the weld using a grinding wheel or sander. Be cautious not to remove too much material.
Plug Welding vs. Other Welding Methods
Let’s compare plug welding to other common sheet metal welding techniques:
| Welding Method | Strengths | Weaknesses | Best Applications |
|---|---|---|---|
| Plug Welding | Strong joints Minimal distortion Works for overlapping sheets | Requires hole drilling Visible weld marks | Automotive body repair Sheet metal fabrication |
| Spot Welding | Fast No filler material needed Minimal visible marks | Requires specialized equipment Limited to thin materials | High-volume production Automotive manufacturing |
| Seam Welding | Continuous, strong joint Can be watertight | More distortion Slower than spot welding | Tanks and containers Structural applications |
| Stitch Welding | Less heat input than seam welding Reduced distortion | Not watertight More visible than spot welds | Non-critical joints Where appearance is less important |
Advanced Plug Welding Techniques
As you become more proficient in basic plug welding, consider these advanced techniques:
Rosette Welds
Similar to plug welds, but using a circular or oval-shaped hole instead of a round one. This technique can provide a larger weld area and increased strength.
Slot Welds
Instead of circular holes, elongated slots are used. This method is useful for longer joints or when more flexibility is needed in the connection.
Plug Welding with Backing Plates
For situations where access to the back of the weld is limited, a backing plate can be used to support the weld pool and ensure proper penetration.
Safety Considerations
Always prioritize safety when plug welding:
- Wear appropriate personal protective equipment (PPE), including a welding helmet, gloves, and fire-resistant clothing.
- Ensure proper ventilation to avoid inhaling welding fumes.
- Keep a fire extinguisher nearby.
- Be aware of your surroundings and remove any flammable materials from the welding area.
- Never weld on containers that have held flammable materials without proper cleaning and preparation.
Troubleshooting Common Plug Welding Issues
Even experienced welders encounter problems. Here are some common issues and their solutions:
Burn-Through
Problem: The weld melts through both sheets of metal.
Solution: Reduce heat input by lowering voltage or wire speed, or increase travel speed.
Lack of Penetration
Problem: The weld doesn’t fully join both sheets.
Solution: Increase heat input, ensure proper fit-up, or slightly enlarge the hole.
Porosity
Problem: Small bubbles or holes in the weld.
Solution: Clean the metal thoroughly, check for drafts affecting shielding gas, or adjust gas flow.
Spatter
Problem: Excessive molten metal droplets around the weld.
Solution: Adjust wire speed and voltage, clean the metal surface, or check for proper shielding gas coverage.
Conclusion
Plug welding is a versatile and valuable technique for joining sheet metal. With proper preparation, execution, and practice, you can achieve strong, reliable welds in a variety of applications. Remember to prioritize safety, maintain your equipment, and continually refine your technique to become a master of plug welding.
Whether you’re restoring a classic car, fabricating custom metal pieces, or working in industrial applications, the skill of plug welding will serve you well. As with any welding technique, the key to success lies in understanding the fundamentals, practicing regularly, and always striving for improvement.
By following the guidelines outlined in this guide, you’ll be well on your way to producing high-quality plug welds and expanding your metalworking capabilities.

I’m Darrell Julian, the founder, lead writer, and hands-on welding enthusiast behind ArcWeldingPro.com. With more than 15 years of real-world welding experience, I created this platform to share what I’ve learned in the field, in the shop, and in the heat of the arc.


