Soldering brass to steel is a valuable skill for many hobbyists, craftsmen, and professionals working with metal. This process requires careful preparation, the right tools, and proper technique to achieve a strong and durable bond.
We’ll explore the intricacies of soldering brass to steel, covering everything from the necessary materials to step-by-step instructions and troubleshooting tips.

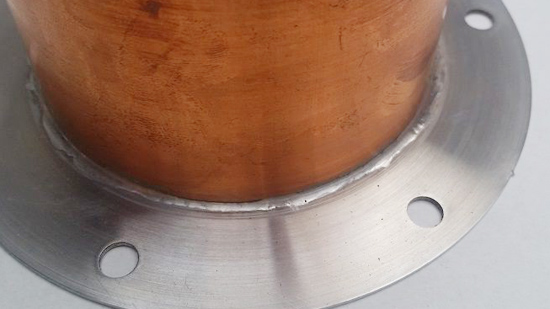
Image by instructables
Understanding the Materials
Before diving into the soldering process, it’s essential to understand the properties of the materials we’re working with:
Brass
Brass is an alloy primarily composed of copper and zinc. It’s known for its excellent conductivity, corrosion resistance, and attractive golden color. Brass is relatively easy to solder due to its copper content.
Steel
Steel is an alloy of iron and carbon, often containing other elements to enhance its properties. It’s stronger and harder than brass but can be more challenging to solder due to its higher melting point and tendency to oxidize quickly.
Required Tools and Materials
To successfully solder brass to steel, you’ll need the following:
- Soldering iron (40-60 watts recommended)
- Solder (60/40 tin-lead or lead-free alternative)
- Flux (rosin-core or separate flux)
- Steel wool or fine emery cloth
- Cleaning solution (isopropyl alcohol or specialized metal cleaner)
- Safety equipment (safety glasses, gloves, and proper ventilation)
- Heat-resistant work surface
- Brass and steel pieces to be joined
- Clamps or helping hands to hold pieces in place
- Damp sponge or brass sponge for cleaning the soldering iron tip
Preparation Steps
Proper preparation is crucial for a successful solder joint between brass and steel:
Clean the metals
Use steel wool or fine emery cloth to thoroughly clean both the brass and steel surfaces. This removes any oxidation, dirt, or oils that could interfere with the soldering process.
Apply flux
After cleaning, apply a thin layer of flux to both surfaces. Flux helps prevent oxidation during the soldering process and promotes better solder flow.
Secure the pieces
Use clamps or helping hands to hold the brass and steel pieces in the desired position. Ensure they’re in good contact with each other.
Prepare your work area
Set up your soldering station on a heat-resistant surface in a well-ventilated area. Have all your tools and materials within easy reach.
Tin the soldering iron
Clean the soldering iron tip with a damp sponge or brass sponge, then apply a small amount of solder to the tip. This process, known as “tinning,” helps improve heat transfer
Step-by-Step Soldering Process
Now that everything is prepared, let’s go through the soldering process:
- Heat the joint: Place the flat edge of the soldering iron tip against both the brass and steel pieces, ensuring maximum contact for efficient heat transfer. Hold it there for a few seconds to allow the metals to heat up.
- Apply solder: Once the metals are hot enough, touch the solder to the joint on the opposite side from the iron. If the temperature is correct, the solder should melt and flow into the joint. Don’t apply solder directly to the iron tip.
- Fill the joint: Continue adding solder until the entire joint is filled. The solder should flow smoothly and evenly between the brass and steel.
- Remove heat and allow cooling: Once the joint is filled, remove the soldering iron and allow the joint to cool naturally. Avoid moving the pieces until the solder has completely solidified.
- Clean the joint: After the joint has cooled, use a damp cloth to remove any excess flux residue. This prevents corrosion and ensures a clean finish.
Tips for Success
To achieve the best results when soldering brass to steel, keep these tips in mind:
- Temperature control: Brass and steel have different melting points, so finding the right temperature is crucial. Start with a lower temperature and increase as needed.
- Use the right solder: Choose a solder with a melting point lower than both brass and steel. A 60/40 tin-lead solder or a lead-free alternative designed for mixed metals works well.
- Apply heat evenly: Try to heat both the brass and steel pieces equally to ensure good solder flow and adhesion.
- Don’t overheat: Excessive heat can cause the metals to warp or the solder to burn, weakening the joint.
- Practice on scrap pieces: If you’re new to soldering or working with these materials, practice on scrap pieces before attempting your actual project.
Troubleshooting Common Issues
Even with careful preparation and technique, you may encounter some challenges. Here are some common issues and how to address them:
Solder not flowing
This is often due to insufficient heat or inadequate cleaning. Ensure the metals are clean and free of oxidation, and try increasing the temperature slightly.
Weak joints
If the joint feels weak or brittle, it may be due to movement during cooling or insufficient solder. Make sure the pieces are held securely and that you’ve applied enough solder to fill the joint completely.
Solder balling up
This usually indicates that the surfaces aren’t clean enough or that there’s insufficient flux. Clean the surfaces thoroughly and apply more flux if needed.
Burnt flux
If the flux turns dark or burns, you’re likely applying too much heat. Reduce the temperature or work more quickly.
Safety Considerations
Soldering involves high temperatures and potentially harmful materials, so safety should always be a priority:
- Ventilation: Always work in a well-ventilated area to avoid inhaling harmful fumes.
- Personal protective equipment: Wear safety glasses to protect your eyes from solder splatter and gloves to prevent burns.
- Fire safety: Keep a fire extinguisher nearby and work on a heat-resistant surface.
- Lead-free options: Consider using lead-free solder, especially for projects that may come into contact with food or skin.
Conclusion
Soldering brass to steel requires patience, practice, and attention to detail. By following the steps outlined in this guide and keeping the tips and troubleshooting advice in mind, you’ll be well-equipped to create strong, durable joints between these two versatile metals.
Remember that mastering this skill takes time, so don’t be discouraged if your first attempts aren’t perfect. With practice, you’ll soon be confidently tackling a wide range of projects involving brass and steel soldering.
Whether you’re repairing jewelry, creating custom hardware, or working on intricate model-making projects, the ability to solder brass to steel opens up a world of creative possibilities. As you gain experience, you’ll develop a feel for the right temperatures, solder flow, and joint preparation that works best for your specific applications.
Always prioritize safety, work methodically, and don’t hesitate to experiment with different techniques on scrap materials. With time and practice, you’ll find that soldering brass to steel becomes a valuable and rewarding skill in your metalworking repertoire.

I’m Darrell Julian, the founder, lead writer, and hands-on welding enthusiast behind ArcWeldingPro.com. With more than 15 years of real-world welding experience, I created this platform to share what I’ve learned in the field, in the shop, and in the heat of the arc.


