If you’re staring down a dripping water pipe and wondering how to weld a leaking water pipe to stop the mess, I’ve got you covered. I’ve spent years in workshops and on job sites fixing everything from copper lines in homes to steel pipes in industrial setups, and welding is often the best way to create a permanent, leak-proof repair.
Whether you’re a DIYer tackling a home plumbing issue, a hobbyist patching up irrigation lines, or a pro handling commercial systems, knowing how to weld a leaking water pipe can save you time, money, and a whole lot of frustration.
Why does this matter? A leaking pipe can waste water, damage property, or even create health hazards like mold or contamination. Welding offers a durable fix that meets US plumbing codes, unlike temporary patches that can fail under pressure.
But it’s not without challenges—water and welding don’t mix, and the wrong technique can weaken the pipe or create new leaks. I’ll share the processes, tools, and tips I’ve learned from real-world experience to help you seal that pipe tight.

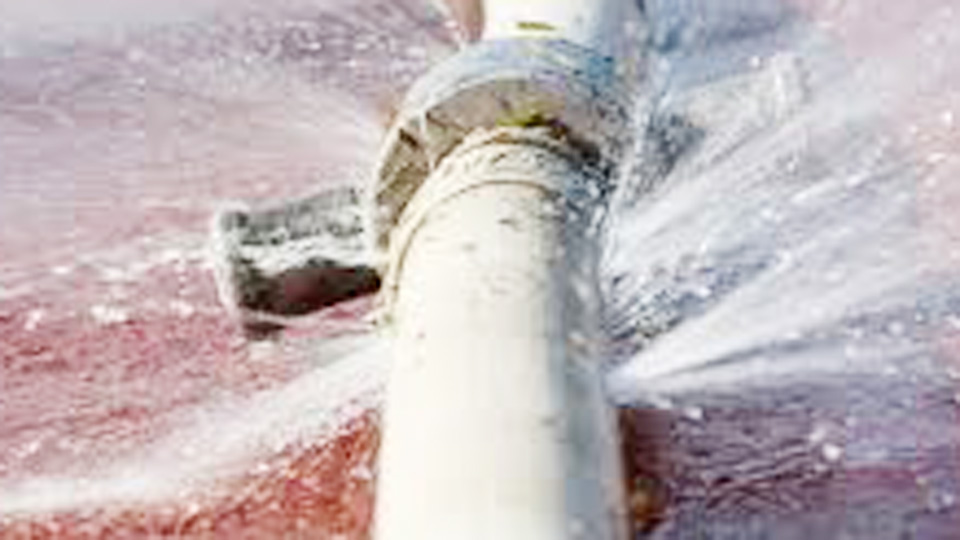
Image by plumbersingapore
Why Welding a Leaking Water Pipe Matters
A leaking water pipe isn’t just a nuisance—it can lead to costly water bills, structural damage, or system failures in industrial settings. Welding creates a strong, permanent repair that can handle pressure, temperature changes, and corrosion, ensuring the pipe stays functional. For potable water systems, a proper weld is critical to meet NSF/ANSI 61 standards and avoid contamination.
I once helped a neighbor fix a leaking copper pipe in his basement. A quick weld saved him from tearing out drywall for a full replacement. But welding pipes requires care—moisture can cause porous welds, and poor material compatibility can lead to cracks. Getting it right ensures safety, longevity, and cost savings.
Identifying Pipe Materials and Welding Challenges
Before you start welding, you need to know what the pipe is made of. Common water pipe materials in the USA include copper, galvanized steel, stainless steel, and plastic (like PVC or CPVC). Each has unique properties that dictate the welding approach.
- Copper: Common in homes, copper is soft and conducts heat quickly, requiring low-heat welding to avoid burn-through.
- Galvanized Steel: Found in older buildings or industrial systems, it’s durable but produces toxic zinc fumes when welded.
- Stainless Steel: Used in commercial or high-purity systems, it’s corrosion-resistant but needs precise heat control.
- Plastic: PVC or CPVC pipes require solvent welding, not traditional metal welding.
The biggest hurdle is water. Even a small amount of moisture can create steam, causing porosity or weak welds. I once tried welding a steel pipe that wasn’t fully drained, and the weld was a mess—full of holes. Thorough prep and the right process are critical to success.
Best Welding Processes for Leaking Water Pipes
Several welding methods work for repairing leaking water pipes, depending on the material and job conditions. Here’s what I’ve found works best.
TIG Welding (GTAW)
TIG (Gas Tungsten Arc Welding) is my top choice for copper and stainless steel pipes. It’s precise, produces clean welds, and lets you control heat to avoid damaging thin pipes.
How It Works: A tungsten electrode creates an arc, shielded by argon gas, to melt the base metal and a filler rod (if needed). A foot pedal controls heat, making it ideal for delicate work.
When to Use It: Perfect for copper pipes in residential plumbing or stainless steel lines in commercial systems, like food processing or hospitals. I used TIG to fix a copper water line in a friend’s house, and it’s been leak-free for years.
Practical Tips:
- Prep Work: Clean the pipe with a stainless steel wire brush or emery cloth to remove oxides. For copper, polish until it shines to ensure good filler flow.
- Machine Settings: For 1/8” copper pipe, set your TIG welder to 50-80 amps (AC for copper, DCEN for stainless). Use a 1/16” tungsten electrode and pure argon at 15-20 CFH.
- Common Mistake: Don’t weld a wet pipe. Dry the area with a heat gun or torch to eliminate moisture, or you’ll get porous welds.
Equipment: A TIG welder like a Miller Syncrowave or Lincoln Precision TIG, plus filler rods (ERCu for copper, ER316L for stainless).
Stick Welding (SMAW)
Stick welding (Shielded Metal Arc Welding) is rugged and portable, great for outdoor or industrial repairs on galvanized or mild steel pipes. It’s less precise than TIG but handles thicker materials well.
How It Works: A flux-coated electrode creates an arc that melts the rod and base metal, forming a weld. The flux shields the weld, but you’ll need to chip off slag afterward.
When to Use It: Best for galvanized steel pipes in irrigation systems or industrial water mains. I’ve used stick welding to patch a steel pipe on a farm, where a TIG setup wasn’t practical.
Practical Tips:
Electrode Choice: Use E6011 for thin steel pipes or E7018 for thicker ones (3/32” or 1/8” diameter). E7018 offers low-hydrogen welds for better strength.
Machine Settings: Set your welder to 80-120 amps for a 1/8” rod on 1/4” steel. Use DC reverse polarity (DCEP) for deeper penetration.
Mistake to Avoid: Zinc fumes from galvanized pipes are toxic. Weld in a well-ventilated area or use a fume extractor to avoid metal fume fever.
Equipment: A stick welder like a Hobart Stickmate or Lincoln AC-225, plus a chipping hammer and wire brush.
Solvent Welding for Plastic Pipes
For plastic pipes like PVC or CPVC, solvent welding is the go-to. It’s not traditional welding but chemically bonds the plastic for a leak-proof joint.
How It Works: A solvent (like MEK or THF) softens the plastic surfaces, which fuse together as the solvent evaporates. It’s simple and doesn’t require heat.
When to Use It: Ideal for PVC or CPVC water pipes in residential plumbing, like under sinks or in irrigation systems. I fixed a leaking PVC line in my sprinkler system with solvent welding, and it’s held up through seasons.
Practical Tips:
- Prep Work: Sand the pipe and fitting with 120-grit sandpaper and clean with alcohol for a strong bond.
- Application: Apply a thin layer of solvent with a brush, press the parts together, and hold for 30 seconds. Let it cure for 24 hours.
- Common Mistake: Don’t over-apply solvent—it can weaken the plastic or create a sloppy joint.
Equipment: Solvent cement, applicator brush, and sandpaper—cheap and easy, under $20.
Comparing Welding Processes for Leaking Pipes
Here’s a table to help you pick the right method, based on my experience.
| Welding Process | Best For | Pros | Cons | Cost |
|---|---|---|---|---|
| TIG (GTAW) | Copper, stainless steel | Precise, clean, great for thin pipes | Requires skill, pricey equipment | $500-$2,000 (welder) |
| Stick (SMAW) | Galvanized steel, mild steel | Portable, good for thick pipes | Less precise, slag cleanup | $200-$800 (welder) |
| Solvent Welding | PVC, CPVC | Cheap, no heat needed, easy | Limited to plastics, slow curing | Under $20 |
When to Choose Each: TIG is best for copper or stainless steel pipes needing precision, like in potable water systems. Stick welding suits rugged steel pipe repairs in tough environments. Solvent welding is perfect for plastic pipes in plumbing or irrigation.
Step-by-Step Guide to Welding a Leaking Water Pipe
Here’s a detailed guide for TIG welding a copper water pipe, the most common residential repair. Adjust for stick or solvent welding based on your material.
Step 1: Shut Off and Drain the System
Locate the leak and confirm the pipe material (copper, steel, or plastic). Shut off the water supply and drain the pipe completely. Use a bucket or towel to catch residual water. I once welded a copper pipe with a trickle left inside—steam ruined the weld, and I had to redo it.
Step 2: Prep the Pipe
Clean the leak area with a stainless steel wire brush or emery cloth until it’s shiny. For a pinhole leak, widen it slightly with a small drill bit or file for better filler penetration. For a crack, grind a V-groove along it with a rotary tool. Ensure the pipe is bone-dry using a heat gun or propane torch.
Pro Tip: Check for corrosion around the leak. If the pipe is thinning or pitted, consider replacing the section instead of welding.
Step 3: Set Up Your TIG Welder
For a 1/8” copper pipe, set your TIG welder to AC mode, 50-80 amps, with a 1/16” tungsten electrode (2% lanthanated). Use an ERCu filler rod (1/16” or 3/32”) and pure argon shielding gas at 15-20 CFH. Test your settings on scrap copper to ensure a smooth arc and good filler flow.
Step 4: Weld the Leak
Strike the arc by tapping the tungsten against the pipe, keeping a short arc length (about 1/16”). Use your foot pedal to control heat, starting low to avoid burn-through. For a pinhole, fill the hole with a circular motion, adding filler rod as needed. For a crack, weave along the V-groove, ensuring the filler fuses with both sides. The weld should be smooth and slightly convex.
Mistake to Avoid: Don’t overheat the copper—it conducts heat fast and can warp or burn through. If it turns bright red, reduce heat or move faster.
Step 5: Inspect and Test
Let the weld cool naturally—avoid quenching with water, as it can cause cracks. Check for a smooth, shiny weld with no porosity or gaps. Turn the water back on slowly and test for leaks with a soap bubble solution. For potable water pipes, flush the system to remove any welding residue.
Pro Tip: If welding stainless steel, use ER316L filler and DCEN polarity. For stick welding on steel, chip off slag and brush the weld clean before testing.
Practical Tips for Success
Here are some tips I’ve picked up from years of pipe welding:
- Dry Thoroughly: Use compressed air or a shop vac to remove all water from the pipe. Even a drop can cause steam and ruin the weld.
- Purge for Stainless: For stainless steel pipes, purge the inside with argon to prevent oxidation and ensure a clean weld.
- Practice First: Weld on a scrap piece of the same material to dial in your settings and technique before the real job.
- Check Codes: For potable water, ensure your materials and process meet NSF/ANSI 61 standards. Copper and stainless welds usually comply, but verify local regulations.
- Know When to Replace: If the pipe has multiple leaks or heavy corrosion, replace the section. I’ve seen DIYers waste time patching a pipe that was too far gone.
Safety Considerations
Welding a leaking pipe involves risks, especially with water and heat:
Ventilation: Weld in a well-ventilated area or use a fume extractor, especially for galvanized steel (zinc fumes cause metal fume fever) or solvent welding (chemical fumes).
PPE: Wear a welding helmet (shade 10-12 for TIG/stick), flame-resistant gloves, and a leather jacket. For solvent welding, use a mask and gloves.
Fire Safety: Keep a fire extinguisher nearby. Wet pipes can still ignite nearby flammable materials. I had a spark ignite some rags once—lesson learned.
Electrical Safety: Ensure your welder is grounded and avoid welding on wet surfaces to prevent shocks.
Pressure Safety: Confirm the pipe is depressurized and drained before welding. A pressurized pipe can spray hot water or burst.
Real-World Applications in the USA
Welding leaking water pipes is common in various settings:
- Residential Plumbing: Fixing copper or PVC lines in homes, like under sinks or in crawlspaces.
- Industrial Systems: Repairing stainless steel pipes in breweries, hospitals, or chemical plants where hygiene and corrosion resistance matter.
- Agriculture: Patching galvanized steel irrigation pipes on farms, where portability is key.
- DIY Projects: Restoring old plumbing in workshops or fixing plastic sprinkler lines.
- Commercial Buildings: Maintaining water lines in offices or schools, often requiring ASME-compliant welds.
For students, learning pipe welding is a gateway to careers in plumbing, HVAC, or industrial maintenance, where AWS or ASME certifications are valued.
Conclusion
Mastering how to weld a leaking water pipe gives you the skills to tackle everything from a dripping copper line in your home to a steel water main on a job site. With TIG for precision, stick for rugged repairs, or solvent welding for plastics, you’ve got the right tools for any material.
You now know how to prep properly, choose the best process, set up your equipment, and avoid mistakes like welding a wet pipe or overheating. Whether you’re a DIYer saving on plumbing costs, a hobbyist fixing farm equipment, or a pro meeting code standards, you’re ready to create strong, leak-proof welds.
My final pro tip? Keep a small propane torch handy to dry out pipes before welding—it’s a quick step that saves you from porosity headaches. Grab your welder, prep that pipe, and seal that leak for good!
FAQ
Can you weld a water pipe with water still in it?
No, welding a pipe with water inside is nearly impossible—steam causes porosity or weak welds. Drain the pipe fully and dry it with a heat gun or compressed air before welding.
What’s the best welding method for copper water pipes?
TIG welding is ideal for copper pipes due to its precision and low heat input, preventing burn-through. Use AC polarity, an ERCu filler rod, and argon shielding gas.
Is it safe to weld galvanized steel water pipes?
Yes, but be cautious of toxic zinc fumes. Use stick welding with E6011 or E7018 rods, weld in a well-ventilated area, and use a fume extractor to avoid metal fume fever.
Can solvent welding be used for potable water pipes?
Yes, if you use NSF/ANSI 61-approved solvent cement for PVC or CPVC. Allow 24 hours for curing and flush the system to remove residue before use.
When should I replace a pipe instead of welding it?
Weld small leaks or cracks in sound pipes. If the pipe is heavily corroded, thinned, or has multiple leaks, replace the section to avoid repeated repairs.

I’m Darrell Julian, the founder, lead writer, and hands-on welding enthusiast behind ArcWeldingPro.com. With more than 15 years of real-world welding experience, I created this platform to share what I’ve learned in the field, in the shop, and in the heat of the arc.


