To weld a patch on a car, clean the area, secure the patch, and weld it in place. Welding a patch on a car involves a few key steps to ensure a strong and durable bond.
Whether you’re fixing rust spots or repairing damage, knowing how to weld a patch on a car can save you time and money in the long run. By following the right techniques and using the proper tools, you can effectively weld a patch on your car and keep it looking great for years to come. Let’s explore the process of welding a patch on a car in more detail to help you tackle this task with confidence.

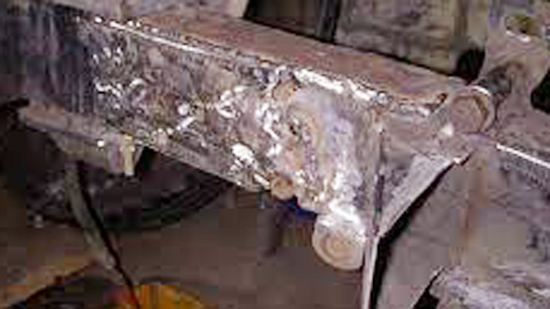
Photo by motortrend
About Car Welding
Learn the essential steps for welding a patch on a car. Start by preparing the surface, setting up the welding equipment, and carefully welding the patch to ensure a secure and professional repair job. Mastering car welding techniques can save you time and money on auto body repairs.
Importance Of Proper Welding
Welding is crucial for car repairs to ensure structural integrity. Improper welding can lead to safety hazards and vehicle damage.
Safety Measures Before Starting
Always wear protective gear like gloves, goggles, and aprons. Clear the work area of any flammable materials or clutter. Inspect the welding equipment for any defects or malfunctions. Car welding is a fundamental skill for repairing vehicle bodies. Professional welders use techniques to join metal pieces securely. Welding a patch on a car requires precision and expertise. It is essential for maintaining the safety and aesthetics of a vehicle.
Essential Welding Tools And Materials
When it comes to welding a patch on a car, having the right tools and materials is essential for a successful and safe outcome. From choosing the right welder to ensuring you have the necessary protective gear, each component plays a crucial role in the welding process.
Choosing The Right Welder
Before starting the welding process, it’s crucial to select the appropriate welder for the job. Consider the type of metal being welded and the thickness of the material. For automotive welding, a MIG (Metal Inert Gas) welder is often preferred for its versatility and ease of use. Ensure that the welder has the necessary power output for the specific welding task at hand.
Protective Gear And Equipment
Welding requires the use of protective gear to ensure the safety of the welder. Essential equipment includes a welding helmet with a protective face shield, welding gloves, and flame-resistant clothing. Additionally, a welding apron and boots can provide added protection from sparks and heat. Investing in quality welding safety equipment is crucial for preventing injuries and ensuring a successful welding outcome.

Image by thefabricator
Preparing the Car For Welding
To prepare the car for welding a patch, start by removing any rust and debris from the area. Clean the surface thoroughly and protect surrounding areas with a welding blanket or fire-resistant material. Ensure the car is properly supported and grounded before beginning the welding process.
Preparing the Car for Welding
Welding a patch on a car is a great way to repair damage caused by rust or accidents. Before you begin welding, it’s important to prepare the car properly to ensure the patch will be strong and long-lasting. This involves cleaning and stripping the area, as well as cutting out the damaged metal. Here’s how to prepare your car for welding.
Cleaning and Stripping the Area
The first step in preparing your car for welding is to clean and strip the area where you will be welding. This is important because welding requires a clean surface to work properly. You can use a wire brush or sandpaper to remove any rust or paint from the area. Be sure to wear gloves and a mask to protect yourself from the dust and debris.
Cutting Out the Damaged Metal
Once you have cleaned and stripped the area, you will need to cut out the damaged metal. This involves using a cutting tool, such as a plasma cutter or an angle grinder, to remove the damaged metal.
Be sure to wear safety glasses and gloves to protect yourself from the sparks and debris. Cut the metal out in a square or rectangular shape, leaving a small gap between the edge of the cut and the edge of the patch. This gap will allow you to weld the patch in place. Once you have cut out the damaged metal, you can clean up the edges with a file or a grinder.
This will ensure that the patch fits snugly into the hole and will make welding easier. If the hole is large, you may need to make a patch out of sheet metal. Cut the patch to size and shape it to fit the hole. Be sure to leave a small gap around the edge of the patch to allow for welding.
Preparing the car for welding is an important step in ensuring that your patch will be strong and long-lasting. Cleaning and stripping the area and cutting out the damaged metal are two crucial steps that should not be overlooked.
By following these steps, you can ensure that your welding project will be a success.

Image by eurekaoxygencompany
Selecting The Correct Patch Material
When it comes to welding a patch on a car, selecting the correct patch material is crucial for ensuring a strong and durable repair. The patch material should match the metal thickness of the car body, and proper preparation is essential for a successful weld. Here’s a detailed look at how to select the correct patch material for welding on a car.
Matching Metal Thickness
Matching the metal thickness of the car body is essential to ensure a seamless and secure patch. Use a gauge to measure the thickness of the car body metal. Once you have determined the thickness, select a patch material that matches it closely. This will help maintain the structural integrity of the car body and prevent weak spots or uneven welding.
Preparing The Patch
Before welding the patch onto the car body, it’s crucial to prepare the patch material properly. Clean the surface of the patch material to remove any debris, rust, or coatings that could interfere with the welding process. Ensure that the edges of the patch are smooth and free of any irregularities that could affect the weld. Properly preparing the patch material will contribute to a strong and seamless weld.
Techniques For Aligning The Patch
When welding a patch on a car, proper alignment is crucial for a successful repair. Here are the key techniques for aligning the patch effectively:
Clamping The Patch In Place
- Secure the patch using clamps to hold it firmly in position.
- Position the clamp on the outer edges for even pressure distribution.
- Ensure the patch is level with the surrounding metal surface.
Ensuring A Flush Fit
- Check for any gaps between the patch and the car body.
- Use a mallet to gently tap the patch for a flush fit.
- Verify the alignment visually before proceeding with welding.
Welding The Patch
Welding the patch on your car requires precision and skill to ensure a strong and lasting repair.
Tack Welding For Stability
- Start by tack welding the patch onto the car to secure it in place.
- Use a welding machine to create small welds along the edges of the patch.
Completing The Weld Seam
- Once the patch is tack welded, proceed to complete the weld seam.
- Ensure smooth and consistent welding to prevent weak spots.
Finishing Touches Post-welding

Image by thefabricator
Grinding And Sanding The Weld
After the welding process, it’s essential to grind and sand the welded area to achieve a smooth and seamless finish. Use a grinding wheel to remove any excess weld material and ensure the surface is even. Then, switch to sanding to create a smooth texture and blend the patch with the surrounding metal.
Applying Primer And Paint
Once the weld is ground and sanded, it’s time to apply primer and paint to protect the metal from corrosion and restore the car’s appearance. Start by applying a primer designed for metal surfaces to ensure proper adhesion. After the primer dries, paint the patched area with a color that matches the rest of the car’s body for a seamless look.
Mistakes To Avoid
When welding a patch on a car, avoid common mistakes like inadequate surface preparation and improper heat control. Ensure proper welding technique for a seamless repair job. Remember to use the right tools and protective gear for safety and precision.
Common Mistakes to Avoid When Welding a Patch on a Car Welding a patch on a car is a task that requires precision and skill. It can be tempting to rush through the process, but that can lead to costly mistakes. In this section, we will discuss some common mistakes to avoid when welding a patch on a car.
Avoiding Overheating the Metal One of the most common mistakes when welding a patch on a car is overheating the metal. This can weaken the surrounding area and cause it to warp or distort. It’s important to use the right amount of heat when welding and to keep the heat focused on the patch itself.
Be sure to use the right welding technique based on the type of metal you’re working with. Preventing Warping and Distortion Another common mistake when welding a patch on a car is warping or distortion. This can happen when the metal is heated unevenly or when too much heat is applied to one area. To prevent warping, it’s important to use a steady hand and move the heat around evenly. You can also use a heat sink or heat spreader to help distribute the heat evenly.
It’s important to take your time when welding a patch on a car. Rushing through the process can lead to costly mistakes. By avoiding overheating the metal and preventing warping and distortion, you can ensure a successful weld and a patch that will last for years to come.
Maintaining Your Welding Equipment

Image by canadianmetalworking
When it comes to welding a patch on a car, maintaining your welding equipment is essential for achieving high-quality results and ensuring safety. Regular cleaning and inspection as well as replacing consumable parts are crucial aspects of equipment maintenance that can directly impact the success of your welding projects.
Regular Cleaning And Inspection
Regular cleaning and inspection of your welding equipment is vital to ensure its optimal performance. Clean the welding machine, torch, and cables regularly to remove any dirt, debris, or spatter. Inspect the equipment for any signs of wear, damage, or loose connections. By keeping your equipment clean and well-maintained, you can prevent potential issues and prolong its lifespan, ultimately saving time and money in the long run.
Replacing Consumable Parts
Replacing consumable parts such as welding tips, nozzles, and electrodes on a regular basis is crucial for maintaining the quality of your welds. Over time, these parts can wear out and affect the welding process. Keep a close eye on the condition of consumable parts and replace them as soon as they show signs of wear or deterioration. This simple maintenance practice can significantly improve the performance and efficiency of your welding equipment.
Conclusion
Welding a patch on a car requires precision and safety measures. By following the step-by-step guide and using the right tools, you can effectively restore your vehicle’s integrity. Remember to prioritize safety, seek professional help if needed, and enjoy the satisfaction of a job well done.

I’m Darrell Julian, the founder, lead writer, and hands-on welding enthusiast behind ArcWeldingPro.com. With more than 15 years of real-world welding experience, I created this platform to share what I’ve learned in the field, in the shop, and in the heat of the arc.