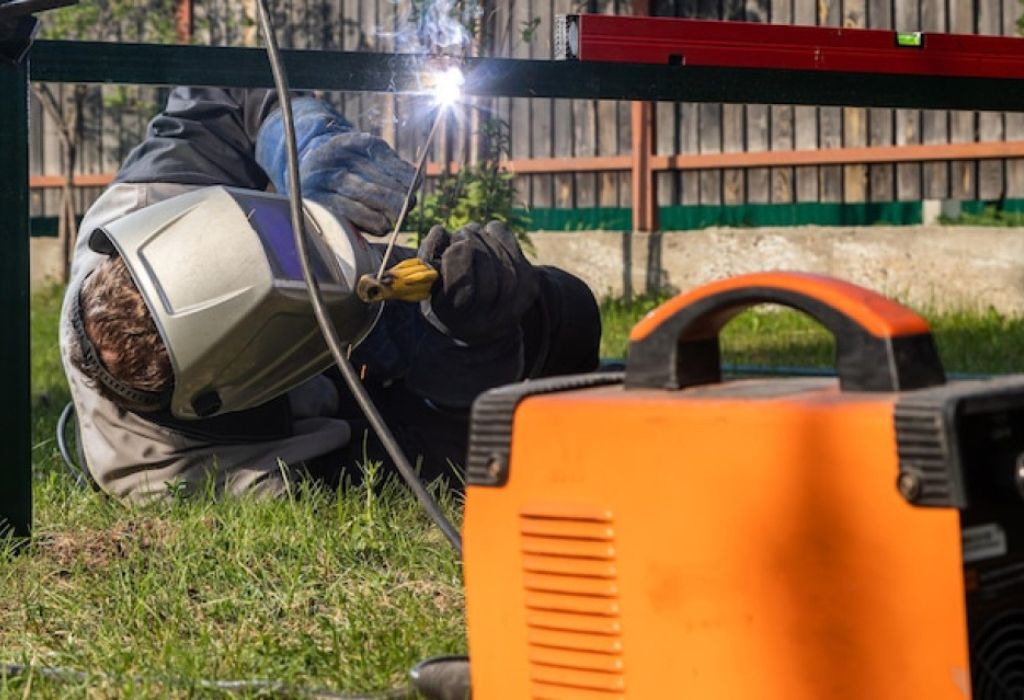
A technician arrives at a remote site clutching a compact welder, ready to mend a cracked frame under harsh sunlight.
Within minutes, the arc sputters, the weld pool is erratic, and the repaired joint looks rushed and weak.
This scenario plays out daily across industrial sites, farms, and marine repairs.
Portable welders promise flexibility, but many users struggle with inconsistent results, poor fusion, and fragile welds.
What separates a sloppy weld from a strong, clean joint in the field?
The answer lies not in brute power—but in technique, correct settings, and understanding the machine’s limits.
Mastering how to use a portable welding machine empowers clean, durable welds even in imperfect environments.
In recent years, portable and inverter welders have surged in field repair roles, enabling maintenance crews to respond quickly and reduce downtime.
Though data on failure rates is sparse, many field welders attribute 30–40% of weld rework to improper settings or poor technique under site conditions.
What Is a Portable Welding Machine & Its Use Cases

Portable welding machines are designed for flexibility, allowing users to perform high-quality welds anywhere without relying on large shop equipment.
They are compact, lightweight, and often inverter-based, making them ideal for field repairs, construction, or maintenance in hard-to-reach locations.
Unlike stationary welders, portable units offer mobility without compromising welding performance.
They can handle mild steel, stainless steel, and even light aluminum depending on the machine’s amperage and electrode type.
These machines come in various types, such as inverter welders, engine-driven welders, and battery-powered models.
Each is designed for specific applications — from pipeline maintenance to on-site machinery repair and emergency fixes.
Their biggest advantage is accessibility.
When equipment breaks down on a farm, factory floor, or remote job site, a portable welder becomes the go-to solution for quick, efficient welding.
However, portability comes with trade-offs.
A smaller duty cycle, limited input voltage, and potential power fluctuations can restrict continuous welding or reduce penetration on thicker metals.
According to welding industry data, over 45% of field welders now rely on portable or inverter-based units for maintenance and repair tasks due to their efficiency and reduced power consumption.
This growing trend proves that learning how to use a portable welding machine correctly is a valuable skill for both professionals and DIY welders.
What types of portable welders are available?
Inverter, engine-driven, and battery-powered models designed for different environments and material types.
What materials can be welded with a portable machine?
Most can weld mild steel, stainless steel, and aluminum when properly configured.
What are the main limitations of portable welders?
Shorter duty cycles, limited voltage capacity, and sensitivity to overheating.
Why choose a portable welder over a stationary one?
It offers mobility, faster response to field repairs, and energy-efficient operation.
What industries use portable welding machines most often?
Construction, automotive repair, shipbuilding, and agricultural maintenance benefit most from portable welding versatility.
Safety & Site Preparation Before Using a Portable Welding Machine
Before striking an arc, proper safety and site preparation are essential.
Portable welding machines may be lightweight and easy to move, but they carry the same risks as full-size welders—electric shock, fumes, and intense UV radiation.
A well-prepared workspace is the first step to clean, stable welds.
Whether indoors or outdoors, ensure there is adequate ventilation, dry footing, and a clear area free of flammable materials.
Field welding introduces extra hazards such as unstable surfaces, high winds, or limited lighting.
Welders must adapt by using stable platforms, wind shields, and portable work lights to maintain control and visibility.
Inspect every part of the setup before starting.
Check cables, ground clamps, and connectors for fraying or damage, as faulty connections can cause arc instability or electric shock.
Ensure the machine’s power supply is secure, and confirm that the voltage matches the welder’s requirements.
Personal protection is non-negotiable.
Always wear a welding helmet with an auto-darkening lens, flame-resistant gloves, a long-sleeved jacket, and leather boots.
Protective gear reduces the risk of burns and exposure to UV and infrared rays.
According to occupational safety reports, nearly 60% of welding-related accidents occur due to poor preparation or missing PPE.
That makes careful setup a vital step in mastering how to use a portable welding machine safely and effectively.
What PPE is essential for portable welding?
Auto-darkening helmet, welding gloves, leather jacket, safety boots, and a respirator in enclosed spaces.
How to prepare a site for welding?
Remove flammable materials, ensure ventilation, use a dry surface, and stabilize the workpiece before starting.
Why inspect cables and clamps before welding?
Damaged insulation or loose clamps can cause electric shock and inconsistent current flow.
How to stay safe while welding outdoors?
Use windbreaks, avoid wet conditions, and ground the machine properly to prevent arc instability.
What’s the most overlooked safety step?
Verifying grounding and cable integrity—both critical for stable arc performance and electrical safety.
Power Supply, Cable & Input Considerations
Power stability is the backbone of clean, consistent welds.
A portable welding machine may be smaller in size, but it still demands a reliable and properly rated power source to deliver smooth current output.
Before plugging in, always verify that the power input matches the welder’s specifications.
Running a 220V machine on a 110V line or using undersized extension cables can cause voltage drops, overheating, and weak arc performance.
Long cables and lightweight wiring are common field mistakes.
When current travels through a cable that’s too thin or too long, resistance increases, resulting in reduced amperage at the torch.
Using heavy-gauge cables and keeping them as short as possible ensures efficient energy transfer.
If a generator is used, confirm that it delivers clean, stable current with minimal voltage fluctuation.
Unstable generator output can damage the inverter components inside the welder and produce erratic arcs.
Duty cycle also matters.
Portable welders often have shorter duty cycles than shop machines, meaning they must rest periodically to avoid overheating.
Ignoring this can shorten machine life and cause performance drops.
Proper power management not only ensures consistent bead quality but also prevents sudden equipment failures during critical field operations.
Mastering this step is a key part of learning how to use a portable welding machine effectively and safely.
Why does cable gauge matter in portable welding?
Thicker cables reduce voltage drop and maintain consistent current for stable arcs.
Can a generator power a portable welding machine?
Yes, but it must have stable voltage and adequate wattage output to prevent arc fluctuation.
What happens if voltage input is too low?
Low voltage causes poor penetration, unstable arcs, and weak fusion.
How to prevent overheating during long welds?
Follow the welder’s rated duty cycle and allow cooling intervals between welds.
Why keep cables short and connections tight?
It minimizes resistance, improves current delivery, and prevents unnecessary power loss.
Electrode, Filler & Consumable Selection

The quality of a weld depends heavily on choosing the right electrode and filler materials.
Portable welding machines may have power limitations, but with proper consumable selection, they can still produce strong, clean welds on various metals.
For stick welding (SMAW), commonly used electrodes include E6010, E6011, and E7018.
E6010 and E6011 are preferred for field repairs and outdoor welding because they work well with dirty or rusty metals and can handle slightly unstable current.
E7018, on the other hand, delivers smoother, stronger welds when the metal is clean and dry.
When using a portable MIG welder, wire selection becomes crucial.
ER70S-6 is a versatile solid wire that performs well on mild steel and provides deep penetration with minimal spatter.
For jobs with wind exposure or outdoor work, flux-cored wire such as E71T-11 is better since it does not require shielding gas.
The filler rod should always match or exceed the tensile strength of the base metal.
For stainless steel, ER308L or ER309L rods ensure strong, corrosion-resistant joints, while aluminum work typically uses ER4043 or ER5356.
Consumables like contact tips, gas nozzles, and liners also play a key role in maintaining arc stability.
Dirty or worn components can cause wire feeding issues, arc interruptions, or inconsistent gas coverage.
Proper filler and consumable management ensure consistent arc quality, reduced spatter, and clean bead appearance — the hallmarks of expert welding.
Which electrodes work best for portable welding?
E6010 and E6011 for field conditions, and E7018 for clean, controlled environments.
What wire type is used in portable MIG welding?
ER70S-6 for indoor use or E71T-11 flux-cored wire for outdoor welding without gas.
How to select the right filler rod?
Match it to the base metal’s composition and required strength for optimal fusion.
Why are clean consumables important?
Contaminated or worn parts disrupt gas flow, cause spatter, and weaken the weld.
How should electrodes and fillers be stored?
Keep them dry, sealed, and away from moisture to prevent hydrogen absorption and rust formation.
Setting Parameters: Amperage, Arc Length & Travel Speed
Fine-tuning machine settings is where good welds become great ones.
Even the best portable welding machine can produce weak or messy joints if the parameters are not properly adjusted.
Start by setting the amperage based on material thickness.
A general rule of thumb is to use 1 amp per 0.001 inch of material thickness.
For example, a 1/8-inch steel plate usually requires around 125 amps for optimal penetration and bead formation.
Arc length is another crucial factor.
Keeping the arc too short can cause the electrode to stick, while too long a distance leads to spatter and shallow penetration.
Maintaining a consistent arc length—roughly equal to the electrode diameter—creates stable arcs and smooth welds.
Travel speed determines bead appearance and heat distribution.
Moving too slowly overheats the metal, resulting in burn-through or distortion.
Moving too fast creates undercut, poor fusion, and narrow, weak welds.
Field welders often adjust travel speed by watching the weld pool.
A properly formed puddle should flow evenly without excessive buildup or irregular ripples.
Balancing these three settings—amperage, arc length, and travel speed—ensures clean, controlled results even when using compact equipment.
Mastering them is one of the most essential steps in learning how to use a portable welding machine for professional-quality welds.
How do you choose the correct amperage?
Base it on metal thickness and electrode size; increase slightly for thicker materials or deeper penetration.
What happens if the arc length is too short?
It causes the electrode to stick, leading to an unstable arc and poor bead control.
Why avoid long arcs in portable welding?
Long arcs introduce air into the weld, causing porosity and weak fusion.
How to identify the right travel speed?
Watch the puddle; it should stay fluid and uniform without excessive buildup or burn-through.
Can these settings vary by electrode type?
Yes, each electrode or filler wire has unique current and travel speed requirements listed by the manufacturer.
Welding Techniques for Portable Machines (Positions, Joints & Movement)
Mastering welding technique is the difference between a rough, uneven bead and a clean, professional weld.
Portable machines make it possible to weld anywhere, but they also require careful control of angles, motion, and positioning to maintain consistency.
The most common welding positions include flat, horizontal, vertical, and overhead.
Each demands unique adjustments to electrode angle, travel speed, and heat control.
In the flat position, maintain a slight drag or push angle of 10–15 degrees to ensure even penetration and proper puddle flow.
This is the easiest position for beginners because gravity assists in forming uniform beads.
For vertical welds, move slightly upward using a steady weaving or triangle pattern to prevent sagging or metal runoff.
When welding overhead, shorten the arc length and reduce amperage to control the molten puddle and prevent dripping.
Joint preparation also matters.
Bevel thicker materials, clean the edges, and tack-weld the pieces to maintain alignment during the final weld.
Good joint setup minimizes distortion and helps the portable machine deliver precise, consistent heat distribution.
Smooth motion and rhythm are key.
A steady hand, proper torch manipulation, and correct electrode angle help maintain arc stability and bead uniformity in any position.
With practice, even small portable machines can produce welds that rival shop-quality results.
What is the easiest position for portable welding?
The flat position, as it offers natural puddle control and even bead formation.
How should the electrode be angled during welding?
Use a 10–15° push or drag angle depending on process and joint type.
What’s the best way to weld vertically?
Use an upward motion with a weaving technique to control heat and prevent sagging.
How can overhead welding be controlled?
Reduce amperage, maintain a short arc, and use small, quick motions to prevent metal from dripping.
Why is joint preparation so important?
Properly cleaned and beveled joints improve penetration, reduce distortion, and ensure a stronger weld bond.
Testing & Quality Checks on Field Welds
Once the welds are complete, inspection and testing are essential to confirm strength, appearance, and durability.
Even minor defects can compromise the integrity of the joint, especially when using portable welding machines in field environments.
Start with a visual inspection.
Look for consistent bead shape, uniform ripples, and a smooth surface without cracks, porosity, or undercut.
A clean weld should have good tie-in at the edges and minimal spatter.
Next, perform a penetration check when possible.
On test pieces, grind or cut through the weld to verify that the filler has fused fully into the base metal.
Incomplete penetration is a sign of low amperage, poor travel speed, or improper joint prep.
For critical work, non-destructive tests (NDT) like dye penetrant, magnetic particle, or ultrasonic testing can be used.
These methods detect internal flaws without damaging the weld or surrounding structure.
If defects are found, adjust the parameters before re-welding.
Sometimes, small tweaks in amperage or travel speed can eliminate repeated issues.
Consistent self-checks ensure continuous improvement and prevent costly rework.
By developing a habit of testing each project, welders can identify weaknesses early and perfect their settings for future jobs.
Inspection is not just about quality assurance—it’s the final step in mastering how to use a portable welding machine with confidence and precision.
How to visually inspect a weld properly?
Check for smooth, uniform beads without holes, cracks, or uneven edges.
What indicates good penetration?
A smooth transition between the weld and base metal, visible fusion, and no gaps underneath.
Which simple field tests can be done without lab tools?
Hammer tap, bend tests, and visual inspection are quick and effective for on-site checks.
When should a weld be reworked?
If it shows porosity, cracks, undercut, or incomplete fusion that compromises strength.
Why is testing important for portable welds?
Because field conditions are unpredictable, testing ensures reliability and long-term performance even outside the workshop.
Troubleshooting Common Portable Welding Issues

Even skilled welders encounter challenges when working with portable machines.
Environmental conditions, power fluctuations, and incorrect settings can all lead to weld defects that affect strength and appearance.
One of the most frequent problems is arc instability.
This usually happens due to a weak ground connection, voltage drop from long cables, or contaminated electrodes.
Ensuring clean clamps and tight cable connections can immediately improve arc control.
Porosity is another common issue, caused by contaminants, drafts, or improper shielding.
Always clean the base metal before welding and protect the weld area from wind or moisture to maintain proper shielding.
If spatter appears excessively, the amperage may be too high, or the electrode angle could be off.
Adjusting travel speed and keeping a consistent arc length helps produce a smoother bead with less cleanup required afterward.
Burn-through often occurs when welding thin metals at high amperage or with slow travel speed.
To prevent it, lower the current slightly or use shorter, controlled welds with pauses for cooling.
Lastly, electrode sticking happens when current is too low or the electrode touches the puddle.
Raising amperage slightly and maintaining a steady arc gap typically solves the problem.
Understanding and quickly diagnosing these issues allows welders to correct mistakes on the spot.
Troubleshooting is a key skill in mastering how to use a portable welding machine, ensuring consistent quality even in unpredictable field conditions.
Why does the arc keep flickering or cutting out?
Loose ground connections or voltage drops from long cables cause unstable current flow.
What causes porosity in portable welds?
Moisture, oil, paint, or drafts around the weld area disrupt shielding and create trapped gas pockets.
Why am I getting excessive spatter?
Amperage is too high, travel speed is uneven, or the electrode angle is incorrect.
How to prevent burn-through on thin metal?
Lower the current and use quick, short welds to reduce heat concentration.
Why does the electrode stick to the workpiece?
Current is too low, or the arc length is too short—slightly increase amperage and maintain a steady gap.
Conclusion
Using a portable welding machine effectively is all about balance — between power, technique, and preparation.
Every clean, strong weld begins long before striking the first arc, with proper setup, safety checks, and fine-tuned parameters.
From managing power input and cable length to selecting the right electrode and adjusting travel speed, each step shapes the final result.
When done correctly, a portable machine can deliver professional-quality welds that rival those from heavy shop equipment.
Understanding how to troubleshoot common problems, inspect welds, and make small adjustments is what transforms good welders into great ones.
Portable welders demand precision, but they reward it with unmatched versatility and reliability on any job site.
Learning how to use a portable welding machine the right way ensures not just cleaner welds, but greater efficiency, safety, and confidence in the field.
With the right technique and preparation, every portable weld can be as durable and refined as one made in a controlled workshop environment.

I’m Darrell Julian, the founder, lead writer, and hands-on welding enthusiast behind ArcWeldingPro.com. With more than 15 years of real-world welding experience, I created this platform to share what I’ve learned in the field, in the shop, and in the heat of the arc.


