Mastering TIG welding is one of the most rewarding skills for any welder, yet it’s also one of the most challenging to perfect.
Many beginners struggle with unstable arcs, overheating, and contaminated tungsten because they don’t fully understand how to use a TIG welding machine correctly.
Imagine trying to create a flawless bead on a thin piece of stainless steel, only for the arc to wander and the weld to discolor.
Such results often stem from incorrect settings, poor gas flow, or improper torch control—small mistakes that make a big difference in weld quality.
According to industry data, TIG welding accounts for over 15% of precision welds in manufacturing and aerospace applications, proving its unmatched importance in producing clean, high-strength joints.
However, studies show that nearly 30% of weld defects occur due to operator setup errors, especially in shielding gas and tungsten preparation.
TIG, or Gas Tungsten Arc Welding (GTAW), offers superior precision and control, but it demands attention to detail.
Understanding how each element—amperage, polarity, gas flow, electrode angle, and filler technique—affects the weld is what separates professionals from amateurs.
Learning how to use a TIG welding machine properly ensures better heat control, cleaner welds, and longer equipment life.
It gives the welder complete command over the arc, enabling seamless joints on stainless steel, aluminum, or titanium.
What Is TIG Welding & Why It Matters
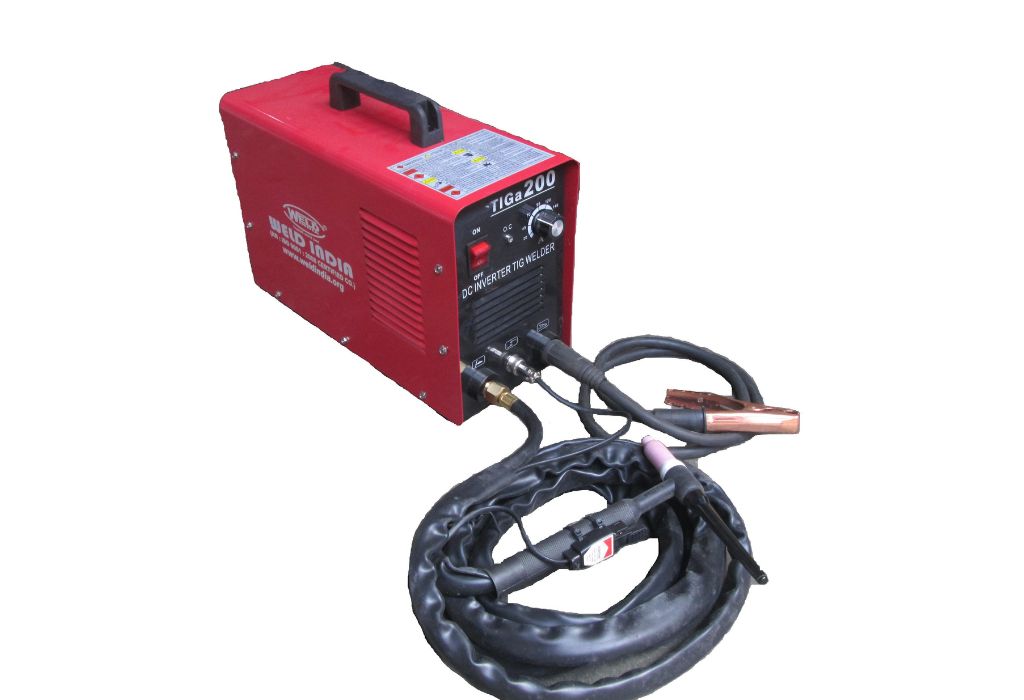
TIG welding, also known as Gas Tungsten Arc Welding (GTAW), is a process that uses a non-consumable tungsten electrode to produce a precise, high-quality weld.
Unlike MIG or stick welding, TIG provides exceptional control over heat and filler material, making it ideal for thin metals and applications that demand clean, visually appealing joints.
This precision is why industries like aerospace, automotive, and food-grade manufacturing rely heavily on TIG for critical welds.
The process operates with an electric arc formed between the tungsten electrode and the workpiece, protected by an inert shielding gas such as argon or helium.
This gas prevents contamination by keeping atmospheric elements like oxygen, nitrogen, and hydrogen away from the molten weld pool. Because of this shielding, TIG welding produces minimal spatter and requires little to no post-weld cleanup.
TIG welding stands apart for its versatility and ability to handle materials like aluminum, stainless steel, copper, and titanium. However, the same precision that makes it powerful also makes it demanding.
Maintaining proper gas coverage, controlling arc length, and balancing amperage are essential for achieving consistent penetration and flawless results.
Understanding how to use a TIG welding machine effectively allows welders to harness its full potential.
When done correctly, it produces durable, aesthetically perfect welds that meet both structural and visual standards—something few other welding methods can consistently achieve.
Safety & Machine Setup Essentials
Before striking a TIG arc, safety and proper setup must come first. TIG welding involves high heat, bright ultraviolet light, and pressurized shielding gases, making careful preparation essential to avoid injury and ensure consistent performance. Creating a safe and well-organized workspace builds the foundation for perfect welds.
Start by ensuring the welding area is clean, dry, and free from combustible materials such as oil, rags, or solvents. Adequate ventilation or fume extraction is necessary, especially when welding stainless steel or exotic alloys that can release harmful fumes.
Always wear appropriate personal protective equipment, including a welding helmet with an auto-darkening lens, flame-resistant gloves, long sleeves, and leather boots.
Eye and skin protection are vital, as ultraviolet radiation from the TIG arc can cause burns or long-term eye damage.
Next, focus on the machine setup. Connect the power source, ground clamp, torch, and gas supply according to the manufacturer’s guidelines.
The workpiece should be securely clamped to ensure proper grounding and stable current flow. Any loose or dirty connection can lead to erratic arcs and poor weld penetration.
The shielding gas—typically pure argon—plays a crucial role in TIG welding. Set the flow rate between 15 and 20 cubic feet per hour (CFH) for most applications, adjusting slightly based on the torch cup size and joint type. Using the correct gas flow prevents contamination and oxidation of the weld pool.
Finally, double-check all connections, inspect hoses for leaks, and verify that the foot pedal or amperage control functions properly. Attention to safety and setup details ensures smooth operation and creates the right conditions for achieving professional-grade welds.
Machine Controls & Settings for TIG
Mastering a TIG welding machine starts with understanding its controls and how each one influences the welding process.
Unlike other welding methods, TIG allows precise control over amperage, heat input, and arc characteristics. This flexibility makes it ideal for delicate work, but it also means that even small adjustments can dramatically affect weld quality.
Begin by identifying the key controls: amperage setting, polarity selection, gas flow rate, pulse control, and balance adjustment.
For most metals, direct current electrode negative (DCEN) is used because it provides deeper penetration and concentrates heat on the workpiece.
Alternating current (AC) is commonly used for aluminum and magnesium since it alternates between cleaning and penetration cycles, removing oxide layers during welding.
The amperage control, often managed through a foot pedal or finger switch, determines heat intensity.
Using a pedal gives the welder dynamic control, allowing smooth transitions in heat input during start and finish.
Pulse mode is another powerful feature found on modern TIG machines—it rapidly alternates between high and low amperage levels to improve puddle control and minimize distortion.
Post-flow and pre-flow gas timers protect the tungsten electrode and weld puddle from oxidation before and after welding. Adjusting the post-flow setting ensures continuous shielding as the weld cools, preventing discoloration and contamination.
Finally, proper balance control is vital when using AC mode for aluminum. Setting the balance correctly divides time between oxide cleaning and penetration, resulting in strong, clean welds with a shiny finish.
Learning how to use a TIG welding machine effectively means understanding these settings and how they interact to create consistent, defect-free welds. Precision in setup translates directly into precision in the weld itself.
Electrode & Filler Metal Selection & Preparation
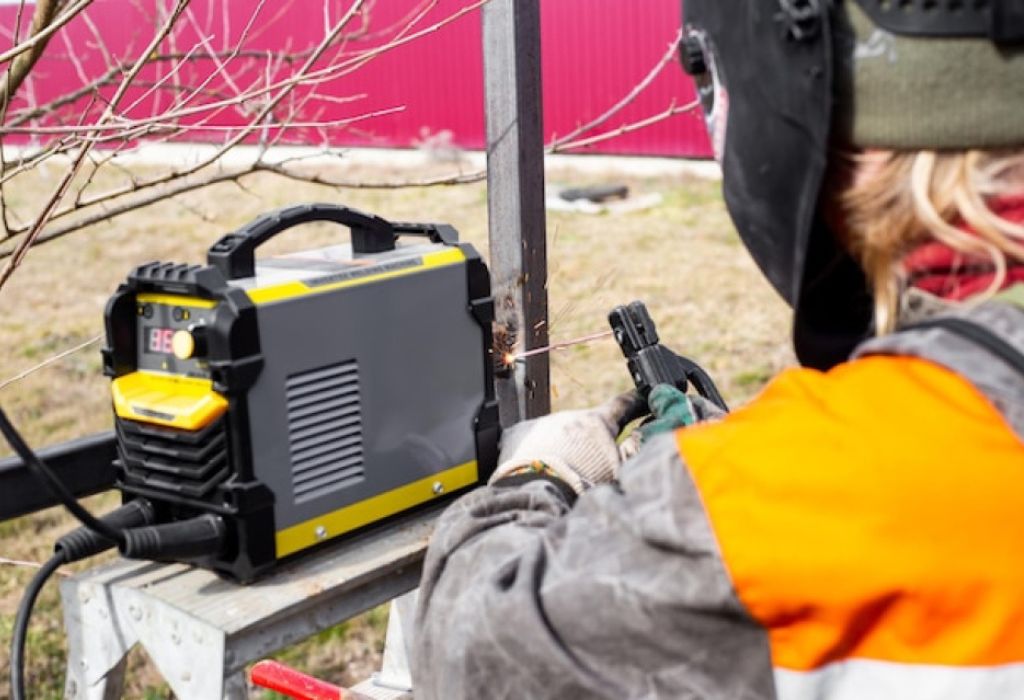
Choosing the correct tungsten electrode and filler metal is one of the most critical steps in TIG welding. These two components directly determine arc stability, weld penetration, and overall appearance.
A poor choice can lead to contamination, irregular beads, or weak welds, while the right combination ensures clean, strong, and consistent results.
Tungsten electrodes come in several types, each suited for different applications. Thoriated (red) tungsten is common for DC welding on steel and stainless steel because it offers excellent arc stability and longevity.
Ceriated (gray) and lanthanated (blue or gold) tungsten provide similar benefits but with easier arc starting and lower amperage capability, making them ideal for thinner materials.
For aluminum welding, pure tungsten (green) or ceriated tungsten with an AC balance setting is preferred, as they form a rounded tip that helps clean the oxide layer from the surface.
Preparation of the tungsten is equally important. The electrode should be ground lengthwise on a dedicated grinding wheel to maintain a sharp, even point. Grinding across the grain can cause arc wandering and instability.
Contaminated tungsten must be replaced or re-ground immediately since even a small amount of embedded material can cause porosity and discoloration in the weld.
The filler metal should match the base material as closely as possible. Common filler rods include ER70S-2 for mild steel, ER308L or ER316L for stainless steel, and ER4043 or ER5356 for aluminum. Each type offers unique properties in terms of tensile strength and corrosion resistance.
Cleanliness is crucial before starting. Both tungsten and filler rods must be free of grease, oil, or oxidation. Wiping them with acetone before welding eliminates surface contaminants that could disrupt the arc or introduce impurities into the weld pool.
Mastering electrode and filler preparation ensures the TIG welding process begins with precision and ends with perfection.
Welding Technique: Torch Handling & Bead Control
Once the TIG machine is properly configured and the electrodes and filler metals are prepared, the real artistry begins—controlling the torch and managing the weld puddle.
TIG welding demands precision and patience, where every movement affects the bead’s shape, consistency, and strength. The welder’s technique determines whether the result is a clean, professional weld or a messy, uneven joint.
Start by holding the torch at a comfortable 10–15 degree angle from vertical, pointing the tungsten electrode slightly toward the direction of travel.
This helps direct shielding gas effectively over the molten puddle, protecting it from atmospheric contamination. The electrode should maintain a steady distance from the workpiece, roughly the same as its diameter.
Too long an arc introduces oxidation and spatter, while too short a gap risks the tungsten touching the puddle and contaminating it.
Controlling the weld puddle is key. Adjust heat with the foot pedal to maintain a consistent puddle size, large enough for fusion but small enough to prevent excessive heat buildup.
Watch the leading edge of the puddle—the moment it forms, dip the filler rod smoothly into it, then retract slightly. Each dip should be deliberate and timed with the puddle’s rhythm.
Travel speed and torch movement also influence bead quality. Moving too fast leads to shallow penetration, while too slow overheats the metal and causes distortion. Smooth, steady travel with uniform filler addition produces a clean, even bead profile.
Finally, keep the weld area clean and the shielding gas flowing slightly after stopping the arc to protect the cooling metal from oxidation.
Precision torch control, combined with proper filler feeding and travel rhythm, transforms basic TIG welding into a refined process that produces flawless, professional-grade welds.
Troubleshooting & Common Defects
Even with perfect setup and technique, TIG welding can still present challenges. Small issues such as contamination, incorrect settings, or inconsistent gas flow often cause visible defects in the weld.
Recognizing these problems early and understanding their causes is essential to maintaining weld quality and extending equipment life.
One of the most common problems is tungsten contamination. This happens when the electrode accidentally touches the molten puddle or the filler rod. The result is a dirty arc, blackened tungsten, and visible inclusions in the weld.
To fix this, stop immediately, regrind or replace the tungsten, and ensure proper torch angle and arc length. Preventing contact between the tungsten and weld pool keeps the arc stable and clean.
Another frequent issue is porosity, which appears as tiny holes or bubbles on the surface or inside the weld. This usually results from poor shielding gas coverage, moisture, or oil contamination on the metal surface.
Always check gas flow, inspect hoses for leaks, and clean the base metal thoroughly before welding. Using the correct gas flow rate and maintaining a consistent post-flow ensures the weld remains shielded while cooling.
Lack of fusion occurs when the filler metal doesn’t bond completely with the base material. It’s often caused by low amperage, excessive travel speed, or an incorrect torch angle.
The solution is to increase amperage slightly, slow down, and maintain a stable arc length. Proper joint preparation also ensures better fusion and penetration.
Cracking and warping happen when the heat input is too high or when the weld cools unevenly. Managing heat with a foot pedal, using shorter weld sections, and allowing the metal to cool between passes can minimize these issues.
Lastly, oxidation or discoloration indicates insufficient gas coverage or incorrect post-flow timing. Always let argon flow for a few seconds after the arc stops to protect the hot metal from oxygen.
By learning how to identify and correct these common TIG welding problems, welders can quickly improve consistency and confidence. A clean setup, proper gas management, and steady technique ensure that each weld meets both structural and aesthetic standards.
Advanced Modes & Techniques
Modern TIG welding machines come equipped with advanced modes and features designed to enhance precision, efficiency, and control.
Understanding how to use these settings correctly allows welders to adapt to different metals, thicknesses, and joint types with greater accuracy. These innovations transform TIG welding from a manual art into a fine-tuned, professional process.
One of the most valuable features is pulse TIG mode, which alternates the current between high and low amperage levels.
The high pulse provides penetration, while the low pulse allows the puddle to cool slightly, reducing heat distortion and burn-through on thin materials. This setting is especially beneficial for stainless steel and sheet metal, helping produce consistent, ripple-free welds.
Another critical adjustment is the AC balance control, mainly used for aluminum and magnesium. This feature determines how much time the current spends cleaning oxides versus penetrating the material.
Increasing cleaning action helps remove surface oxidation, while more penetration improves fusion and weld strength. Striking the right balance ensures smooth, shiny welds with minimal contamination.
Some high-end TIG machines also offer hot start and crater fill functions. Hot start provides a quick amperage surge at the beginning of a weld to prevent tungsten sticking, while crater fill gradually reduces amperage at the end to prevent cracking or craters. These functions give the welder more control at critical moments in the weld cycle.
Advanced users can explore TIP TIG or hot wire TIG, which automate filler feeding or preheat the wire for increased deposition rates. These techniques are popular in industries that demand speed without sacrificing quality, such as aerospace and pipeline welding.
Finally, remote amperage control systems and foot pedals allow welders to fine-tune heat input in real time, adapting to complex joint shapes and varying metal thickness.
By mastering these advanced modes and techniques, welders can take full advantage of the capabilities of modern TIG welding machines. These tools not only improve efficiency but also help produce precise, durable, and visually flawless welds across a wide range of applications.
Final Tips, Best Practices & Maintenance
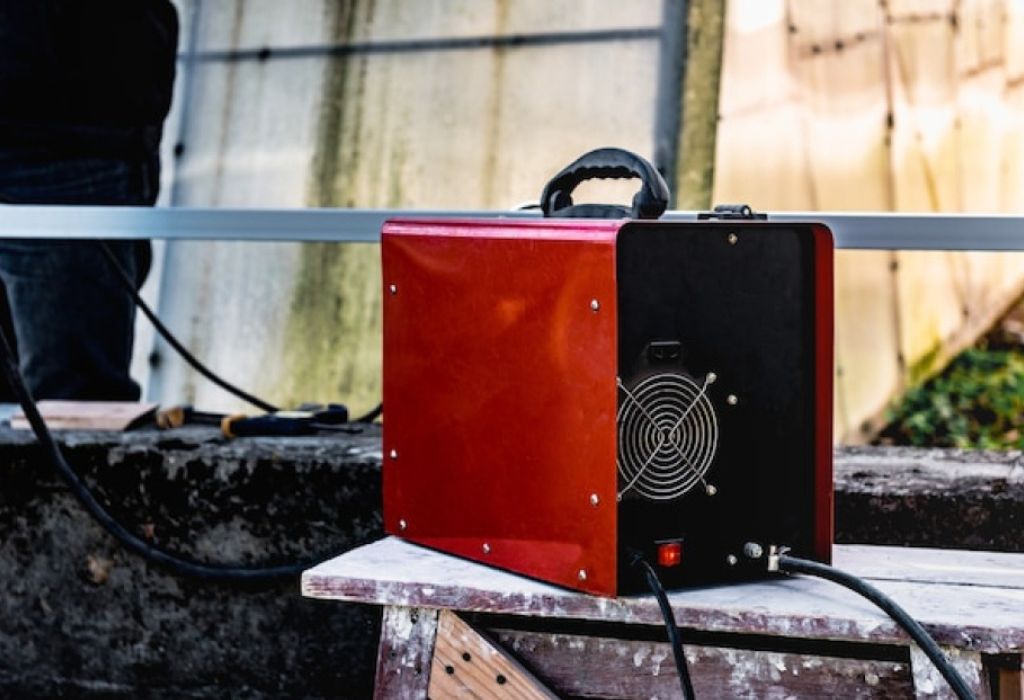
To maintain consistent results and extend the lifespan of both the welder and the TIG machine, disciplined maintenance and smart working habits are essential.
TIG welding requires precision and cleanliness at every step, so small daily practices often make the biggest difference in weld quality and equipment reliability.
Always start each session by inspecting your machine and accessories. Check that the torch, cables, and ground clamp are clean and securely connected. Loose or oxidized terminals can cause current loss, unstable arcs, and weak welds.
Examine gas hoses for cracks or leaks and ensure the regulator is functioning properly. A quick pre-check saves hours of troubleshooting later.
Keep tungsten electrodes sharp and free of contaminants. Grind them on a dedicated wheel to avoid transferring particles that can cause porosity or inconsistent arcs.
Replace collets, cups, and back caps when they show signs of wear. Clean the torch body regularly to prevent dirt or metal dust from restricting gas flow.
Shielding gas management is another key factor in maintaining weld consistency. Always purge lines before welding to remove trapped air, and allow post-flow gas to run a few seconds after the arc stops to protect the hot tungsten and weld puddle from oxidation.
Environmental control matters too. Store filler rods and electrodes in dry, sealed containers to prevent moisture absorption. Humidity can cause contamination and hydrogen cracking, especially in stainless steel or aluminum welds.
Finally, schedule regular calibration and internal cleaning of your TIG machine every six to twelve months. Verify amperage accuracy and inspect internal components like contactors and capacitors for dust or damage.
A well-maintained machine operates more efficiently, produces stable arcs, and delivers consistent performance over time.
Conclusion
Mastering how to use a TIG welding machine is the gateway to achieving precision, strength, and visual perfection in every weld.
From understanding machine controls to perfecting torch handling and filler feeding, each step plays a vital role in creating flawless results. TIG welding isn’t just a skill—it’s a discipline built on patience, attention to detail, and continuous refinement.
A well-prepared setup, proper safety measures, and clean materials form the foundation of successful welding.
Fine-tuning amperage, polarity, and gas flow ensures a steady arc and consistent penetration, while correct torch angle and travel speed give the weld its signature smooth finish. Each adjustment, no matter how small, affects the outcome and longevity of the joint.
Regular testing, maintenance, and calibration keep the TIG machine performing reliably across projects. Keeping electrodes clean, maintaining gas purity, and inspecting cables and connectors all contribute to long-term performance and superior weld quality. Consistency in practice and preparation is what separates a novice from a true professional.
Modern welding technology now offers features like pulse control, AC balance, and remote amperage adjustment, empowering welders to achieve cleaner welds with greater efficiency.
Combining these advanced tools with strong fundamentals ensures accuracy, reduced distortion, and an impeccable finish every time.
Ultimately, learning how to use a TIG welding machine isn’t just about operating equipment—it’s about mastering control over heat, precision, and craftsmanship.
Each perfected weld becomes a reflection of skill, focus, and understanding. With the right setup, knowledge, and discipline, any welder can produce flawless TIG welds that meet both industrial standards and artistic excellence.

I’m Darrell Julian, the founder, lead writer, and hands-on welding enthusiast behind ArcWeldingPro.com. With more than 15 years of real-world welding experience, I created this platform to share what I’ve learned in the field, in the shop, and in the heat of the arc.

