When I first started working with copper pipes, I assumed soldering and brazing were basically the same thing—just melt some metal, seal the joint, and you’re done. But after burning through a few fittings, overheating some pipes, and making a couple of leaks I had to fix the next day… I quickly learned that these two techniques are very different.
Soldering is what I turn to for everyday plumbing jobs—water lines, quick fixes, or anything under moderate pressure. It’s cleaner, cooler, and perfect for tight spaces. But when I’m working on HVAC systems or anything that demands serious strength and heat resistance, brazing is my go-to. It creates a more durable joint, but it also requires higher heat, the right filler metal, and more precision.

Image by manomano
I’ll break down the real, on-the-job differences between soldering and brazing copper pipe—from heat levels and tools to when (and why) I choose one over the other. If you’re just getting into pipework or want to understand which method is right for your next project, I’ve got the insight you need—straight from the flame.
Why Soldering and Brazing Matter for Welders
Whether you’re a DIYer fixing a leaky sink line, a hobbyist building a custom copper sculpture, or a pro installing refrigeration lines, soldering and brazing are your go-to methods for joining copper pipes. Each creates a leak-tight joint, but they differ in strength, temperature, and application. I’ve seen soldered joints hold up for years in home plumbing and brazed joints withstand brutal pressures in commercial HVAC. Picking the right technique ensures your joints last, saves you from costly repairs, and keeps your work safe and reliable.
Understanding Soldering
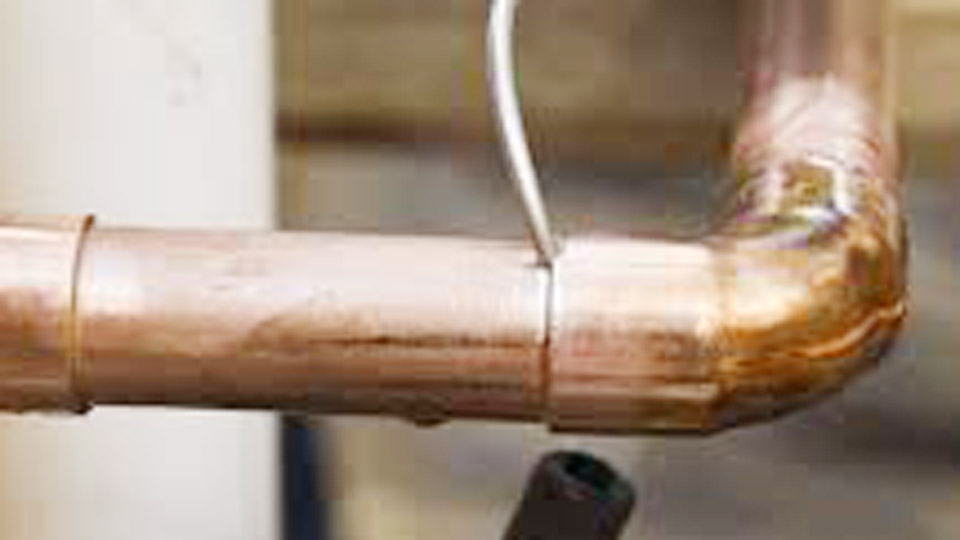
Soldering joins copper pipes by melting a low-temperature filler metal, called solder, into the joint at temperatures below 840°F. The solder—typically a tin-based alloy like 95/5 (95% tin, 5% antimony)—flows into the gap between the pipe and fitting through capillary action, creating a mechanical bond.
I’ve used soldering for water lines in homes because it’s quick, affordable, and strong enough for low-pressure systems up to about 150 psi. It’s beginner-friendly, needing just a propane torch and basic tools, making it perfect for DIYers tackling small plumbing fixes.
Understanding Brazing
Brazing uses higher temperatures—above 840°F, often 1,100–1,500°F—to melt a stronger filler metal, like copper-phosphorus (BCup-5) or silver-based alloys (15% or 45% silver). The filler forms a metallurgical bond, penetrating deeper into the joint for greater strength.
I’ve brazed copper lines for refrigeration systems handling 300+ psi, where soldering wouldn’t cut it. Brazing requires an oxy-acetylene torch and more skill to control heat, but it’s essential for high-pressure or high-temperature applications like HVAC or gas lines.
Key Differences Between Soldering and Brazing
Here’s how soldering and brazing stack up:
- Temperature: Soldering is below 840°F; brazing is above, often 1,100–1,500°F.
- Filler Metal: Soldering uses tin-based solder (e.g., 95/5). Brazing uses copper-phosphorus or silver alloys.
- Joint Strength: Brazed joints handle higher pressures (300–600 psi) and temperatures (up to 400°F). Soldered joints are weaker, suited for 100–150 psi.
- Equipment: Soldering needs a propane or MAPP gas torch. Brazing often requires oxy-acetylene.
- Skill Level: Soldering is easier for beginners. Brazing demands precision to avoid overheating.
- Applications: Soldering for water lines and low-pressure systems. Brazing for HVAC, refrigeration, and gas lines.
I learned the hard way when I soldered a refrigerant line, thinking it’d hold. It leaked under high pressure, and I had to braze it to fix the mess.
Tools and Materials You’ll Need
Here’s my go-to kit for soldering and brazing:
- Torches: Propane or MAPP gas for soldering; oxy-acetylene for brazing larger pipes or high-temperature jobs.
- Filler Metals: 95/5 lead-free solder for potable water; BCup-5 or 15% silver rods for brazing.
- Flux: Tinning flux for soldering; borax-based flux for brazing (unless using self-fluxing rods).
- Cleaning Tools: Emery cloth, wire brush, fitting brush for prepping surfaces.
- Pipe Cutter: For clean, square cuts. A hacksaw works but takes effort.
- Safety Gear: Welding gloves, shade 5–6 safety glasses, fire-resistant jacket.
- Extras: Fire blanket, wet rag, leak detection solution, fire extinguisher.
I keep everything in a sturdy tool bag for job-site portability. A good kit saved me time on a rushed plumbing repair.
How to Solder Copper Pipe
Soldering is straightforward if you prep right. Here’s my process, refined from years of plumbing fixes.
Prep the Pipe and Fitting
Cleanliness is everything. I sand the pipe ends with emery cloth until they’re shiny, no grease or oxidation. Use a fitting brush to clean the inside of the fitting. I once skipped thorough cleaning on a water line, and the joint leaked—lesson learned. Wipe away debris with a rag and don’t touch cleaned surfaces; skin oils can mess things up.
Apply Flux
Brush a thin layer of tinning flux (like Oatey No. 5) on the pipe’s outer surface and the fitting’s inner surface. Too much flux can drip and corrode the pipe later. I’ve used this flux for potable water lines for years—it’s reliable. Push the pipe into the fitting, twisting slightly to spread the flux evenly.
Heat the Joint
Light your propane or MAPP gas torch and adjust to a neutral flame. Heat the fitting first, moving the flame around it to distribute heat evenly. Then, heat the pipe near the joint. Aim for 350–450°F; the flux bubbles and turns clear when ready. I burned a fitting once by focusing the flame too long—keep it moving.
Apply Solder
Touch the 95/5 solder wire to the joint where the pipe meets the fitting. If it’s hot enough, the solder melts and flows into the gap. I feed about 1–2 inches for a ½-inch pipe, stopping when a thin solder ring appears around the joint. Overfeeding creates weak spots, so go easy. Wipe excess flux with a rag.
Cool and Test
Let the joint cool naturally for 5–10 minutes. Don’t quench with water—it can crack the joint. I’ve seen DIYers rush this and ruin their work. Clean off flux residue with a damp rag to prevent corrosion. Test for leaks with soapy water or a leak detection solution. Bubbles mean you’ve got a problem.
How to Braze Copper Pipe
Brazing is trickier but gives you bulletproof joints. Here’s how I do it for HVAC and refrigeration jobs.
Clean the Pipe and Fitting
Clean the pipe ends with emery cloth and the fitting’s interior with a fitting brush until they gleam. I once brazed a dirty refrigerant line, and the filler wouldn’t flow right—wasted time and rod. Ensure surfaces are free of grease, dirt, or oxidation for a strong bond.
Apply Flux (If Needed)
Copper-phosphorus rods like BCup-5 are self-fluxing, so you can skip flux for copper-to-copper joints. For silver-based rods or copper-to-brass, apply a thin layer of borax-based flux. I use just enough to coat the surfaces—too much makes a mess. Assemble the pipe and fitting snugly.
Heat the Joint
Use an oxy-acetylene torch with a neutral flame for precision. Heat the fitting first, circling the flame to heat evenly. When it’s cherry-red (1,100–1,200°F), move to the pipe near the joint. For a ¾-inch HVAC line, I keep the flame moving to avoid burning through. Patience is key here.
Apply Brazing Rod
Touch the brazing rod (like BCup-5) to the joint. If the metal’s hot enough, the rod melts and flows into the gap via capillary action. I feed 2–3 inches for a ¾-inch pipe, letting the filler form a smooth fillet. Don’t aim the flame at the rod—it can burn the alloy. Stop when the joint is filled.
Cool and Test
Let the joint cool naturally for 10–15 minutes. Quenching can cause cracks, as I learned after rushing a job. Brush off flux residue with a wire brush or rag. For refrigeration lines, I test with nitrogen pressure (100–150 psi) and soapy water to spot leaks. A solid joint shows no bubbles.
Comparing Soldering and Brazing: Pros and Cons
Here’s a quick comparison to help you choose:
| Method | Best For | Pros | Cons |
|---|---|---|---|
| Soldering | Water lines, low-pressure systems | Affordable, easy, low heat | Weaker joints, not for high pressure |
| Brazing | HVAC, refrigeration, gas lines | Stronger joints, high durability | Needs more skill, expensive tools |
When to Use Soldering
Soldering shines in these scenarios:
- Potable Water Lines: Most home plumbing, like sink or shower lines, uses soldering. I’ve soldered ½-inch copper pipes for bathroom repairs—quick and reliable for pressures up to 150 psi.
- Low-Temperature Systems: Hydronic heating or drainage systems don’t need brazing’s strength. I soldered a radiant floor heating loop that’s still leak-free after a decade.
- DIY Fixes: Soldering’s low heat and simple tools make it ideal for beginners fixing leaks or installing fixtures.
I soldered a kitchen water line with a propane torch and 95/5 solder. It held up perfectly under household pressure.
When to Use Brazing
Brazing is your pick for:
- Refrigeration and HVAC: High-pressure lines (300–600 psi) in AC units need brazed joints. I’ve brazed ¾-inch lines for commercial cooling systems with BCup-5 rods.
- Gas Lines: Natural gas or propane lines demand brazing’s durability. I brazed a gas line fitting that’s held up for years.
- High-Temperature Systems: Hot water heaters or steam systems (above 350°F) benefit from brazing’s strength.
- Loose Fittings: Brazing fills gaps better, perfect for imperfect fits. I brazed a loose evaporator coil connection where soldering would’ve failed.
Safety Tips for Soldering and Brazing
Both methods involve open flames, so safety first:
- Wear Proper Gear: Welding gloves, shade 5–6 safety glasses, and a fire-resistant jacket. I got a burn from dripping solder in short sleeves—never again.
- Ventilate the Area: Flux fumes are nasty. I work in an open garage or use a fan.
- Keep a Fire Extinguisher Nearby: Sparks can ignite wood or insulation. I always have one on hand.
- Use a Fire Blanket: Protect walls or floors with a flame barrier. Cool Gel spray works too.
- Purge for Brazing: Flow nitrogen through refrigeration lines to prevent internal oxidation. I do this on every HVAC job.
Common Mistakes to Avoid
I’ve made these mistakes, so you don’t have to:
- Dirty Surfaces: Grease or oxidation blocks filler flow. Clean until shiny.
- Wrong Flux: Tinning flux for soldering, borax-based for brazing. I once used brazing flux for soldering—disaster.
- Overheating: Too much heat burns solder or weakens pipes. Move the flame constantly.
- Loose Joints: A tight fit is critical for capillary action. I’ve had to redo loose fittings.
- Rushing Cooling: Quenching hot joints cracks them. Let them cool naturally.
I overheated a soldered joint on a water line once, and it leaked. Now I heat gradually and test every joint.
Real-World Applications for Welders
Here’s where these techniques come into play:
- DIY Repairs: Soldering a leaky copper pipe under a sink. I fixed one with a propane torch in 30 minutes.
- Hobbyist Projects: Brazing copper for a custom lamp base. The strong joints held up to polishing and wear.
- Professional Jobs: Brazing refrigerant lines for a commercial AC unit. I used BCup-5 to ensure no leaks under 400 psi.
Advanced Tips for Better Joints
Level up your skills with these tricks:
- Choose the Right Torch Tip: Use a #3 tip for ½-inch pipes, larger for ¾-inch and up. I swap tips for precision.
- Practice on Scrap: Test heat and filler flow on spare copper. I do this before big HVAC jobs.
- Follow AWS 3-T Rule: For brazing, ensure filler penetrates three times the pipe’s thickness for strength.
- Clean Flux Thoroughly: Residual flux corrodes pipes. I scrub with warm water and a brush.
- Use Nitrogen Purge: For HVAC brazing, nitrogen prevents oxide buildup inside pipes.
When to Consider Other Methods
Soldering and brazing aren’t always the answer. TIG welding copper creates stronger joints for structural or high-pressure applications, like busbars, but it’s overkill for most plumbing. I TIG welded copper for an electrical project when brazing wasn’t enough. Press fittings, like ProPress, are a no-heat option for plumbing—fast but pricey. I used them on a large commercial job to save time. For temporary fixes, epoxy putty can patch leaks, but it’s not a long-term solution.
Maintaining Your Tools
Keep your gear in top shape:
- Check Torch Hoses: Look for cracks or leaks. I replace mine every few years.
- Clean Torch Tips: Clogged tips mess up your flame. I use a tip cleaner weekly.
- Store Filler Materials: Keep solder and rods in a dry container to avoid oxidation.
- Test Regulators: Ensure accurate pressure for a steady flame. I check before every job.
A clogged tip once ruined a brazing job—regular cleaning keeps things smooth.
Conclusion
Soldering vs brazing copper pipe comes down to your project’s needs. Soldering is quick, cheap, and perfect for low-pressure water lines—great for DIYers and small repairs. Brazing delivers rock-solid joints for high-pressure HVAC, refrigeration, or gas lines, ideal for pros and demanding jobs.
Prep thoroughly, heat carefully, and test every joint to avoid leaks. Whether you’re fixing a sink or installing an AC unit, practice these techniques, and you’ll make joints that last a lifetime. Grab your torch, clean those pipes, and get to work—you’ve got this!
FAQ
Can I use a propane torch for both soldering and brazing?
Yes, a propane torch works for soldering and brazing small pipes (½-inch or less). For larger pipes or high-temperature brazing, I use oxy-acetylene for better heat control. MAPP gas is a good middle option for lead-free solder or small brazing jobs.
How do I choose between soldering and brazing for copper pipes?
Solder for low-pressure systems like water lines (up to 150 psi). Braze for high-pressure or high-temperature systems, like HVAC or gas lines (300+ psi). I soldered a bathroom line but brazed a refrigerant line for durability.
What filler metal should I use for soldering and brazing?
For soldering, I use 95/5 lead-free solder for potable water—it’s code-compliant. For brazing, BCup-5 copper-phosphorus rods work for copper-to-copper HVAC joints. Silver-based rods (15% or 45%) are best for high-pressure or dissimilar metals.
Why do my soldered joints leak?
Leaks usually mean dirty surfaces, poor fit-up, or uneven heating. I clean pipes until shiny, ensure a tight fit, and heat the fitting first, then the pipe. Test with soapy water to catch issues.
Do I need flux for soldering and brazing?
Yes for soldering—tinning flux ensures a strong bond. For brazing, copper-phosphorus rods like BCup-5 are self-fluxing, but silver rods need borax-based flux. I always use flux for soldering water lines but skip it for BCup-5 brazing.

I’m Darrell Julian, the founder, lead writer, and hands-on welding enthusiast behind ArcWeldingPro.com. With more than 15 years of real-world welding experience, I created this platform to share what I’ve learned in the field, in the shop, and in the heat of the arc.


