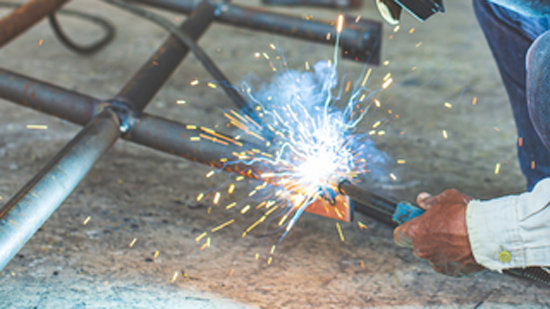
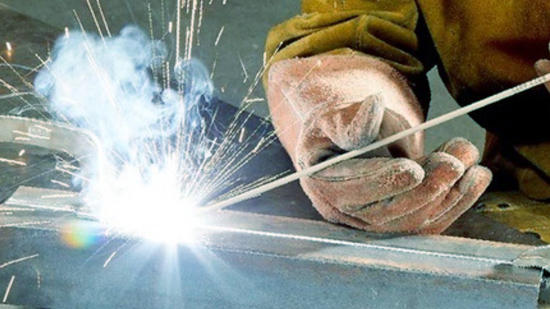
Stick welding, also known as shielded metal arc welding (SMAW), is a popular welding process used in various industries. One of the key elements of stick welding is selecting the right welding rod size. Welding rods, also called electrodes, come in different sizes, and each size has its own unique characteristics and applications.
Stick welding rod sizes are designated by a system of numbers and letters. The number represents the diameter of the rod, while the letter indicates the type of coating and the welding position it is suitable for. For example, a 1/8-inch diameter rod with an E6011 designation is commonly used for general-purpose welding in all positions.
The size of the welding rod you choose depends on the thickness of the metal you’re welding. Thicker metals require larger rods, while thinner metals can be welded with smaller rods. Using the correct rod size ensures proper penetration and fusion, resulting in strong and durable welds.

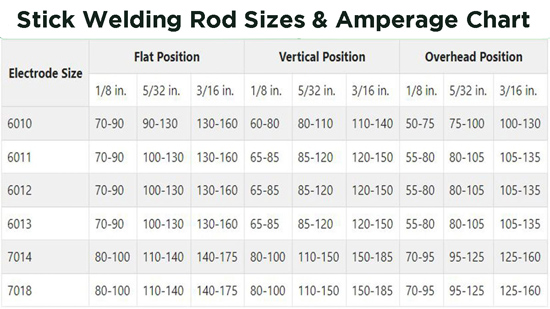
When selecting a welding rod size, it’s important to refer to a stick welding rod sizes and amperage chart. This chart provides valuable information on which rod size to use for different metal thicknesses and welding positions. Let’s delve deeper into the importance of selecting the correct rod size.
Selecting the correct rod size
Choosing the right welding rod size is crucial for achieving high-quality welds. If the rod is too large for the metal thickness, the weld bead may be too wide, resulting in excessive heat input and potential distortion. On the other hand, using a rod that is too small may lead to insufficient penetration and weak welds.
Using the appropriate rod size ensures that the weld bead matches the thickness of the base metal, creating a strong and structurally sound joint. It also helps to control the amount of heat input, minimizing the risk of distortion and warping. Additionally, using the correct rod size improves arc stability and makes it easier to control the welding process.
Another factor to consider when selecting the correct rod size is the welding position. Different rod sizes are designed for specific welding positions, such as flat, horizontal, vertical, and overhead. Using the wrong rod size for a particular position can result in poor weld quality and increased difficulty in achieving proper penetration.
By referring to a stick welding rod sizes and amperage chart, you can ensure that you’re using the right rod size for the specific metal thickness and welding position. This brings us to the next section where we’ll explore the factors to consider when choosing stick welding rod sizes.
Factors to consider when choosing stick welding rod sizes
When selecting a stick welding rod size, several factors need to be taken into consideration. These factors include the metal thickness, welding position, welding technique, and the type of joint being welded.
Metal thickness
The thickness of the metal being welded determines the appropriate rod size. As a general rule, the thicker the metal, the larger the rod size required. For thin metals, smaller rod sizes are suitable to ensure proper penetration.
Welding position
Different welding positions require specific rod sizes to achieve optimal weld quality. For example, vertical and overhead welding positions typically require smaller rod sizes to facilitate better control and penetration.
Welding technique
The welding technique you use can also influence the choice of rod size. Some welding techniques, such as weaving or oscillating the electrode, may require larger rod sizes to ensure proper coverage and fusion.
Joint type
The type of joint being welded is another important factor to consider. Certain joint configurations, such as fillet welds, may require smaller rod sizes to achieve adequate penetration and fusion in the corners.
By evaluating these factors and referring to a stick welding rod sizes and amperage chart, you can confidently select the right rod size for your welding projects. The next section will explain how to read and interpret the amperage chart accurately.
Stick welding amperage chart explained
A stick welding amperage chart provides valuable information on the recommended amperage range for different welding rod sizes and metal thicknesses. Understanding how to read and interpret the amperage chart is essential for achieving optimal weld quality and preventing welding-related issues.
The amperage chart typically consists of two main columns: one for the welding rod size and the other for the metal thickness. The chart also includes a range of amperage values that correspond to the specific rod size and metal thickness combination.
To use the amperage chart effectively, follow these steps: 1. Identify the welding rod size you plan to use. 2. Locate the metal thickness range that matches your project. 3. Find the intersecting point between the rod size and metal thickness. 4. The amperage range listed in that intersecting point is the recommended amperage range for your welding setup.
It’s important to note that the amperage range provided in the chart is a guideline and may need to be adjusted based on factors such as joint configuration, welding position, and welding technique. It’s always recommended to start with the lower end of the amperage range and make adjustments as needed during the welding process.
By utilizing a stick welding amperage chart, you can set the appropriate amperage for your welding projects, ensuring optimal heat input and weld quality. In the next section, we’ll share some helpful tips for welding with different rod sizes.
Tips for welding with different rod sizes
Welding with different rod sizes requires adjusting your welding technique and settings to achieve the desired results. Here are some tips to keep in mind when using different stick welding rod sizes:
Larger rod sizes
When using larger rod sizes, it’s important to maintain a steady and controlled motion to ensure proper fusion and penetration. Slow down your travel speed and increase the amperage to accommodate the larger rod.
Smaller rod sizes
Smaller rod sizes are suitable for thin metals and welding in tight spaces. When using smaller rods, use a faster travel speed to prevent burn-through and adjust the amperage accordingly.
Cleaning and preparation
Regardless of the rod size, proper cleaning and preparation of the base metal are essential for achieving quality welds. Remove any rust, paint, or contaminants from the surface before starting the welding process.
Practice and experimentation
Welding with different rod sizes may require some practice and experimentation to find the optimal settings for your specific application. Take the time to test different techniques and settings to achieve the desired results.
Each welding project is unique, and it may require different rod sizes and settings. By adapting your welding technique and settings to suit the rod size, you can achieve high-quality welds consistently.
Common stick welding rod sizes and their applications
Stick welding rods are available in various sizes, each with its own applications and characteristics. Here are some common stick welding rod sizes and their typical uses:
1/16 inch (1.6 mm)
This small rod size is suitable for thin materials, such as sheet metal or light-gauge plates. It is commonly used for automotive repairs, hobby projects, and maintenance work.
3/32 inch (2.4 mm)
The 3/32 inch rod is versatile and can be used for a wide range of applications. It is commonly used for general-purpose welding, repairs, fabrication, and structural work.
1/8 inch (3.2 mm)
The 1/8 inch rod is one of the most commonly used rod sizes. It is suitable for welding thicker materials and is widely used in construction, heavy fabrication, and pipeline welding.
5/32 inch (4.0 mm)
This larger rod size is used for heavy-duty applications that require higher deposition rates and deeper penetration. It is commonly used in shipbuilding, bridge construction, and heavy machinery repairs.
3/16 inch (4.8 mm) and above
These larger rod sizes are used for heavy structural welding and applications that require high strength and deep penetration.
It’s important to note that these are general guidelines, and the specific applications may vary depending on the welding process, metal type, and other factors. Always refer to the manufacturer’s recommendations and the stick welding rod sizes and amperage chart for accurate guidance.
Safety precautions when using stick welding rods
While stick welding can be a highly effective and versatile welding process, it’s important to follow proper safety precautions to prevent accidents and injuries. Here are some safety guidelines to keep in mind when using stick welding rods:
Personal protective equipment (PPE)
Always wear appropriate PPE, including welding gloves, a welding helmet with a proper shade, flame-resistant clothing, and safety glasses or goggles.
Ventilation
Ensure proper ventilation in your workspace to prevent the accumulation of harmful fumes and gases. If working in a confined space, additional ventilation or respiratory protection may be required.
Fire safety
Keep a fire extinguisher nearby and maintain a clean and clutter-free workspace. Be mindful of flammable materials and take necessary precautions to prevent fires.
Welding area preparation
Clear the area of any flammable materials or combustible substances. Ensure that the workpiece is securely clamped or positioned to prevent accidental movement or slippage during welding.
Electrical safety
Inspect your welding equipment regularly for any damaged cables, loose connections, or faulty components. Follow proper grounding procedures and ensure that the welding machine is suitably rated for the intended welding process.
Training and certification
Obtain proper training and certification in stick welding techniques to ensure that you have the necessary skills and knowledge to operate the equipment safely.
By adhering to these safety precautions and guidelines, you can minimize the risks associated with stick welding and create a safe working environment.
Conclusion
Stick welding rod sizes and amperage play a crucial role in achieving quality welds. By understanding the factors involved in choosing the correct rod size, reading and interpreting the amperage chart, and following proper safety precautions, you can confidently select the right rod size and set the appropriate amperage for your welding projects. To refer to a stick welding rod sizes and amperage chart for accurate guidance. Each welding project is unique, and the correct rod size and amperage setting may vary depending on factors such as metal thickness, welding position, and joint type.
Stick with these guidelines, practice your welding techniques, and continue to expand your knowledge and skills. With the right rod size and amperage, along with proper welding technique and safety measures, you can produce high-quality welds and achieve successful welding projects.

I’m Darrell Julian, the founder, lead writer, and hands-on welding enthusiast behind ArcWeldingPro.com. With more than 15 years of real-world welding experience, I created this platform to share what I’ve learned in the field, in the shop, and in the heat of the arc.


