One of the handiest tricks I’ve picked up over the years is TIG brazing with silicon bronze. It’s not quite welding in the traditional sense, but man, it can save you time, frustration, and even money on certain jobs. Instead of fully melting the base metal like you would with TIG welding on steel or stainless, you’re running a bronze filler rod at lower amperage and basically “gluing” the joint together with a strong, corrosion-resistant bond.
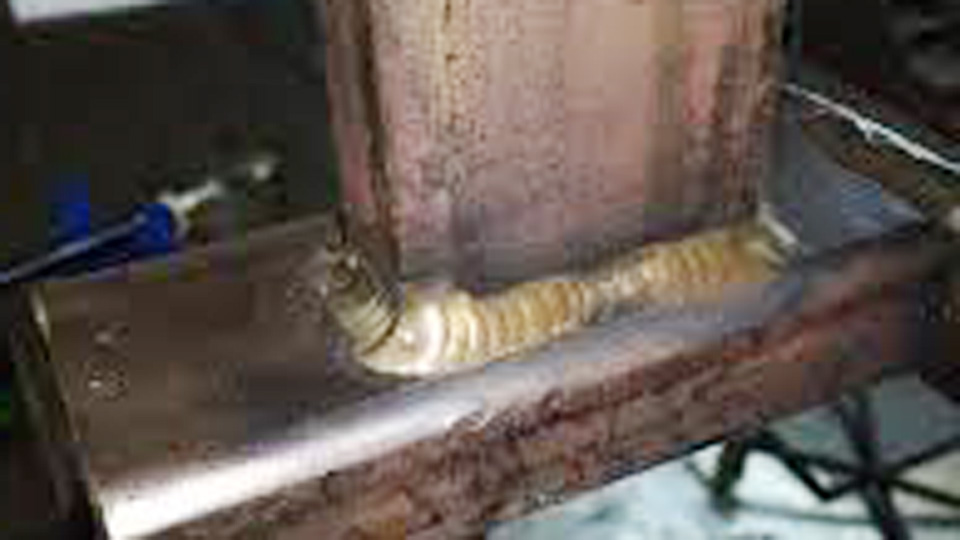
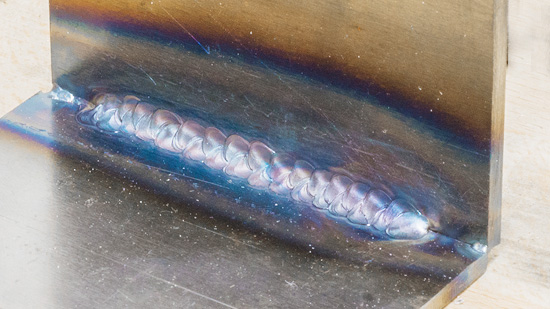
A lot of welders I’ve worked with ask, “Why would you braze with TIG instead of just welding it?” The truth is, silicon bronze shines when you’re dealing with thin sheet metal, dissimilar metals, or parts that can’t handle the heat of full penetration welding. I’ve used it on automotive panels, exhaust work, and even odd repair jobs where traditional filler rods would’ve just burned holes through the material. The lower heat input means less warping, cleaner joints, and a golden finish that actually looks pretty sharp when left exposed.
If you’ve ever struggled with arc control on thin gauge steel, wondered how to join copper to steel, or wanted a more forgiving alternative to welding delicate parts, TIG brazing with silicon bronze is a technique worth having in your back pocket. In this guide, I’ll break down how it works, when to use it, and the real-world pros and cons that only show up once you’ve actually burned a few rods.

weldingweb
What is TIG brazing with silicon bronze and how does it differ from TIG welding?
TIG brazing is using a TIG (GTAW) torch to melt a filler metal that has a lower melting point than the base metals. The filler wets and flows into the joint by capillary action without melting the base metal itself. When we use a silicon bronze filler (commonly AWS/ASME ERCuSi-A), we’re taking advantage of a copper-silicon alloy that flows easily and bonds well to steels, copper alloys, and some coated metals. This is brazing — not fusion welding — because the base metal isn’t intended to liquefy.
Why choose brazing over welding?
- Lower heat input — less distortion and less risk of burn-through on thin sheet metal.
- Joins dissimilar metals easier (e.g., brass/copper to steel) because filler metallurgy can accommodate differences.
- Cleaner, more ductile fillets — often better for cosmetic or thin-gauge work.
When should you use silicon bronze (ERCuSi-A) as your filler?
Use silicon bronze when:
- You’re joining thin steel or galvanized steel where you want minimal warpage and a neat fillet.
- You need to join copper/brass to steel or to itself with a joint that benefits from a ductile filler.
- You’re repairing castings, making decorative fixtures, or building light-duty assemblies like brackets, radiator tanks, or sheet-metal fixtures.
Silicon bronze rods are widely sold in TIG filler diameters (1/16″, 3/32″, etc.) and conform to recognized classifications such as AWS A5.7 ERCuSi-A.
The metallurgy in plain language
Silicon bronze is mostly copper with about 2.8–4% silicon and small amounts of manganese, tin, and zinc. The silicon improves fluidity and wetting — that’s why it spreads into joints well — and adds strength compared to pure copper fillers. The result: a relatively soft, corrosion-resistant deposit with good adhesion to steel when properly prepared.
Tools and consumables you’ll need
- TIG machine (AC/DC capable is fine; brazing uses DC straight polarity for bronze on steel).
- Argon shielding gas (normally 100% argon). Flow 10–15 CFH for a typical bench torch.
- 1/16″ or 3/32″ silicon bronze TIG rods (ERCuSi-A). Keep both sizes available — 1/16″ for thinner work, 3/32″ when you want to build fillets faster.
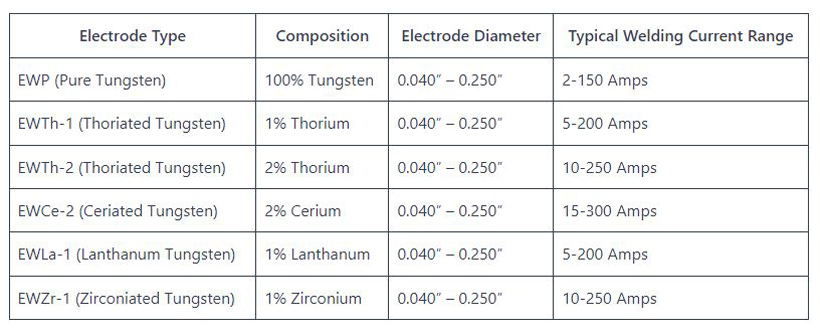
- 2% ceriated or pure tungsten (sharp for fine control) — 1/16″ to 3/32″ electrode per your torch and current.
- Clean-up tools: stainless wire brush for steel, emery cloth, acetone or brake cleaner for degreasing.
- Heat sink or backing where needed (copper backing bar helps with thin parts).
- Proper PPE: welding helmet, gloves, respirator if working on plated/galvanized steel.
Preparations: joint design, fit-up, and cleaning
Brazing relies on capillary action — that means tight, consistent joint gaps are better. Aim for a controlled clearance:
- Lap joints and butt joints with a small gap (0.002″–0.015″ typical). For sheet metal, a snug butt or lap is ideal.
- Cleanliness is everything. Remove paint, oil, rust, and galvanize from the joint area. For steel, I sand with 80–120 grit where I’ll place filler and blow off with acetone. For copper/brass, pickling or a mild acid cleaner sometimes helps, but rinse and dry thoroughly.
- If you’re brazing galvanized steel, the zinc will vaporize and cause porosity if you rush or overheat; grind a clean joint area and consider local ventilation and a respirator.
- Tack with a low heat and minimal filler only to hold geometry — brazing is forgiving, but heavy tack welds change how filler flows.
Machine setup and suggested settings
TIG brazing uses much lower heat than fusion TIG. The numbers below are starting points — adjust to your parts, filler size, and joint mass.
- Polarity: DCEN (straight polarity) for steel and bronze brazing.
- Pulse: Off or very low pulse rate; brazing needs steady heat.
- Amperage: For brazing, think in ranges:
- Thin sheet (22–18 ga): 20–40 amps
- Light plate (1/16″–1/8″): 35–70 amps
- Heavier tube or pieces: 70–120 amps (or more depending on thickness)
As a reference, TIG brazing currents are generally much lower than those for fusion TIG. One PDF I keep on the bench suggests 35–45 amps for small brazing with 1.6mm rod, versus 80–95 amps for running full TIG fusion with the same rod size. Adjust down for delicate work.
- Torch angle: Keep the torch pointed so the arc primarily heats the deposited filler puddle slightly ahead of the joint — you want the filler to flow into the joint, not the arc to sit on the base metal and melt it.
- Filler feed: Hand-feed the rod into the puddle. The arc should be on the filler or the puddle edge; dipping the rod into the arc will contaminate the tungsten.
Step-by-step: TIG brazing with silicon bronze (bench method)
This is how I teach a trainee on the first day.
Prepare parts: Clean and fit; clamp firmly. Use copper backing if the joint is thin and heat-sensitive.
Choose rod and tungsten: For light work, 1/16″ silicon bronze and 1/16″ tungsten. For thicker fillets, 3/32″ rod and matching tungsten.
Set machine: DCEN, 20–60 amps depending on thickness. Argon flow ~10 CFH. Short gas preflow (0.5–1 s) and postflow (5–8 s).
Strike the arc on the parent metal or filler?: I usually start the arc on the parent metal just off the joint, then move the arc to the filler puddle and let the bronze melt into the joint. On very thin metal, use a foot pedal and very low amperage to avoid blow-through.
Add filler: Introduce the rod to the puddle; let the bronze flow and pull into the gap. Move steadily along the joint — don’t glob. Keep puddle small so it cools quick and minimizes base-metal heating.
Cool and clean: Allow the joint to cool naturally. Lightly brush with a stainless wire brush if needed to remove oxidation; do not sand aggressively — you can remove bronze if you overdo it.
Inspect: Look for good fillet wetting, uniform bead, and no gaps or underfill. If you see porosity, you either heated too fast (vaporization) or there’s contamination.
Practical know-how — tips from the bench
Arc on the filler, not the base: With bronze brazing, you’ll often run the arc over the filler puddle so it melts and gets drawn into the joint. If you concentrate the arc on the base metal, you risk fusion instead of brazing.
Keep puddle small: Small puddles cool faster and reduce the chance of overheating base metal. If the puddle grows too large, slow down or reduce current.
Use the right rod diameter: 1/16″ for control; 3/32″ when you need to build the fillet. Larger rods need more amps and make it harder to control heat on thin parts.
Don’t chase a messed-up fillet with more heat: If you blow through or overheat, let it cool and rework from the cold — grinding and rebraze is cleaner than overheating and causing a bigger problem.
Avoid contamination: Oils, galvanized coatings, and paint create porosity and poor wetting. Strip or grind back to clean metal. For galvanized, extreme care with ventilation is essential.
Common mistakes and how to fix them
Porosity in the bead — Often caused by contamination (oil/paint/zinc) or insufficient shielding gas. Fix: re-clean, increase gas flow or reduce drafts, and redo the joint.
Base metal melting (not brazing) — Current too high or arc focused on the base metal. Fix: reduce amps, move arc to the filler/puddle, and keep travel speed up.
Poor wetting/no capillary action — Dirty surfaces or too wide a gap. Fix: re-clean, tighten joint fit, or add flux if using oxy-fuel. For TIG brazing, rely on cleanliness rather than flux.
Excessive oxidation or burnt-looking bead — Insufficient gas coverage or long postflow too short. Fix: increase shielding and lengthen postflow.
Filler compatibility — what can you join with silicon bronze?
- Plain carbon steel — Yes, commonly joined with silicon bronze when brazing is acceptable.
- Galvanized steel — Usable but tricky. Remove heavy zinc at the joint and ventilate; zinc vapor is hazardous.
- Copper and copper alloys — Good compatibility — silicon bronze works well for overlay and joining.
- Stainless steel — You can braze stainless with silicon bronze, but take care with cleanliness and base metal alloys — discoloration and corrosion resistance can be affected.
- Aluminum — Not directly compatible — silicon bronze won’t wet aluminum well; use appropriate aluminum-specified fillers and processes.
If you need a joint with fusion weld strength (structural load-bearing where code requires full fusion), brazing is not an alternative — brazed joints are generally weaker than properly executed fusion welds. Choose the process to match the required strength and code.
Flux: do you need it?
For oxy-acetylene brazing, industry practice uses fluxes to promote wetting. For TIG brazing, the electric arc and shielding gas usually allow you to braze without flux on clean metal. However, on some copper alloys or heavily oxidized surfaces, a flux or chemical cleaner helps. I prefer mechanical cleaning for steel and avoid flux unless I’m working with copper/bronze shop restoration where traditional fluxing is expected.
Comparison table: TIG brazing with silicon bronze vs. TIG fusion welding
| Topic | TIG Brazing with Silicon Bronze | TIG Fusion Welding |
|---|---|---|
| Heat input | Low — base metal not melted | High — base metal melts |
| Distortion | Low | Higher (depends on technique) |
| Dissimilar metals | Good (e.g., copper to steel) | Difficult without special fillers/techniques |
| Strength | Moderate — good for many fixtures | High — structural strength when fusion achieved |
| Appearance | Smooth, neat fillet | Can be smooth but requires skill for cosmetic welds |
| Code/structural use | Not always acceptable for structural work | Widely accepted for structural welds |
Real-world examples & applications
- Repairing a copper radiator seam: I’ve used silicon bronze TIG brazing to add a leak-proof fillet without heating the radiator to the point where soldered joints fail.
- Assembling decorative gates: For ornate thin sections where heat distortion would ruin the fit, brazing gives strong, neat results.
- Sheet-metal fixtures and brackets: Especially when parts are thin and vice forces are moderate, brazed joints are fast to make and attractive.
Safety considerations
- Ventilation: Galvanized or plated steels create hazardous fumes — ventilate and use an appropriate respirator.
- Eye and skin protection: Bronze brazing still emits UV/IR; use a welding helmet and gloves.
- Heat and burns: Bronze deposits remain hot — tack corners and finger guards help prevent burns during handling.
- Flux hazards: If you use flux for copper/brass, follow the manufacturer’s safety data sheet.
Troubleshooting checklist (quick bedside cheat sheet)
- No wetting → clean joint, reduce gap, increase heat on filler puddle.
- Porosity → clean surfaces, increase shielding, check gas flow.
- Too much base metal heating → reduce amps, speed up travel.
- Overly thick fillets → reduce rod feed rate or use smaller rod.
Step-by-step shop example: brazing a 0.060″ steel bracket to a flange
- Clean both surfaces with 120 grit where the fillet will be.
- Fit and clamp so parts don’t move. Use a copper backing bar behind the joint to spread heat.
- Set TIG to DCEN, 30–40 amps (start low; you can increase in 5–10 amp steps). Argon at ~12 CFH.
- Use a 1/16″ silicon bronze rod. Strike arc on the bracket near the joint, move arc to puddle, feed rod until bead fills the gap. Keep moving.
- After finishing, allow to air-cooled, wire-brush lightly, inspect. If the fillet is underfilled, grind flush and re-braze.
Pros and cons — quick summary
Pros:
- Low distortion, good for thin materials.
- Good for joining dissimilar metals.
- Produces attractive fillets with ductile properties.
Cons:
- Not as strong as fusion welds for structural use.
- Requires very clean surfaces and practice for consistent capillary flow.
- Galvanized or plated metals bring fume hazards and extra prep.
Advanced tips for pros and instructors
- Preheat for heavy sections: If base metals are large and act as heat sinks, a light preheat helps flow. Don’t overdo it — brazing still needs lower temps than fusion.
- Use a filler scheduling approach: For long seams, work in short runs and let the assembly cool slightly to control warpage.
- Practice bead geometry: The right fillet profile improves fatigue life — practice varying travel speed and rod feed to get consistent convex but not globular fillets.
- Document settings: For parts you reproduce (fixtures, jigs), write down amps, rod size, and travel speed. Repeatability beats guesswork.
Why code and shop practice matter
If the job will be inspected or is a safety-critical assembly (pressure vessels, structural members, vehicles), verify that brazing is allowed by the applicable code or authority. Many structural or pressure applications require fusion welding or specific brazing certifications. For shipments, fabrication, or commercial work in the U.S., reference AWS/ASME rules relevant to the product or contract before selecting brazing. In the shop, make a judgment call: if the part is carrying major loads, lean toward fusion welding or consult an engineer.
Final checklist before you start a brazing job
- Parts cleaned and correctly fitted?
- Correct rod alloy and diameter at the bench?
- TIG machine set to DCEN and starting amps verified?
- Gas flow tested and torch consumables in good shape?
- PPE, ventilation, and first-aid ready?
If the answer is yes to all — go ahead and run a test coupon first.
Key takeaways and closing thoughts
TIG brazing with silicon bronze is a powerful, under-used method in many shops. It gives you control, low heat, and the ability to join dissimilar materials neatly. It’s not a universal substitute for fusion welding, but for thin materials, decorative work, and many repairs it’s the right tool.
Start with clean metal, the right rod diameter, and low amperage; focus the arc on the puddle and let the filler do the work. After a few practice joints, you’ll find it’s a fast, repeatable technique that saves time and reduces rework.
Pro tip: Keep a small stash of 1/16″ and 3/32″ ERCuSi-A rods and a note on your bench of the amperage you used for common thicknesses — that quick reference saves a lot of fiddling when the job’s on a clock.
Frequently asked questions
What is the difference between TIG brazing and TIG welding?
TIG brazing uses a lower-melting filler that wets the joint without melting the base metal. TIG welding melts the base metal to form a fusion joint. Brazing is lower heat and typically causes less distortion, but fusion welding usually gives higher structural strength.
Can I braze galvanized steel with silicon bronze?
Yes, you can, but take care: remove heavy zinc from the weld area, ventilate well, and use a respirator. Zinc vapor is hazardous and causes porosity if not handled properly.
Will silicon bronze adhere to stainless steel?
Silicon bronze can be used to braze some stainless steels, but surface cleanliness and joint prep are critical. Note that the resulting joint may have different corrosion characteristics; evaluate for your application.
What filler rod diameter should I choose?
Use 1/16″ for thin materials and fine control; use 3/32″ when you need to build a larger fillet quickly. Match filler size to part thickness and desired fillet size.
Is TIG brazing strong enough for structural parts?
Not usually. Brazed joints are adequate for many fixtures and light-load applications, but if the joint must meet structural or code requirements, check standards — many structural applications require fusion welding.

I’m Darrell Julian, the founder, lead writer, and hands-on welding enthusiast behind ArcWeldingPro.com. With more than 15 years of real-world welding experience, I created this platform to share what I’ve learned in the field, in the shop, and in the heat of the arc.


